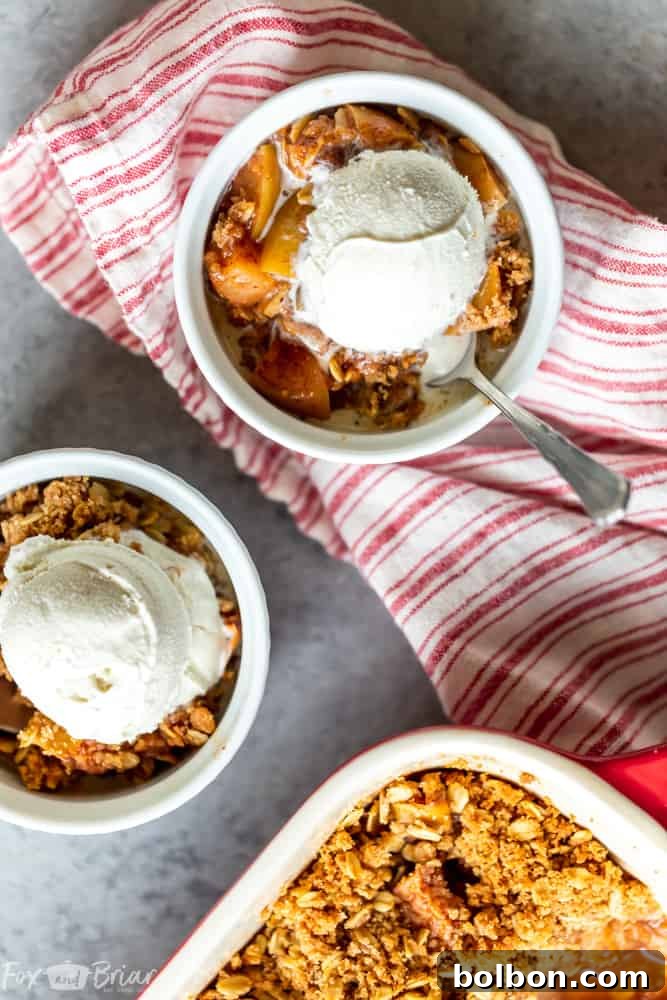
Welcome to the ultimate guide to creating the most delectable, comforting, and incredibly **easy apple crisp recipe** you’ll ever encounter! This **old-fashioned apple crisp** is more than just a dessert; it’s a warm hug in a baking dish, brimming with tender, spiced apples and crowned with a golden, crunchy **oat crumb topping**. Forget complicated baking projects – this homemade apple crisp comes together in minutes, making it the perfect treat for any occasion, from a casual family dinner to a festive gathering. Whether you call it **apple crisp** or **apple crumble**, this recipe promises a dessert experience that will have everyone asking for seconds.
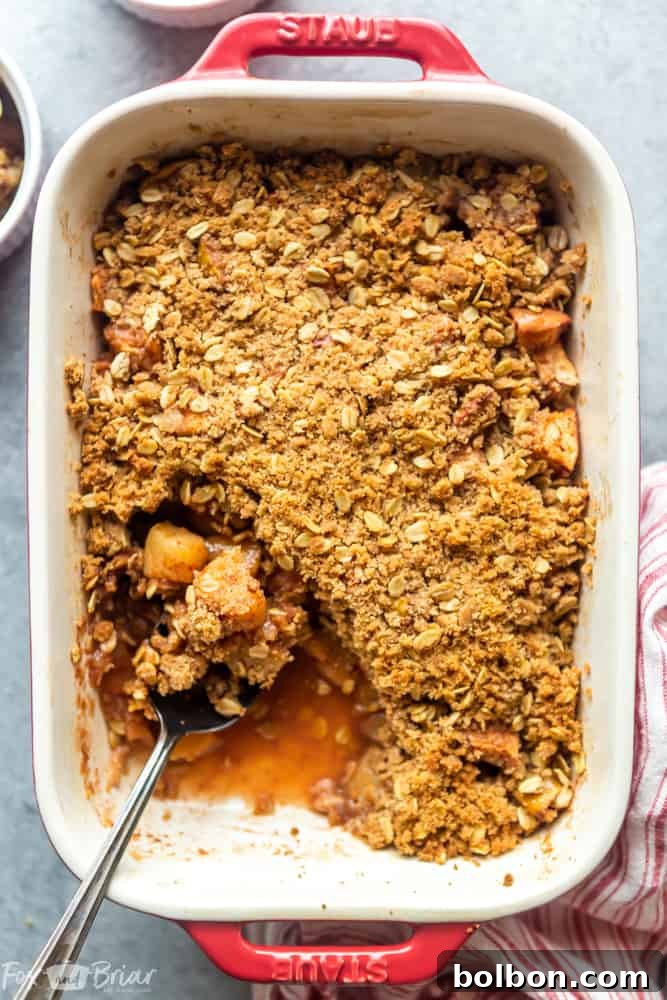
After much anticipation following its debut on my Instagram stories, the highly requested **easy apple crisp recipe** is finally here! I’m thrilled to share my absolute favorite way to make this classic dessert. You truly won’t believe how simple it is to achieve such a rich, flavorful result. This recipe transforms humble apples into a masterpiece of textures and tastes, featuring a sweet, tart filling beneath a perfectly crisp and buttery topping. Get ready to impress your taste buds and your guests with this effortlessly elegant dessert.
Crafting the Perfect Easy Apple Crisp: A Step-by-Step Guide
Making an **easy apple crisp** is a straightforward process that yields incredibly rewarding results. The beauty of this recipe lies in its simplicity and the use of fresh, wholesome ingredients. Here’s a detailed look at how to assemble this delightful dessert, ensuring every bite is a perfect blend of sweet, tart, and crunchy.
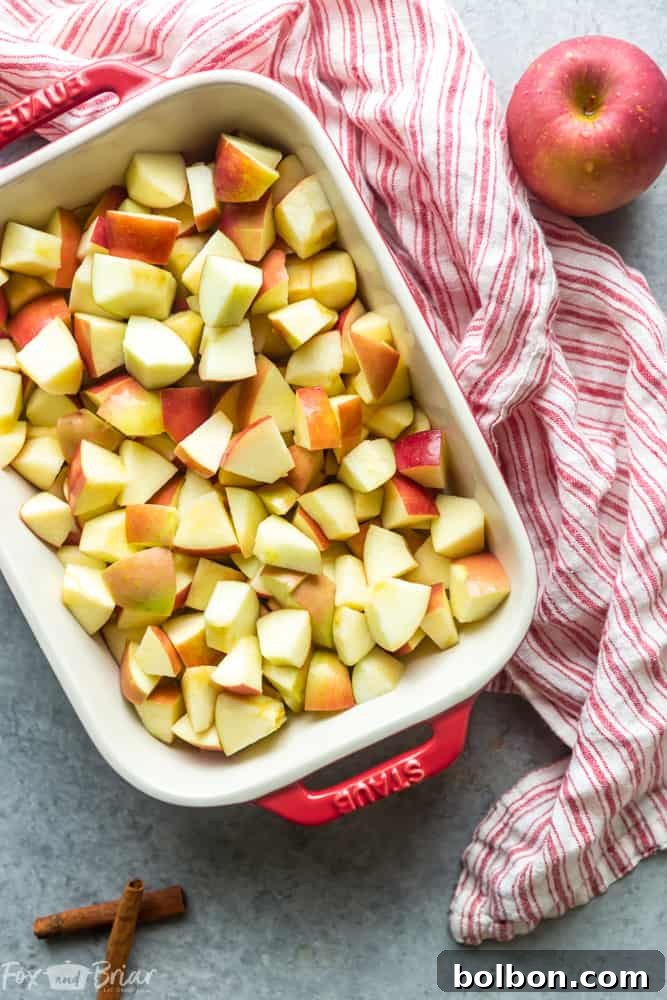
Ingredients for the Apple Crisp Filling:
- 6 medium-sized apples: Cored and diced into approximately 1-inch cubes. The type of apple significantly influences cooking time and texture.
- 1 tablespoon fresh lemon juice: From half a lemon. This brightens the apple flavor and prevents browning.
- 2 tablespoons granulated sugar: To sweeten the apples and help create a luscious, bubbly filling.
- 1 teaspoon ground cinnamon: A classic spice that complements apples beautifully, adding warmth and depth.
- 1/2 teaspoon fresh ground nutmeg: Freshly grated nutmeg offers a more potent and aromatic flavor than pre-ground.
Ingredients for the Delicious Apple Crisp Topping:
- 4 tablespoons unsalted butter: (1/2 a stick) Cut into small cubes. Cold butter works best for a crumbly texture.
- 1/2 cup all-purpose flour: The base for our crisp topping.
- 1/4 cup granulated sugar: For sweetness in the topping.
- 1/4 cup packed brown sugar: Adds moisture, a hint of caramel flavor, and a chewier texture to the crumb.
- 1/2 cup rolled oats: (Not instant oats) These are crucial for that signature textural crunch and wholesome flavor.
- 1 teaspoon ground cinnamon: Echoes the cinnamon in the filling, tying the flavors together.
- 1/4 teaspoon kosher salt: Don’t skip this! Salt balances the sweetness and enhances all the flavors.
Step-by-Step Instructions:
- Preheat your oven: Set your oven to 350°F (175°C). This allows the oven to reach the ideal temperature for even baking.
- Prepare the apple filling: In a 2.5-quart baking dish, combine the diced apples, fresh lemon juice, granulated sugar, cinnamon, and nutmeg. Toss gently until all the apple pieces are evenly coated with the spices and sugar. Spread them evenly in the dish.
- Create the crumb topping: In a separate small bowl, combine the unsalted butter cubes, all-purpose flour, granulated sugar, brown sugar, rolled oats, cinnamon, and kosher salt. Use your hands to mix these ingredients together, working the butter into the dry mixture until it resembles wet sand or coarse crumbs. You can also use a fork or a pastry blender if preferred, but hands are often the most effective tool for achieving the right consistency.
- Assemble and bake: Evenly sprinkle the prepared crumb topping over the spiced apples in the baking dish. Place the dish in the preheated oven and bake for 45 minutes to 1 hour. The baking time will vary depending on the type of apples you use. The apple crisp is done when the apples are very tender when pierced with a fork, and the sweet, spiced filling is bubbling up appealingly through the golden-brown crisp topping.
The Ideal Baking Temperature for Apple Crisp
Achieving a perfectly baked apple crisp requires the right oven temperature. For this particular recipe, you’ll bake the **apple crisp in the oven at 350 degrees Fahrenheit (175°C)**. This moderate temperature ensures that the apples soften beautifully without becoming mushy, while the topping develops a rich, golden-brown hue and a delightful crunch. Baking at too high a temperature can lead to a burnt topping and undercooked apples, while too low a temperature might result in a soggy crust and prolonged cooking times.
Understanding Apple Crisp Baking Times
The duration required to bake an **apple crisp** can fluctuate significantly, primarily influenced by the variety of apples you select. For this recipe, using Fuji apples typically requires a baking time of **45 minutes to one hour**. Fuji apples hold their shape well and develop a lovely tender texture within this timeframe.
If you opt for an apple variety that softens more quickly, such as McIntosh apples (though they are becoming harder to find), your **apple crisp** will bake faster, often in just **20-25 minutes**. Other popular baking apples like Granny Smith or Honeycrisp might fall somewhere in between.
The ultimate indicator that your **homemade apple crisp** is perfectly baked is when the apples are fork-tender and the sweet, spiced filling is visibly bubbling up through the irresistible **crisp topping with oats**. Keep an eye on it, especially during the last 15-20 minutes, to ensure optimal doneness.
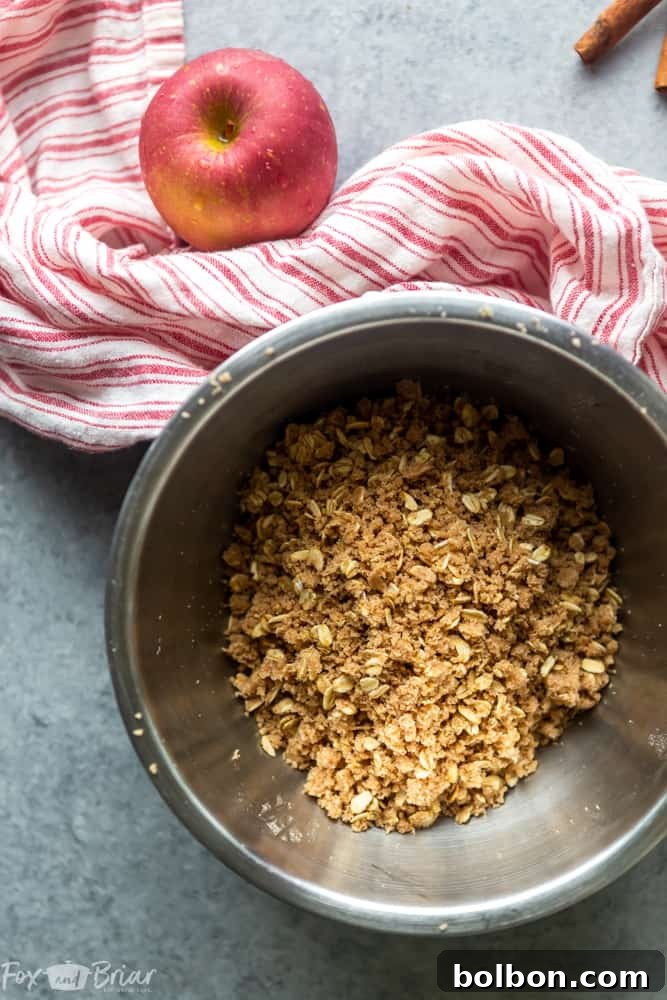
Mastering the Crumb Topping for Apple Crisp
The **crumb topping for apple crisp** is arguably what sets this dessert apart. This recipe features a delightful topping enhanced with oats, providing an extra layer of texture and a wholesome, nutty flavor that perfectly complements the soft apple filling. Creating this topping is incredibly simple and requires just a few pantry staples.
You’ll need cubed unsalted butter, all-purpose flour, both white and brown sugar, cinnamon, and a crucial pinch of salt. The salt is not to be overlooked; it plays a vital role in balancing the sweetness and intensifying the overall flavor profile of the topping. You can mix the ingredients for the **oat crumb topping** using your hands, which allows for better feel and incorporation of the butter, or opt for a fork or pastry blender if you prefer. Once thoroughly mixed, the topping should have a texture reminiscent of wet sand, ready to be sprinkled generously over your apples. This texture ensures it will bake into a golden, crunchy crust that is the hallmark of a truly great **homemade apple crisp**.

Choosing the Best Apples for Apple Crisp
Selecting the right apples is key to a sensational **apple crisp recipe**. While I personally love using Fuji apples for their firm texture and balanced sweetness, there are many excellent choices depending on your preference.
- Fuji: My go-to for this recipe. They offer a perfect balance of sweet and tart, and hold their shape well during baking, providing a pleasant texture.
- Granny Smith: A popular choice for their tartness, which provides a lovely contrast to the sweet crumb topping. They are firm and don’t turn mushy easily.
- Honeycrisp: Known for their crisp texture and sweet-tart flavor, Honeycrisps bake beautifully and maintain some bite.
- Jonagold: A cross between Jonathan and Golden Delicious, Jonagold apples are sweet with a hint of tartness and become wonderfully tender when baked.
- Braeburn: These offer a good balance of sweet and tart, with a firm texture that holds up well to baking.
- McIntosh: While harder to find these days, McIntosh apples are notable for breaking down very quickly, resulting in a softer, almost sauce-like filling. If you prefer a very tender, melt-in-your-mouth apple experience, these are a great option, but keep a close eye on your baking time.
Often, a mix of two or more varieties can create a more complex and interesting flavor and texture profile in your **old-fashioned apple crisp**. For instance, combining a tart Granny Smith with a sweeter Honeycrisp offers the best of both worlds.
To Peel or Not to Peel: The Apple Crisp Dilemma
One of the questions often asked when preparing **homemade apple crisp** is whether to peel the apples. The simple answer is: it’s entirely up to you!
You absolutely **do not have to peel the apples for apple crisp**. Many avid bakers, myself included, often skip this step. One of the reasons I appreciate this particular recipe is how quickly it comes together, and skipping the peeling significantly cuts down on prep time. Furthermore, leaving the peels on can add a lovely subtle pink hue to the filling, enhancing the visual appeal of your dessert. The peels also contribute a slight amount of fiber and nutrients, and if sliced thinly enough, their texture becomes barely noticeable once baked to tender perfection.
However, if you prefer a completely smooth apple filling without any textural variations from the skin, then go ahead and peel them. Both methods will result in a delicious **easy apple crisp**, so choose what best suits your preference and time constraints.
Serving Suggestions and Variations
While **apple crisp** is undeniably delightful on its own, it truly shines when served warm with a few classic accompaniments. A scoop of rich vanilla bean ice cream melting into the warm, spiced apples and crunchy topping is pure bliss. Alternatively, a dollop of freshly whipped cream adds a touch of creamy luxury. For those who enjoy a hint of extra indulgence, a drizzle of caramel sauce can elevate this **best apple crisp recipe** to new heights.
Want to customize your **homemade apple crisp**? Consider adding a handful of chopped walnuts or pecans to the crumb topping for extra crunch and nutty flavor. A touch of ginger or a blend of pumpkin pie spice can also introduce new aromatic dimensions to the apple filling. Don’t be afraid to experiment and make this classic dessert uniquely yours!
Frequently Asked Questions About Apple Crisp
Can I make apple crisp ahead of time?
Yes, you can assemble the **easy apple crisp** ahead of time. You can prepare the apple filling and the crumb topping separately, storing the apples in an airtight container in the refrigerator and the topping in a separate container (or plastic bag) in the fridge for up to 1-2 days. When ready to bake, combine them and proceed with the baking instructions. For best results, don’t combine the topping and apples too far in advance, as the topping can become soggy.
How do I store leftover apple crisp?
Leftover **apple crisp** should be stored in an airtight container in the refrigerator for up to 3-4 days.
Can apple crisp be reheated?
Absolutely! For best results, reheat individual servings in the microwave until warm, or warm the entire dish in a 300°F (150°C) oven for about 15-20 minutes, or until heated through and the topping has re-crisped slightly.
What kind of baking dish should I use?
I typically use a baking dish that is 10×8 inches and about 2.5 quarts in volume. An 8×8 inch baking dish, which usually holds about 2 quarts, also works well, though the crisp might be slightly thicker. The key is to use a dish that allows the apples to spread out enough for even cooking and for the topping to get golden and crisp.
More Delicious Desserts You Will Love
If you’ve enjoyed this delightful **apple crisp recipe**, you might also love exploring some of these other fantastic dessert options:
- Easy Peach Crisp: A summer variation offering sweet, juicy peaches under a similar crunchy topping.
- Pumpkin Cream Cheese Muffins: Perfect for fall, these muffins combine moist pumpkin with a creamy, tangy filling.
- Chocolate Chip Banana Bread: A classic comfort food, rich with bananas and studded with chocolate chips.
Easy Apple Crisp
By Meghan McMorrow | Fox and Briar
Prep Time: 15 mins | Cook Time: 1 hr | Total Time: 1 hr 15 mins
Servings: 6 Servings
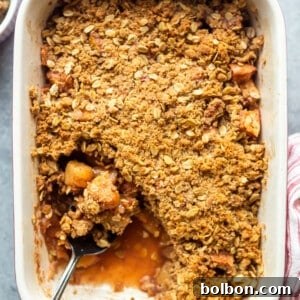
This Easy Apple Crisp Recipe is one of the best apple desserts you can make! This old fashioned apple crisp takes only a few minutes to prepare and has a delicious crumb topping.
Ingredients
For The Apple Crisp:
- 6 apples (cored and diced into 1 inch cubes)
- 1 tablespoon fresh lemon juice (from half a lemon)
- 2 tablespoons granulated sugar
- 1 teaspoon cinnamon
- 1/2 teaspoon nutmeg (fresh grated)
For The Apple Crisp Topping:
- 4 tablespoons unsalted butter (1/2 a stick) cut into cubes
- 1/2 cup all-purpose flour
- 1/4 cup granulated sugar
- 1/4 cup brown sugar (packed)
- 1/2 cup rolled oats (not instant)
- 1 teaspoon cinnamon
- 1/4 teaspoon kosher salt
Instructions
- Preheat oven to 350°F (175°C).
- In an 2.5 quart baking dish, add the diced apples, lemon juice, sugar, cinnamon and nutmeg. Toss together to fully coat.
- In a small bowl, mix together the ingredients for apple crisp topping. It is easier to mix together with your hands, but you can also use a fork or whisk if you prefer. Topping will resemble wet sand when mixed.
- Evenly sprinkle apple crisp topping over apples. Bake in the oven for 45 minutes to an hour, or until apples are very tender and filling is bubbling up through topping.
Video
A video demonstration for this recipe is available:
Watch the full video for step-by-step guidance on making this Easy Apple Crisp.
Notes
I used a baking dish that was 10×8 inches and about 2.5 quarts in volume, but I have also used an 8×8 inch baking dish for this, which holds about 2 quarts.
I really like this served warm with vanilla ice cream.
Nutrition information is automatically calculated, so should only be used as an approximation.
Additional Info
Course: Dessert
Cuisine: American
If you loved this recipe, please consider leaving a comment, rating it, and sharing your creation! Don’t forget to tag me on Instagram @foxandbriar and use the hashtag #foxandbriar so I can see your wonderful homemade apple crisp! Your feedback and shares mean the world.