Honey & Feta Pita
- Makes 4 pitas
- Prep 15 minutes
- Cook 4 minutes
- Total 2 hours 19 minutes
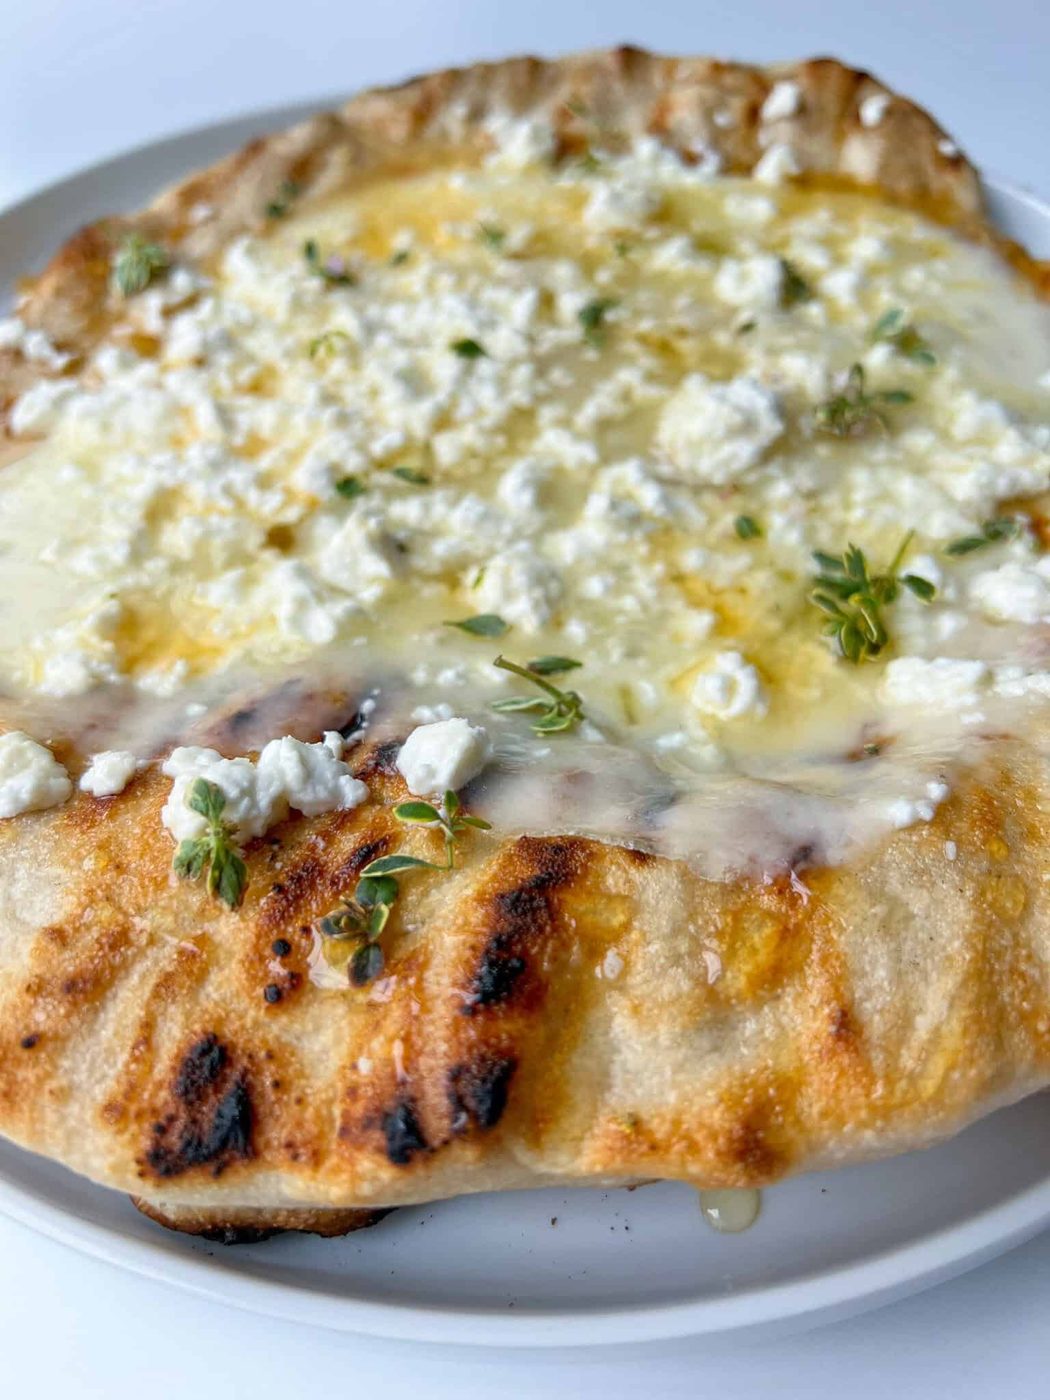
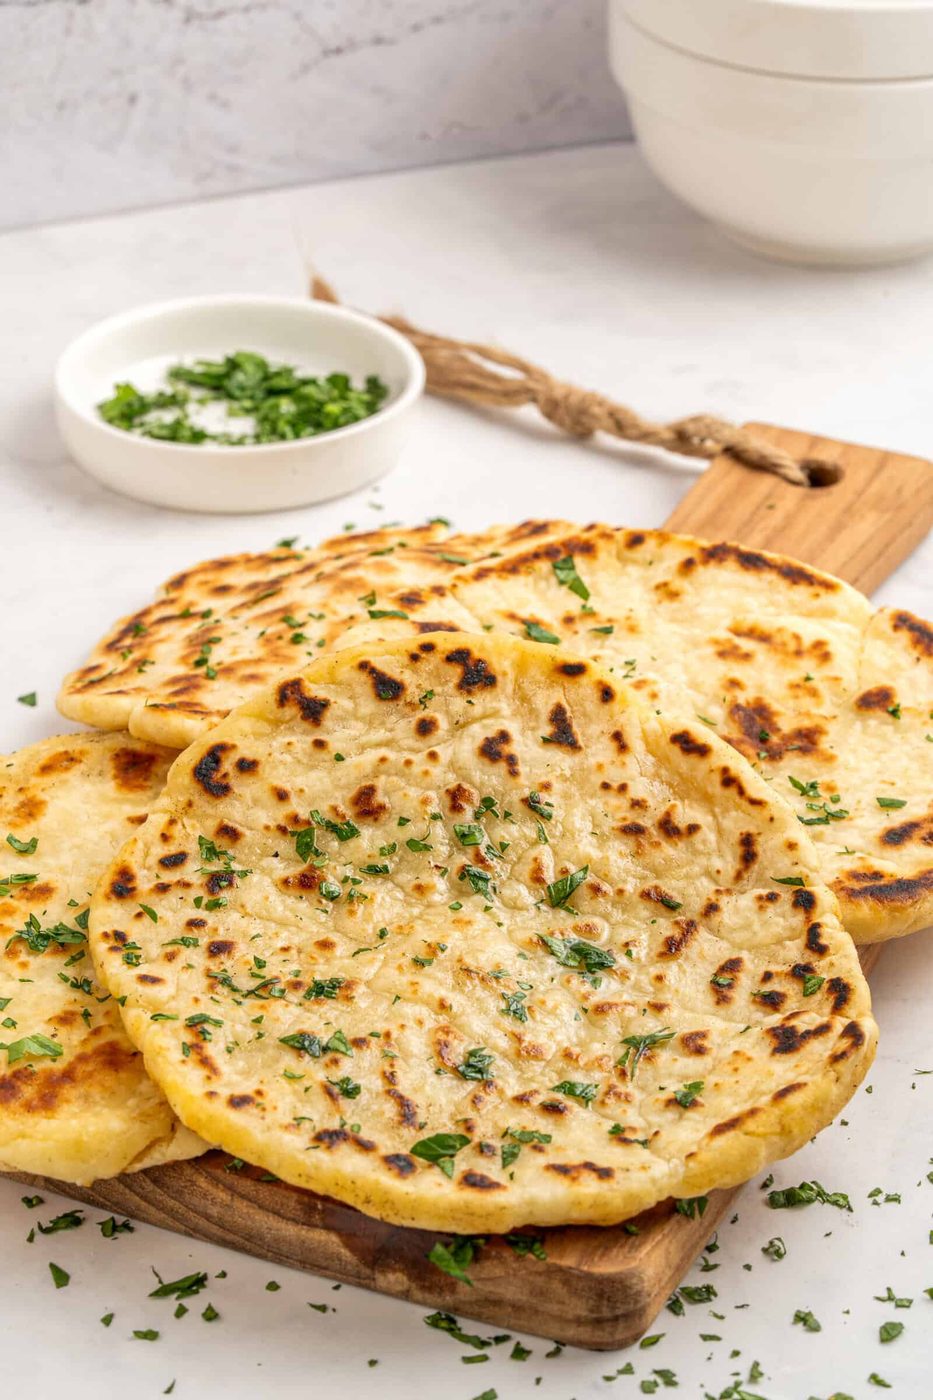
We're so excited to share our grandma’s grilled Honey & Feta Pita recipe. This is a nostalgic childhood dish for us and brings back memories of cooking on our grandma’s traditional wood-fired stove. Our grandma made this every Sunday morning, and she would cook the dough directly on the hot, metal surface of our wood-burning stove until charred and pillowy soft. After cooking the dough, she would slather it with grass-fed butter or olive oil, local feta, and honey. Here, we're adding our own touch to the traditional recipe, cooking the dough directly on the barbecue to achieve those beautiful char marks. These are traditionally topped with a combination of salty feta and sweet honey, but you can use any toppings you love.
What stands out
The beauty of this Honey & Feta Pita recipe is that you can go traditional and make everything from scratch, OR you can use a shortcut and use a store bought pizza dough, naan bread or pita. By cooking the dough on the BBQ, you get beautiful char marks and that bubbly and puffy texture that we all love. You can also play around with the toppings. We love salty provolone and feta with a drizzle of sweet (or spicy!) honey, but use whatever cheese you have and add any other toppings your family loves. Our Honey & Feta Pita is a great make-ahead recipe, too: you can have your dough ready to go so all you need to do is spread, and BBQ when you’re ready to serve.
How to Prepare Honey & Feta Pita
Start by adding the yeast, sugar, and warm water to a mixing bowl. Then give it a quick whisk and leave it to activate and foam up for 5 to 10 minutes.
Now, add the flour and salt to a large bowl or stand mixer and then stir together. (see stand mixer instructions in Common Questions below). Then pour in the activated yeast mixture and stir with a spatula or wooden spoon.
Pour the dough out onto the clean counter and knead it for 8 to 10 minutes. If the dough is sticky, add 1 tablespoon of flour at a time and knead until smooth. When you press down on it with a finger, the indent should bounce back up slowly.
Now, shape the dough into a ball and oil it up with olive oil.
Place it in a big bowl, cover with plastic wrap and let it rest in a warm, dry place away from drafts for about 2 hours, until tripled in size.
Next, remove the plastic wrap and punch down the dough so it deflates. Place the dough on the counter and divide into four equal pieces.
Then roll each piece into a ball and roll or stretch out the pitas as thin as possible. Place each one onto a piece of parchment paper.
Now, prep your cheese, honey, and any other toppings you’re using so they’re ready to go.
Brush one side of the pitas with 1 tablespoon of olive oil and preheat the barbecue to 450F (230C). If you don’t have a BBQ or grill, you can do this in a pan on the stove.
Place the pita onto the hot grill, oil side down, and peel off the parchment paper on top.
Then close the lid of the BBQ and cook for 2 to 3 minutes, or until it puffs up.
Use tongs to flip the pita over and then add 4 provolone cheese slices and 1 tablespoon crumbled feta.
Close the lid and bake another 1 to 2 minutes, or until lightly charred and the cheese melts.
Finally, remove the pita from the heat and generously drizzle it with 1 tablespoon honey or hot honey. Serve these Honey & Feta Pitas warm and enjoy!
Kitchen tip
Activating the yeast is the most important part of this Honey & Feta Pita recipe. If the yeast does not activate, start this step all over. If it does not activate it means that the water was too hot, too cold, or the yeast was expired. The water should be around 100 to 110F (37 to 43C).
Swaps
- You can definitely make your life easier and use store bought pizza dough, or prepared naan bread or pitas to make this Honey & Feta Pita recipe.
- You can also use your favorite gluten-free prepared pizza dough.
- Use your favorite non-dairy cheese to make this recipe dairy-free.
- If you don’t have a BBQ, prepare this Honey & Feta Pita recipe on a hot pan on the stove instead. We like using cast iron in that case.
- Use any toppings you love, such as mushrooms, olives, sliced red onions, crumbled sausage and more! The options are endless.
Serve it with
- This Honey & Feta Pita is alongside a big salad. Try our Green Goddess SaladGreek Feta Salad or our Simple Green Salad.
- Serve our Honey & Feta Pitas with a platter of grilled vegetables like our Grilled Zucchini Recipe or Roasted Eggplant Recipe.
Questions
can we make this Honey & Feta Pita recipe in a stand mixer?
If you’re using the mark stand mixer prepare everything in the bowl of the stand mixer. First activate the yeast in the mixer bowl, then add the flour and salt. Use the dough hook attachment to knead everything together on low speed until smooth. If the dough is sticky, add 1 tablespoon of flour at a time until the dough begins to pull away from the sides of the bowl. The kneading should take 6 to 8 minutes at medium-low speed.
can we use store bought dough to make this Honey & Feta Pita?
You certainly can! Buy a nice dough from an Italian bakery and make it the same way on the grill.
strong Can we make this recipe gluten-free?
We have not tried making this Honey & Feta Pita gluten-free, but it should work with 1-to-1 all-purpose gluten-free flour. Our favorite flour is by Caputo and they have an pizza dough recipe on the back of their GF flour pack linked here strong Caputo Fioreglut (1kg) – Italian Gluten Free Flour.
strong Can we use any yeast?
Yes, you can but if you use instant yeast you do not need to activate it, as the grains are fine. add all the dough ingredients to a bowl all at once. If you use quick-rise, it will cut down the rise time so keep an eye on it. You can also use fresh yeast instead — 21 grams total.
why isn’t our yeast activating?
The water must be warm to activate the yeast — not hot, not cold. The water needs to be between 100 and 110F (37 to 43C). If the water is too hot or too cold the yeast will not activate. Also, make sure the yeast is not expired, or it will never rise.
strong we don’t have a BBQ, what do we do?
Our grandma would make this Honey & Feta Pita on top of a wood-burning stove but you can also make it in a pan on the stove. Cook the pita in the pan until it bubbles, then flip it over and add the toppings. Cover the pan with the lid and then bake for 1-2 minutes until the cheese melts.
can we freeze the dough?
Yes, you can freeze it. After the dough has risen and punched back, divide it into your preferred portion sizes. Then wrap each portion loosely in cling film, place each ball of dough in a freezer bag, and seal. When you want to prepare a pita, thaw the dough overnight in the fridge, or for 2 to 3 hours at room temperature, then roll it out and bake as per our instructions above.
how do you properly measure dry ingredients?
For precise measurement in this Honey & Feta Pita or any baking recipe, always scoop the flour into the measuring cup with a spoon and level off the flour with a knife, discarding the excess before adding it to the bowl. br
Ingredients
Makes 4 pitas
The Yeast
- 1 packet active dry yeast, 2 1/4 teaspoons
- 1 ¼ cups warm water
- 1 teaspoon sugar
The Dough
- 3 cups all-purpose flour, plus more for dusting
- ½ teaspoon salt
- 1 tablespoon olive oil
Additional Toppings
- 4 tablespoon olive oil
- 16 slices provolone cheese, or any cheese, such as Kashkaval, mozzarella, etc. (optional)
- 4 tablespoons crumbled feta, measured with your heart
- 4 tablespoons honey, or hot honey
Equipment
- Mixing Bowls
- Liquid Measuring Cup
- Measuring Cups + Spoons
- Stand Mixer
- Parchment Paper
- Pastry Brush
Method
Activating the Yeast
- In a bowl, add the yeast, sugar and warm water. Give it a quick whisk and leave it to activate and foam up for 5 to 10 minutes.
- Note: Activating the yeast is the most important part of this recipe. If the yeast does not activate start this step all over. If it does not activate it means that the water was too hot, too cold, or the yeast was old or bad. The water should be around 100 to 110F (37 to 43C).
The Dough
- Add the flour and salt to a large bowl (stand mixer instructions in notes below) and mix together. Pour in the activated yeast mixture and stir with a spatula or wooden spoon.
- Pour the dough out onto the clean counter and begin to knead it. If the dough is sticky, add 1 tablespoon of flour at a time (we used about 1/4 cup or less) and knead until you have a smooth dough.
- You will know the dough is ready when you press down on it with a finger and the indent bounces back up slowly. We knead by hand for 8 to 10 minutes. If you don't know how to knead dough, watch this Youtube tutorial here: How to knead bread dough
- Once the dough is kneaded, shape it into a ball and oil it up with the olive oil. Place it in a big bowl and let it rest, covered with plastic wrap, in a warm dry place away from drafts. (This can be in a turned-off oven, microwave, or cupboard.) Let rest for about 2 hours, until the dough has tripled in size.
- When the dough has risen, remove the plastic wrap and punch it down in the middle so it deflates. Place the dough on the counter and divide into four equal pieces.
- Roll each piece into a ball and start to roll out the pitas one by one. We take a dough ball, flatten it with our hands and begin to stretch out the dough gently with our fingers, rotating it around.
- If you don't know how to stretch the dough with your hands you can use a rolling pin, to roll it as thin as possible, making sure you rotate the rolling pin in all directions. Be sure to lightly flour the dough and rolling pin, if the dough gets sticky.
- Roll out all four pitas as thin as possible and set them aside. Place each one onto a piece of parchment paper.
Grilling Method
- Before you start, make sure you have all the toppings ready.
- Brush one side of the pitas with 1 tablespoon of olive oil and get the BBQ ready. Please follow your manual on how to safely use and operate a grill or have someone assist you.
- Preheat the barbecue to 450F (230C). If you don't have a BBQ or grill, you can do this in a pan on the stove.
- Place the pita onto the hot grill, oil side down, and peel off the parchment paper on top.
- Close the lid of the BBQ and let the dough cook for 2 to 3 minutes, or until it bubbles up. This happens very quickly so keep an eye on it.
- Flip the pita over (with BBQ tongs or a BBQ-safe spatula) and immediately add 4 provolone cheese slices and 1 tablespoon crumbled feta.
- Close the lid for another 1 to 2 minutes, or until the other side is charred and the cheese starts to melt.
- Remove the pita from the heat and generously drizzle it with 1 tablespoon honey or hot honey. Serve hot!