
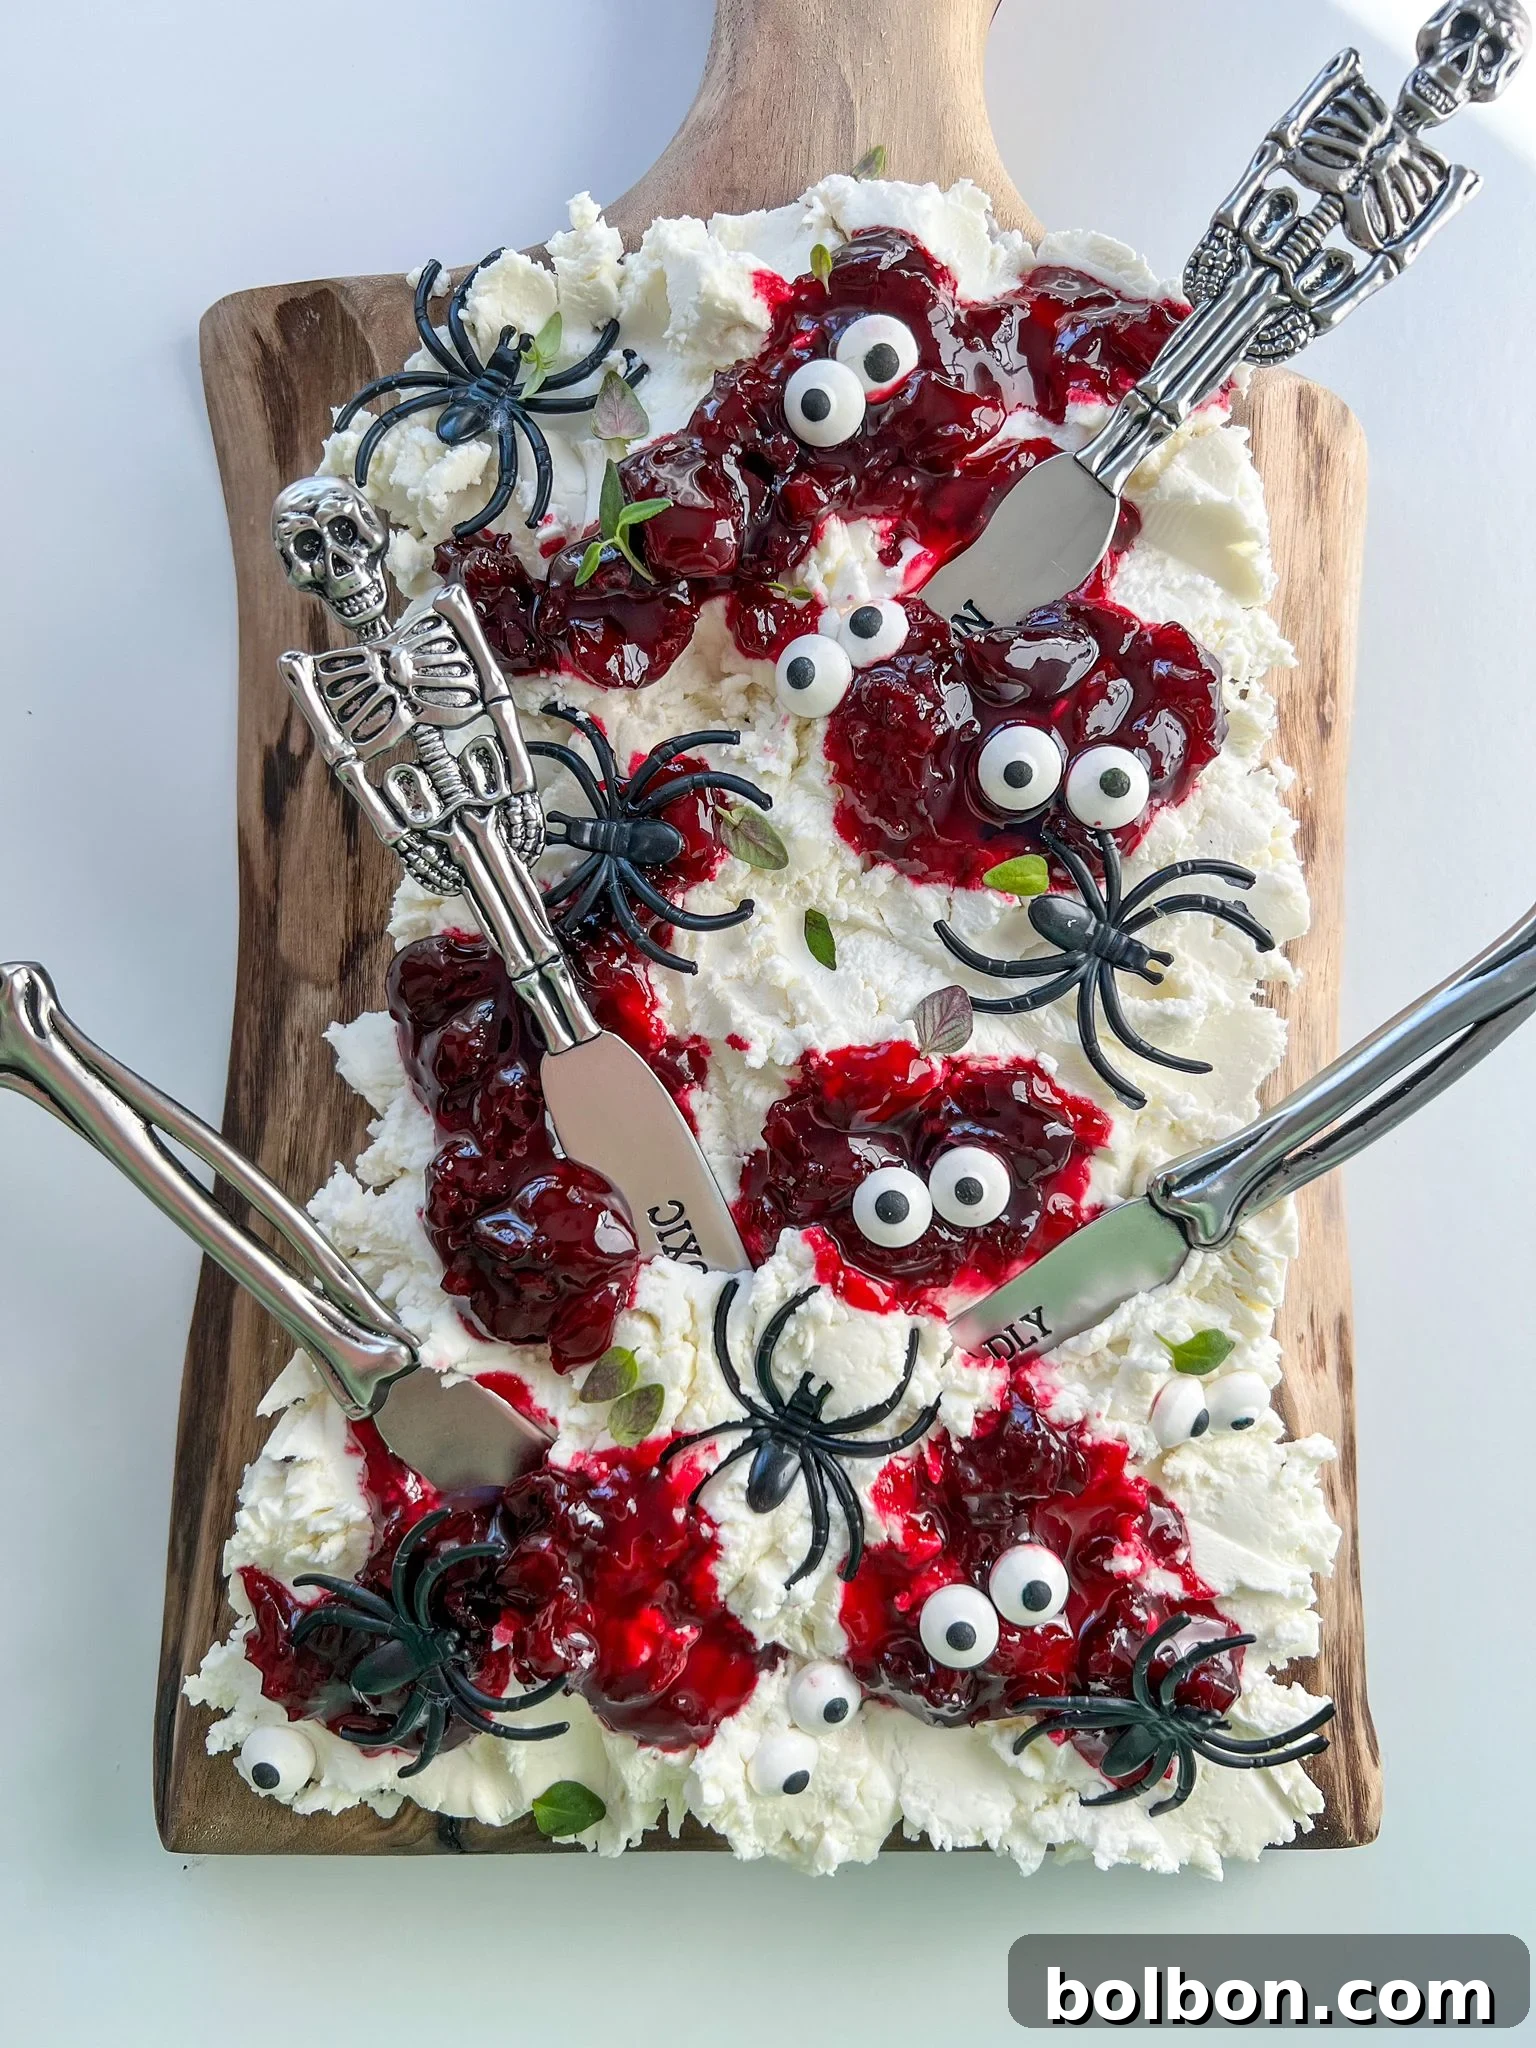
Unleash the Spooky Fun: Crafting the Ultimate Halloween Cheese Board
Are you ready to elevate your Halloween party game with an irresistibly spooky yet effortlessly chic appetizer? This quick and captivating **Halloween Cheese Board** is more than just a snack; it’s a ghoulishly good showstopper guaranteed to delight your guests. Inspired by the viral butter board trend, we’re taking that innovative concept and infusing it with a chillingly creative Halloween twist. With just a handful of simple ingredients and a dash of artistic flair, you’ll conjure a masterwork that’s both delicious and visually stunning, all in under 10 minutes. Say goodbye to complicated party prep and hello to a frighteningly simple way to impress!
This article will guide you through creating your own hauntingly beautiful cheese board, from selecting the perfect creamy base to adding those eerie, eye-catching decorations. We’ll explore various substitutions and variations to cater to every taste and dietary need, ensuring your spooky spread is inclusive and enjoyable for all your partygoers. Get ready to transform basic ingredients into an unforgettable centerpiece that will have everyone talking!
Why This Halloween Cheese Board Will Be Your Party MVP
You’ll fall head over heels for this spooky Halloween Cheese Board because it perfectly blends speed, creativity, and visual appeal into one unforgettable party dish. In a mere 10 minutes, you can transform everyday ingredients into a stunning, conversation-starting centerpiece that sets the ideal eerie atmosphere for your Halloween gathering. Here’s why this board is an absolute must-have for your festivities:
- **Effortless & Speedy Preparation:** Forget spending hours in the kitchen. This board comes together in just 10 minutes, allowing you more time to enjoy the party and less time stressing over food prep.
- **A Canvas for Creativity:** It’s more than just food; it’s an artistic expression! The simple base provides a blank canvas for you to unleash your inner Halloween artist, making each board uniquely yours.
- **Visually Captivating Centerpiece:** With its vibrant colors and creepy-cute decorations, this cheese board naturally draws attention. It’s a guaranteed focal point that will charm and intrigue your guests, sparking conversations and Instagram-worthy moments.
- **Customization at Its Core:** Whether you prefer the tang of goat cheese, the richness of cream cheese, or a plant-based alternative, this recipe offers incredible flexibility. You can choose your favorite creamy base and tailor the toppings to suit any palate or dietary preference.
- **Perfect for All Ages:** While adults will appreciate the sophisticated flavors, the playful decorations like candy eyes and spiders make it a hit with kids too. It’s a fun activity to involve younger guests in the decorating process!
- **Versatile Serving:** Ideal as an appetizer, a late-night snack, or even a dessert option, its versatility makes it suitable for various points throughout your Halloween celebration.
Crafting Your Hauntingly Delicious Halloween Cheese Board: A Step-by-Step Guide
Creating this Halloween Cheese Board is as simple as it is satisfying. Follow these steps to assemble a masterpiece that’s both spooky and delectable:
- 1. The Creamy Canvas: Create the Cheese Base 🧀
Begin by selecting your creamy base. While goat cheese offers a delightful tang and soft texture, alternatives like ricotta, cream cheese, or even whipped butter work wonderfully. The key is to choose a soft, spreadable consistency. Take your chosen cheese and artfully smear it across a wooden board or a decorative plate. Don’t just flatten it; instead, create inviting swirls, peaks, and valleys. These textures not only look visually appealing but also provide perfect nooks and crannies for your spooky jam and decorations to nestle into. Aim for an organic, slightly rustic look that suggests a haunted landscape. - 2. Bloody Sweet Accents: Spooky Jam 🩸
In a separate small bowl, combine your cherry jam (or any red jam of your choice, like raspberry or strawberry) with a few drops of red food coloring. Start with about 20 drops, then mix well and add more until you achieve a rich, deep, and slightly unsettling crimson hue—like fresh blood! Using a spoon, artfully add dollops of this “spooky jam” onto your creamy cheese base. You can place them randomly for an organic look, or create a more deliberate pattern, allowing the vibrant red to contrast dramatically with the pale cheese. For an even more eerie effect, lightly swirl a toothpick or knife through the jam into the cheese, creating a marbled, vein-like pattern. - 3. Creepy-Crawly Charms: Eerie Decor 🕷️
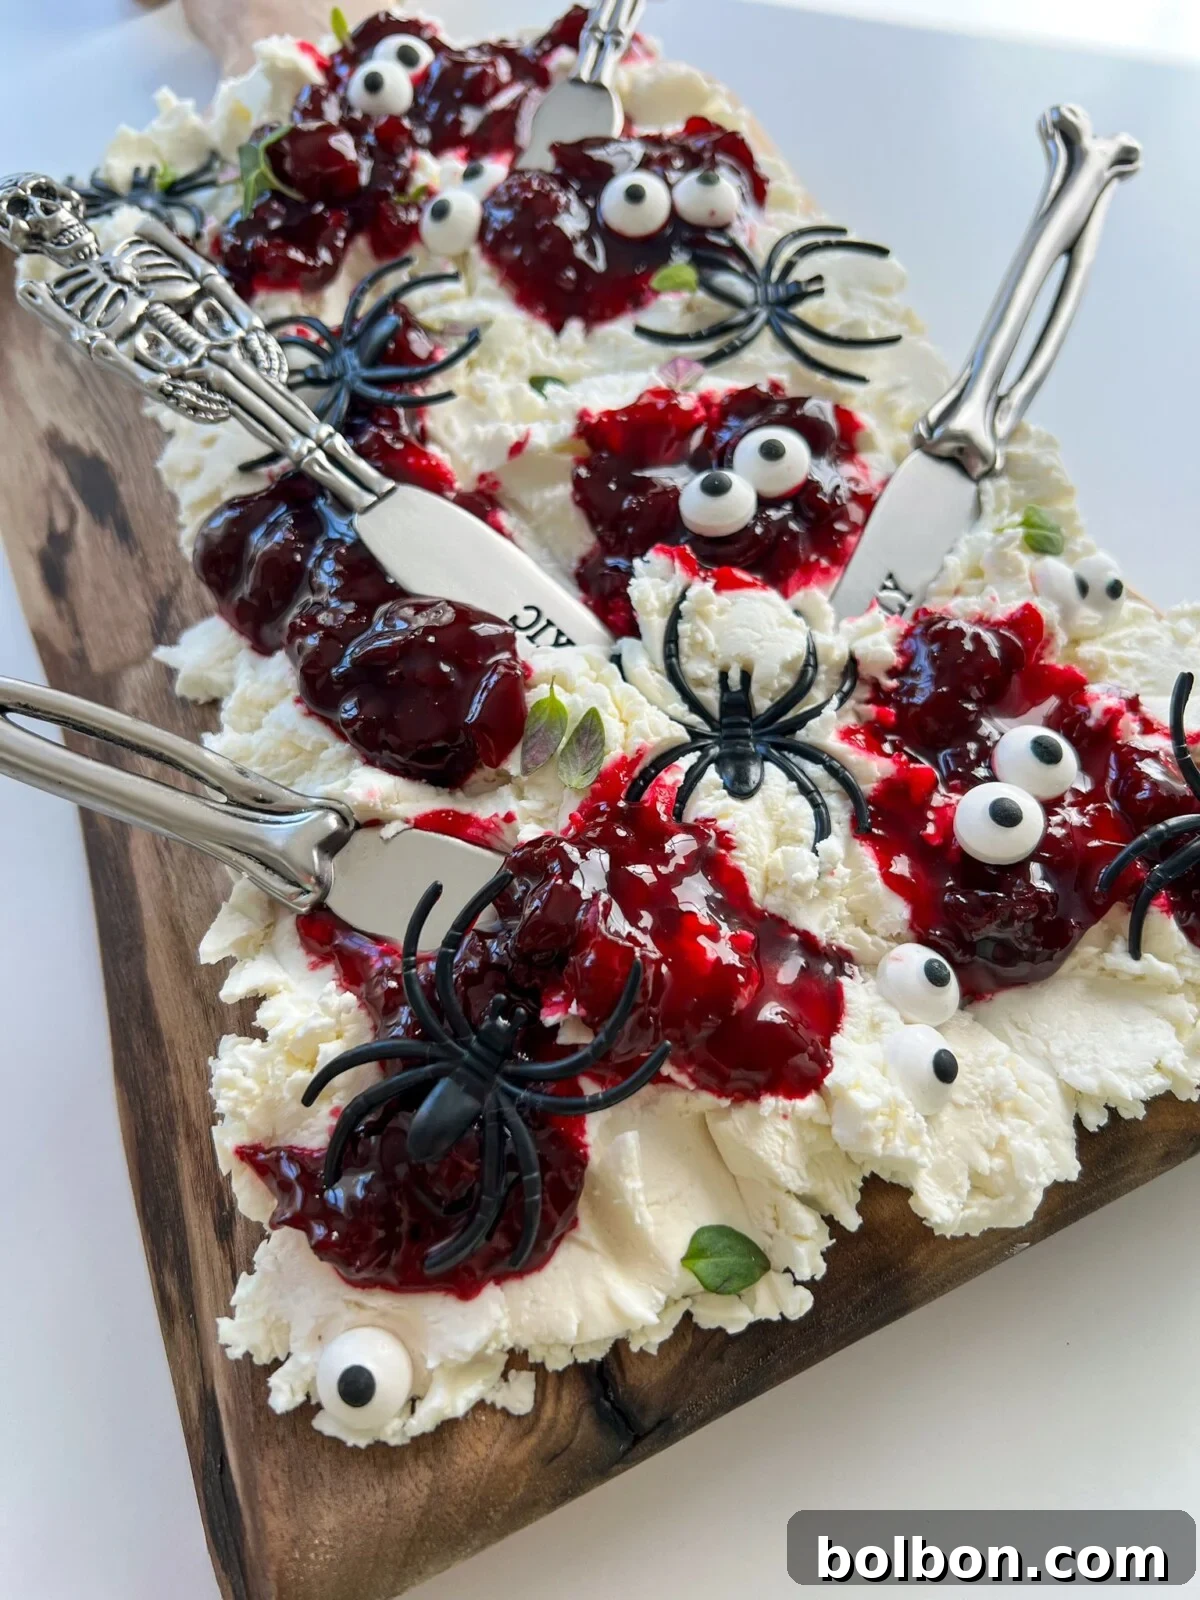
Now for the fun part: bringing your board to life with frightful details! Strategically place plastic spiders, miniature bats, and edible candy eyes across your board. Arrange the spiders so they appear to be crawling out of the jam or across the cheese. Place candy eyes in clusters or individually to create a watchful, unsettling gaze. Remember, the goal is to make it look both fun and slightly unsettling. For non-edible decorations like plastic spiders, ensure they are clean and clearly distinguishable from the edible components, or place them on areas that won’t be directly consumed. - 4. Functional Fright: Serving Knives 🔪
Complete your spooky tableau by adding Halloween-themed butter or cheese knives. These aren’t just for serving; they’re an integral part of the theme! Whether you find ones shaped like skulls, ghosts, or simply knives with dark, eerie handles, they add a perfect functional and thematic touch. If themed knives aren’t available, any clean, stylish spreading knives will do. Simply stick a few into the cheese and jam, making them easily accessible for your guests. - 5. Personalize Your Potions & Enjoy!
This is your chance to truly make the board your own. Feel free to let your creativity run wild by adding any other spooky props or edible garnishes that match your Halloween theme. Think small plastic skeletons, gummy worms, black licorice “spider legs,” or even edible glitter for a touch of mystical sparkle. The more personal and unique, the better! Once assembled, your Halloween Cheese Board is ready to be unveiled and enjoyed by your eagerly awaiting guests.
Nonna’s Spooky Tips for a Perfect Board
Achieving a show-stopping cheese board is easier than you think with these clever tricks:
- Board Alternatives: No fancy new wooden board? No problem! You can easily create this masterpiece on any large, flat serving plate you have at home. For an even simpler cleanup, or if you’re concerned about the cheese staining your board, line it with a piece of parchment paper before spreading on the creamy cheese. This creates a clean barrier and makes for effortless tidying.
- Cheese Temperature: For the smoothest spreading and best texture, ensure your cheese base (especially goat cheese or cream cheese) is at room temperature. Take it out of the fridge about 30 minutes before you plan to assemble.
- Jam Consistency: If your jam is too thick, gently warm it for a few seconds in the microwave to make it more spreadable and easier to create those “bloody” dollops. If it’s too thin, a tiny pinch of cornstarch whisked in and briefly heated can help thicken it slightly.
- Creative Presentation: Think beyond the board! Surround your spooky cheese board with themed napkins, small bowls of crackers or baguette slices, and perhaps a few flickering LED candles (for safety) to enhance the eerie ambiance.
- Serving Suggestion: Offer an assortment of dippers, such as plain crackers, pretzel crisps, sliced baguette, or even vegetable sticks like carrots and celery, to give guests options for enjoying their spooky spread.
Unleash Your Inner Mad Scientist: Substitutions and Variations
The beauty of this Halloween Cheese Board lies in its incredible adaptability. Embrace the creative possibilities and tailor it to your dietary needs, thematic preferences, and what you have on hand. Don’t be afraid to experiment!
- Flexible Cheese Base Options:
- Goat Cheese: Offers a delightful tangy and creamy profile.
- Ricotta: For a milder, fluffier texture, perfect if you prefer a less assertive flavor.
- Cream Cheese: A classic choice for its smooth, rich consistency and universal appeal. Use softened cream cheese for easy spreading.
- Whipped Butter: If you’ve loved the butter board trend, a good quality, softened whipped butter can be an indulgent and delicious alternative, especially with sweet jams.
- Vegan Cheeses: Many excellent plant-based cream cheese or soft vegan cheese spreads are available, making it easy to create a dairy-free version that caters to vegan guests.
- Diverse Jam & Spread Options:
- Red Jams: Beyond cherry, experiment with raspberry, strawberry, or even a mixed berry jam for varying shades of red and different fruity notes.
- Cranberry Sauce: For a tart and festive twist, especially around autumn holidays, my homemade cranberry sauce makes an excellent spooky topping.
- Savory Swaps: For a less sweet board, consider red pepper jelly, a balsamic glaze, or even a bright green pesto for a “monster slime” effect with different decorations.
- Beyond Spiders: Creative Decorative Elements:
- Seasonal Fruits: Black grapes, sliced figs, pomegranate seeds, and dark berries add natural color and flavor. Arrange them artfully around the cheese.
- Savory Choices: Black olives (halved to look like eyes), gherkins (chopped into creepy shapes), or even thinly sliced radishes can add a savory dimension and textural contrast.
- Candy & Sweets: Gummy worms, black licorice, mini chocolate chips, or sprinkles can amplify the playful Halloween theme.
- Herbaceous Touches: Fresh rosemary sprigs can resemble tiny, eerie tree branches, adding an aromatic touch.
- Inclusive Indulgences: Dietary Preferences:
- Gluten-Free: Offer a selection of gluten-free crackers, rice cakes, or vegetable sticks as dippers.
- Vegan: As mentioned, use plant-based cream cheese or soft vegan cheese spreads, and ensure your jam and any other toppings are vegan-friendly.
- Low-Carb: Swap out traditional crackers for sliced cucumbers, bell peppers, celery sticks, or other low-carb vegetables for dipping.
- Nut-Free: If serving, be mindful of nut allergies and avoid adding nuts as decorative elements or dippers, or clearly label for guests.
Pairing Your Spooky Spread: What to Serve With It
A fantastic cheese board isn’t complete without the perfect accompaniments. These thoughtful additions will enhance the flavors and textures of your Spooky Halloween Cheese Board:
- Cracker & Bread Selection: Offer a variety of neutral crackers like water crackers or plain breadsticks, which allow the cheese and jam flavors to shine. Sliced baguette, toasted crostini, or even pretzel thins also provide a satisfying crunch. For gluten-free guests, ensure a dedicated gluten-free cracker option is available.
- Fresh Vegetables: Provide a colorful assortment of sliced vegetables for a lighter dipping option. Cucumber slices, carrot sticks, celery stalks, bell pepper strips (orange and purple work well for Halloween), and even endive leaves are excellent choices.
- Extra Fruit & Dried Fruit: Beyond the board’s decorations, a small bowl of fresh berries (raspberries, blackberries), apple slices, or pear wedges can add a refreshing counterpoint. Dried cranberries or figs can also offer a chewy, sweet element.
- Savory Bites: A small dish of cured meats (like prosciutto or salami, artfully folded) or a bowl of spiced nuts can add a savory balance to the sweet and tangy board.
- Beverage Pairings:
- Wine: A crisp, dry white wine like Sauvignon Blanc or a light-bodied red such as Pinot Noir can complement goat cheese beautifully. For sweeter jams, a sparkling wine or a rosé might be delightful.
- Halloween Cocktails/Mocktails: Lean into the theme with festive drinks. A “Witches’ Brew” punch or a “Vampire’s Kiss” cocktail will perfectly match the spooky vibe.
- Hard Cider: The crisp, apple notes of a good hard cider can be a fantastic pairing with creamy cheeses and fruit jams.
- Sparkling Water or Juice: Simple and refreshing options for all guests.
Other Haunting Halloween Recipes
Looking to complete your Halloween feast? Here are more terrifyingly tasty recipes to inspire your menu:
- Mummy Hot Dogs
- Frankenstein Kiwis
- Witch Finger Cookies
- Chocolate Bats
- Pretzel Broomsticks
- Halloween Cocktails
Frequently Asked Frights: Your Halloween Cheese Board Questions Answered
Absolutely! This recipe is incredibly versatile. You can personalize it with virtually any preserves or jam you personally love. While red jams like cherry, raspberry, or strawberry work best for the “bloody” aesthetic, don’t hesitate to try fig jam, apricot preserves, or even a spicy pepper jelly if you’re aiming for a different flavor profile or color scheme.
Certainly! If goat cheese isn’t your preference, feel free to use any creamy, spreadable cheese. Excellent alternatives include soft cream cheese, whipped ricotta, Boursin cheese, or even softened, high-quality butter for a richer base. For those seeking a vegan option, it’s entirely feasible to create a delicious plant-based board by using dairy-free cream cheese or other plant-based soft cheeses, which are widely available in most grocery stores today.
For optimal spreading and an inviting presentation, the cheese should have a soft, pliable texture. If it’s too firm, let it sit at room temperature for about 15-30 minutes before spreading. As for the serving board, creativity is key! You can use any type of serving board you have at home—a wooden charcuterie board, a slate platter, or even a regular ceramic plate can work beautifully. For reference, the board used in the accompanying images was a small wooden board, measuring approximately 9 inches in length and 7 inches in width, proving you don’t need a huge surface for a stunning display.
Yes, if you’re not keen on spreading the cheese directly onto your serving board, or if you want to make cleanup even easier, a clever alternative is to place a small piece of parchment paper on the board first. Then, spread your creamy cheese onto the parchment paper. This method works perfectly and allows you to lift off the paper with any leftovers, keeping your board pristine.
Certainly. The plastic spiders are primarily used for visual presentation, adding that essential creepy-crawly factor to your Halloween theme. They are not intended for consumption. The candy eyes, however, are edible and add a fun, whimsical, and slightly eerie touch. While safe to eat, please exercise caution as they can be quite hard on the teeth, especially for younger guests. They’re best enjoyed as a garnish rather than a primary food item.
The original spooky Halloween knives featured in this recipe were purchased from Winners a few years back. However, if you wish to source similar items, you can often find a wide variety of Halloween-themed butter knives or cheese spreaders online through retailers like Amazon, Etsy, or specialty party supply stores, especially as Halloween approaches. Look for keywords like “Halloween butter knives,” “spooky cheese tools,” or “gothic serving utensils.”
Halloween Cheese Board
Facebook Share
Rate Recipe
Print Recipe
Appetizer
American
8
The Modern Nonna
10 minutes
10 minutes
Video
Equipment
Ingredients
- ▢ 250 grams goat cheese, ricotta, cream cheese, or butter work as well
- ▢ ⅓ cup cherry jam, any red jam works
- ▢ red food coloring, start with 20 drops until it’s a nice dark red
- ▢ spider, for presentation (non-edible)
- ▢ candy eyes, for presentation (edible, but use caution)
Instructions
-
Take the goat cheese (or your chosen creamy base) and smear it onto a wooden board or plate. Be sure to make it look presentable and add artistic swirls as you layer the cheese onto the board for a textured, inviting appearance.
-
In a separate bowl, mix the cherry jam with the red food coloring until you achieve a deep, spooky red hue. Take a spoon and carefully add dollops of this “bloody” jam onto the cheese board, creating visual interest.
-
Enhance the presentation by adding plastic spiders and candy eyes strategically across your board. Lastly, stick a few butter knives or cheese spreaders into the board. Themed Halloween knives are ideal, but any suitable knives you have on hand will work perfectly. Enjoy your frightfully festive creation!
Nutrition
Nutrition information is automatically calculated, so should only be used as an approximation.
Additional Info
Appetizer
American