Witch Finger Cookies
- Makes 11 cookies
- Prep 40 minutes
- Cook 30 minutes
- Total 1 hour 10 minutes
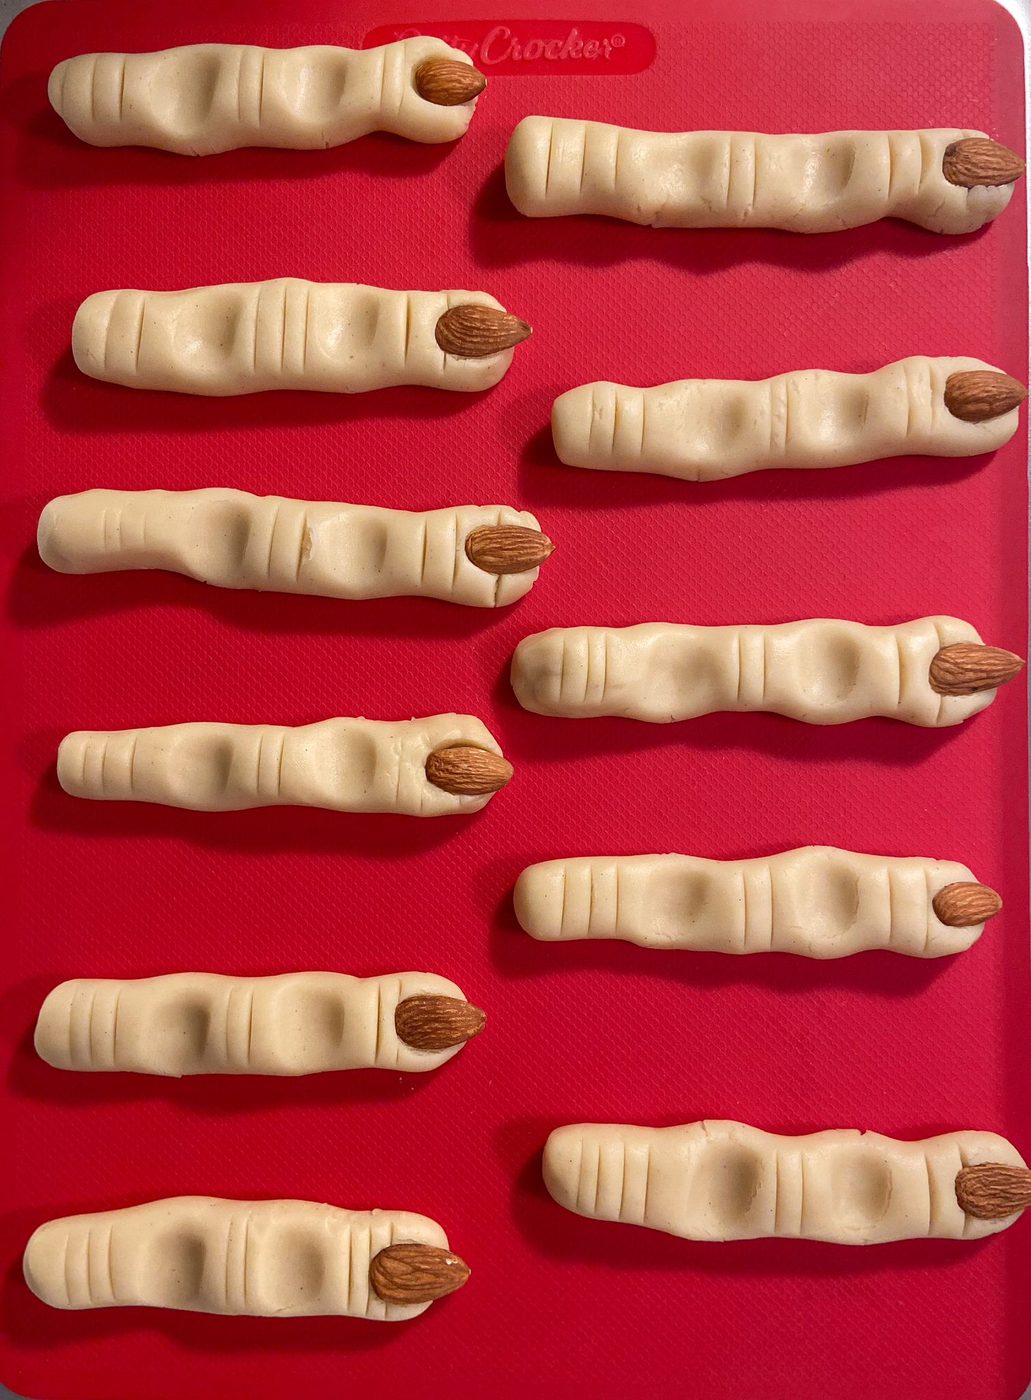
Impress your Halloween party guests with these creepy Witch Finger Cookies. Despite their frightening appearance, these buttery cookies will cast a spell on your taste buds. suited to spooky celebrations these cookies are sure to leave everyone mesmerized and eager for more. Share your spine-tingling creations and tag us or leave a comment below!
What stands out
- Scary Good Taste: Despite their spooky appearance, these Witch Finger Cookies are, with a buttery, melt-in-your-mouth texture.
- Showstopper for Halloween: These cookies are the addition to your Halloween party, guaranteed to amaze your guests and steal the show.
- Memorable Reactions: The eerie appearance of these cookies will evoke epic reactions at your Halloween gathering, from brave souls willing to try them to those who watch in amazement.
How To Prepare Witch Finger Cookies
- Start by mixing the dry ingredients in a bowl. Combine flour, salt, and baking powder, and then set this mixture aside. Next, prepare the wet ingredients. In a separate bowl, stir together the softened butter, egg, powdered sugar, vanilla extract, and almond extract (if you choose to use it).
- Incorporate the wet ingredients into the dry mixture. Blend them until a soft, play-dough-like dough forms.
- Give the dough some chill time by wrapping it in plastic wrap and refrigerating it for 30 minutes to an hour. This step is crucial to prevent spreading during baking.
- After the dough has chilled, it’s time to shape the fingers. Take 1.5-2 tablespoons of dough and roll it into a ball. Repeat this process until you have 11-12 equal-sized balls. Shape each ball into a finger:
- Roll it into a rope create knuckles with small indents, and use a knife to make cuts on top. Don’t forget to add half an almond to the front as a fingernail.
- Now, preheat the oven to 350°F (175°C).
- Bake the cookies by placing the shaped cookies on a lined baking sheet with parchment paper or a silicone mat. Bake for 25-30 minutes or until they turn lightly golden.
- To add a spooky “blood” effect, mix the cherry jam in a small bowl with 8 drops of red food coloring. Use a small brush or a spoon to add a bit of this ‘bloody’ jam under each almond. If you want to give them an eerie appearance, you can optionally brush cocoa powder on top of the cookies for a “dirt” effect.
- Finally, it’s time to enjoy. Allow the cookies to cool completely before serving.
The family's Spooky Tip
It is crucial to chill the dough well or the fingers will spread in the oven as they bake.
Substitutions and Variations
Embrace the creative possibilities and make these spooky Witch Finger Cookies your own while accommodating dietary needs and thematic preferences.
- Witch’s Warts: Insert a few raisins or currants into the dough before baking to create “witch’s warts” for a more whimsical and spooky appearance.
- Gluten-Free Alternative: Substitute all-purpose flour with a 1-1 gluten-free flour substitute. Ensure that all other ingredients are gluten-free, including the baking powder and jam.
- Nut Allergies: You can use alternative nails; Instead of almonds for the fingernails, use small pieces of white chocolate, candy corn, or marshmallows. There are also options for decoration here; you can also use small candies like chocolate chips as alternative “fingernails.”
- Flavored Extracts: Experiment with different extracts to alter the flavor profile. For example, use orange extract for a citrusy twist or mint extract for a fresh, cool taste.
Other Halloween Recipes
- Mummy Hot Dogs
- Frankenstein Kiwis
- Halloween Cheese Board
- Chocolate Bats
- Pretzel Broomsticks
- Halloween Cocktails
Questions
What if the jam is too scary for the kids?
If the jam used to create the gory effect is too scary for kids, you can leave it out without compromising the taste of the cookies.
strong What’s the alternative for those with almond allergies?
You can use small pieces of white chocolate, candy corn, or even marshmallows instead of almonds to create the fingernail effect, making the cookies nut-free.
strong How should these cookies be stored for freshness?
strong Is there a way to achieve the red u0022bloodu0022 effect without artificial food coloring?
Yes, you can use natural food coloring alternatives. For example, consider beet juice for the ‘blood’. But, keep in mind that natural colors may be lighter.
strong How can we create a gluten-free version of these cookies?
To make gluten-free strong Witch Finger Cookies, use a 1-1 gluten-free flour blend in place of all-purpose flour. Ensure that all other ingredients, including the baking powder and jam, are also gluten-free.
Ingredients
Makes 11 cookies
- ¾ cup unsalted melted or softened butter, cooled down
- 1 cup powdered sugar
- 1 medium egg
- ½ teaspoon pure vanilla extract
- ½ teaspoon pure almond extract, optional
- 2.5 cups all-purpose flour
- 1 teaspoon baking powder
- ½ teaspoon salt
- almonds, or gummies
- 3 tablespoons cherry jam, or any jam
- 8 drops red food colouring, optional
- small brush + cocoa powder
Equipment
- Mixing Bowls
- Baking Mat
- Measuring Cups + Spoons
Method
- In a bowl, mix flour, salt, and baking powder and set aside. In a separate bowl mix the softened butter, egg, sugar, vanilla, almond extract and stir.
- Now pour the dry ingredients into the wet and incorporate until you have a nice and soft dough — the dough should feel like play dough. Wrap it up with some cling wrap and leave it in the fridge for 30 minutes to an hour. This step is extremely important so that the cookies don't spread in the oven.
- After 30 minutes, take 1.5-2 tablespoons of the dough, squish it together and roll it into a ball. Do this until the dough is finished and you have 11-12 equal size balls. Take each ball and begin to shape it into a finger.
- Shape the cookies just like we show on the video below by rolling each ball into a rope as long as a finger. Make two small indents on the side and top of the dough with your fingers so that the "finger" looks like it has knuckles. Take a knife and make small cuts starting from the back, then middle, and then front. Cut an almond in half and press it down where the fingernail would normally go to complete the look.
- Preheat the oven to 350F degrees. Bake the cookies on a lined baking sheet with parchment paper for 25-30 minutes or until lightly golden. You can also use a baking mat as well. Let them cool completely.
- Mix the cherry jam in a small bowl with 8 drops of red food coloring, take a small painting brush (or spoon) and add a little jam under each almond. Optionally you can brush cocoa powder on top of the cookies to make it look like "dirt," but we will leave that up to you. Enjoy.