
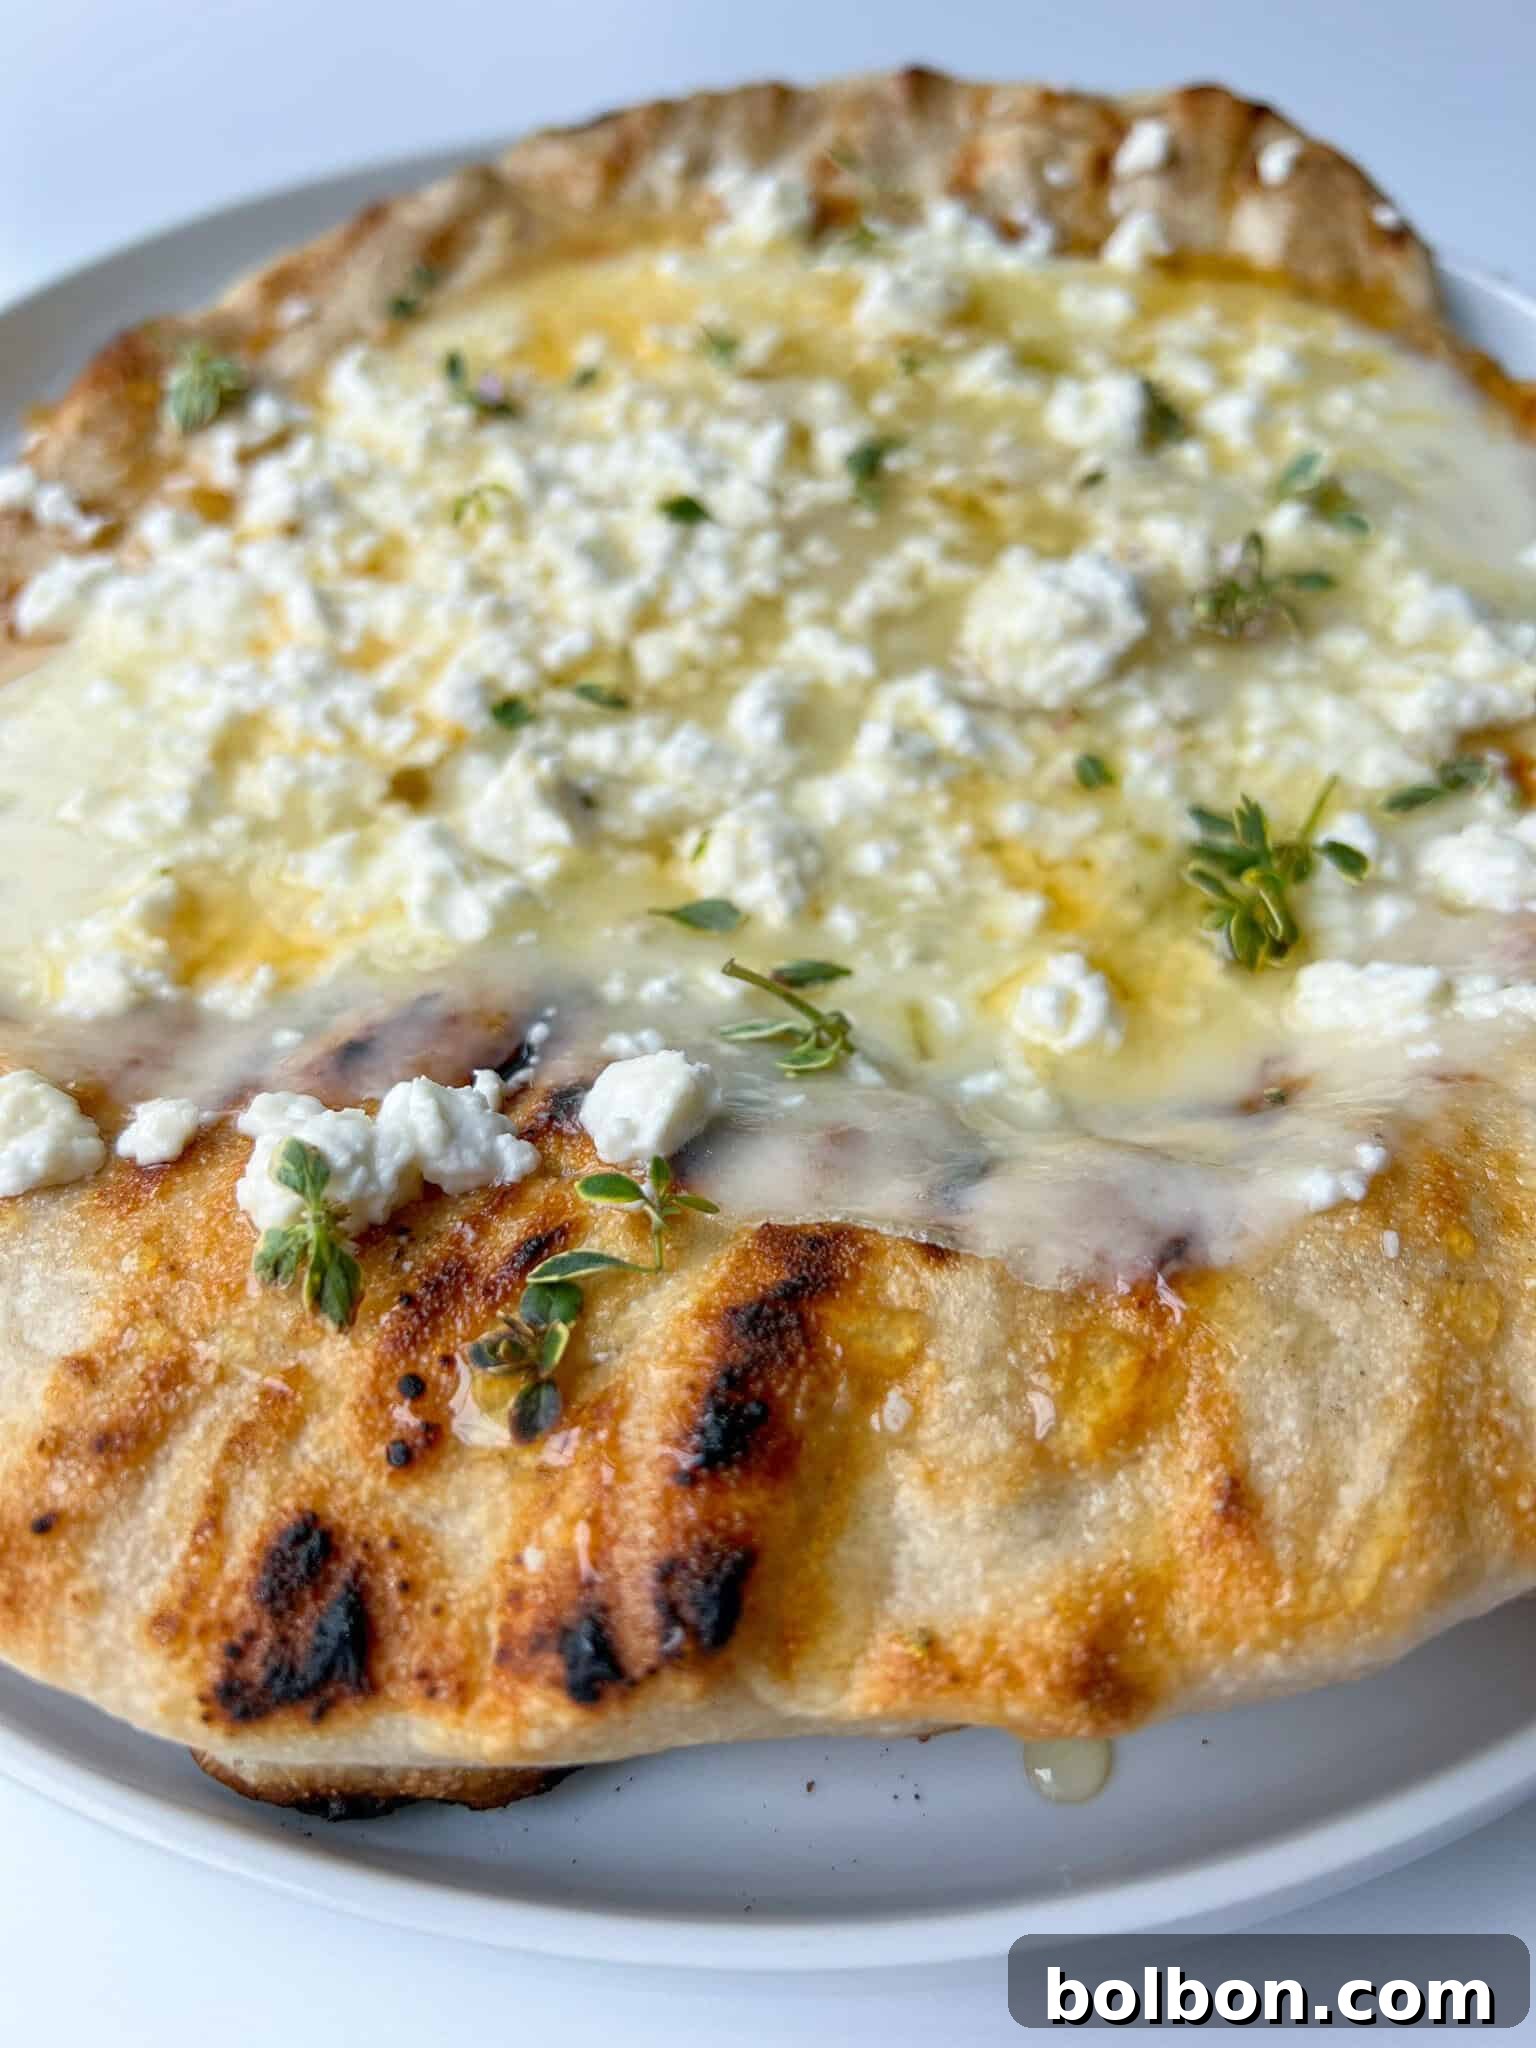
Embark on a culinary journey with this irresistible Grilled Honey and Feta Pita recipe, a dish that transcends mere food and evokes cherished memories. For me, it’s a deeply nostalgic callback to my childhood, a Sunday morning ritual spent by my grandma’s side as she lovingly prepared this treat on her traditional wood-fired stove. I can still recall the warmth and the savory scent as she cooked the dough directly on the stove’s hot metal surface until it was beautifully charred and exquisitely pillowy soft. Each perfectly cooked piece of flatbread was then generously slathered with rich, grass-fed butter or fragrant olive oil, crumbled local feta, and a lavish drizzle of sweet, golden honey.
While honoring the heart of this time-honored tradition, I’ve infused it with a modern twist, adapting the cooking method for today’s kitchens. My version takes the dough directly to the barbecue grill, where it develops those sought-after, smoky char marks and a wonderfully puffy texture. This adaptation not only makes the recipe accessible but also adds a distinctive smoky depth to the flavor profile. The classic combination of tangy, salty feta and luscious, sweet honey remains at the core, creating a symphony of flavors that is both comforting and exhilarating. However, the beauty of this recipe lies in its versatility; feel free to customize your pita with any delightful toppings that capture your imagination and please your palate.
Why This Grilled Honey and Feta Pita Will Become Your New Favorite
This Grilled Honey and Feta Pita is more than just a meal; it’s an experience that promises to delight your senses and simplify your cooking. Here’s why this recipe deserves a permanent spot in your culinary rotation:
Unforgettable Flavor Fusion: Sweet, Salty, and Savory Perfection
At the heart of this dish is the exquisite contrast between the salty, tangy notes of feta cheese and the rich, golden sweetness of honey. This classic pairing creates a flavor profile that is both complex and incredibly satisfying, hitting all the right spots. The subtle char from the grill adds a smoky, savory dimension that elevates the entire experience, making each bite an adventure. Whether you prefer a milder sweetness or a fiery kick with hot honey, this pita offers a delightful balance for every palate.
Irresistible Texture: Crispy, Puffy, and Tender
Cooking the pita dough directly on a hot barbecue grill achieves a textural masterpiece. The high heat rapidly cooks the dough, causing it to puff up dramatically, creating a light and airy interior. Meanwhile, the exterior develops those coveted grill marks and a slight crispness that contrasts beautifully with the dough’s tender chewiness. This unique combination of a puffy, bubbly crust with a soft center is truly what makes this flatbread stand out, offering a satisfying mouthfeel with every bite.
Remarkable Versatility: Traditional or Time-Saving
One of the greatest appeals of this Honey and Feta Pita recipe is its incredible adaptability. You can embrace your inner chef and go the super traditional route, making the pita dough entirely from scratch for an authentic, handcrafted feel. Alternatively, for those busier days or when convenience is key, you can opt for a smart shortcut by using store-bought pizza dough, naan bread, or even pre-made pita. Both approaches yield delicious results, allowing you to tailor the preparation to your schedule and skill level without compromising on flavor or quality.
Endless Customization Options: Tailor to Your Taste
Beyond the classic feta and honey, this recipe serves as a perfect canvas for culinary creativity. While I adore the combination of salty provolone and crumbled feta with a generous drizzle of sweet (or even spicy!) honey, the possibilities for toppings are virtually limitless. Experiment with different cheeses like creamy mozzarella, sharp cheddar, or a blend of your favorites. Add fresh herbs such as mint, oregano, or thyme. For a heartier meal, consider grilled vegetables like bell peppers, zucchini, or caramelized onions, or even a sprinkle of cooked sausage or olives. This flexibility ensures that every Honey and Feta Pita can be a unique reflection of your preferences.
The Ultimate Make-Ahead Meal Solution
Planning ahead for deliciousness has never been easier! This Honey and Feta Pita is an excellent make-ahead recipe. You can prepare the dough in advance, letting it rise and develop its full flavor, then store it until you’re ready to cook. This means that when it’s time to serve, all you need to do is roll out the dough, add your desired toppings, and quickly grill it. It’s perfect for entertaining, weeknight dinners, or spontaneous gatherings, ensuring fresh, hot pita is just minutes away.
Crafting Your Delicious Honey and Feta Pita: A Step-by-Step Guide
Follow these detailed steps to create your own irresistible Grilled Honey and Feta Pita, from activating the yeast to the final, mouth-watering drizzle of honey.
Step 1: Activating the Yeast
Begin by combining the yeast, sugar, and warm water in a mixing bowl. Whisk these ingredients gently until they are well combined. Allow the mixture to rest for 5 to 10 minutes, giving the yeast time to activate and foam up. This crucial step ensures your dough will rise beautifully.
Step 2: Preparing the Dough
In a large bowl, or the bowl of a stand mixer (refer to the “Common Questions” section for stand mixer specific instructions), combine the all-purpose flour and salt, stirring them together thoroughly. Once mixed, pour the activated yeast mixture into the flour and salt blend. Use a sturdy spatula or a wooden spoon to stir until a shaggy dough forms.
Step 3: Kneading the Dough
Transfer the dough onto a clean, lightly floured counter surface. Knead the dough vigorously for 8 to 10 minutes. If the dough feels too sticky during this process, gradually add one tablespoon of flour at a time until it becomes smooth, elastic, and no longer adheres to your hands or the counter. A good test for readiness is to gently press a finger into the dough; the indent should slowly spring back.
Step 4: First Rise (Proofing)
Form the kneaded dough into a neat ball. Lightly coat the dough ball with olive oil to prevent it from drying out. Place the oiled dough into a large bowl, cover it tightly with plastic wrap, and allow it to rest in a warm, draft-free environment. This could be a turned-off oven, a microwave, or a warm cupboard. Let it proof for approximately 2 hours, or until the dough has impressively tripled in size.
Step 5: Shaping the Pitas
Once the dough has risen, gently remove the plastic wrap and punch down the center of the dough to release the air, causing it to deflate. Transfer the dough to your counter and divide it into four equal portions. Roll each portion into a smooth ball. Next, take each ball and either roll it out with a rolling pin or stretch it with your hands until it is as thin as possible, forming a classic pita shape. Place each stretched pita onto a piece of parchment paper, which will assist in transferring it to the grill.
Step 6: Preparing Toppings and Grill
Before you start grilling, ensure all your chosen toppings—cheese, honey, and any other additions—are prepped and conveniently within reach. This allows for quick assembly once the pita is on the grill. Brush one side of each pita with approximately 1 tablespoon of olive oil. Preheat your barbecue grill to a temperature of 450°F (230°C). If a BBQ is unavailable, a hot pan on your stovetop can also be used effectively (preferably cast iron for best results).
Step 7: Grilling the Pitas
Carefully place the olive oil-brushed side of the pita onto the hot grill. Gently peel off the parchment paper from the top. Close the BBQ lid and cook for 2 to 3 minutes, or until the pita visibly puffs up and begins to show light charring on the underside. Keep a close watch, as this stage cooks very quickly!
Step 8: Adding Cheese and Final Grilling
Using tongs, carefully flip the puffed pita over. Immediately arrange four slices of provolone cheese (or your preferred cheese) and one tablespoon of crumbled feta over the grilled surface. Close the grill lid once more and continue to cook for an additional 1 to 2 minutes. This brief cooking time allows the cheese to melt into a gooey, savory layer while the other side of the pita achieves a perfect golden char.
Step 9: Serve and Enjoy!
Promptly remove the hot, cheesy pita from the grill. Lavishly drizzle each one with a tablespoon of sweet honey or, for a delightful kick, hot honey. Serve your Grilled Honey and Feta Pitas warm, inviting everyone to savor the delicious blend of sweet, salty, and smoky flavors!
Essential Tips for Perfect Honey and Feta Pita
Achieving the perfect Honey and Feta Pita relies on a few key details. Pay close attention to these expert tips for a consistently delicious result:
The Golden Rule of Yeast Activation
The most critical step in preparing your pita dough is ensuring the yeast is properly activated. If your yeast mixture does not foam up or show signs of activity within the specified time, it is imperative to restart this step. Inactive yeast typically indicates one of three common issues: the water used was either too hot (killing the yeast), too cold (preventing activation), or the yeast itself was expired. The ideal temperature range for warm water to awaken the yeast is between 100°F and 110°F (37°C to 43°C). Using a food thermometer can help ensure accuracy.
Kneading for Texture and Elasticity
Proper kneading is fundamental for developing the gluten in the dough, which in turn gives your pita its characteristic chewy yet tender texture and allows it to puff up beautifully on the grill. Don’t rush this process; ensure the dough is smooth and elastic before proofing. If kneading by hand, a sticky dough can be remedied by adding small amounts of flour, one tablespoon at a time, until it reaches the desired consistency. For stand mixer users, aim for a dough that pulls cleanly away from the sides of the bowl.
Optimizing Dough Rising Conditions
To achieve maximum rise and a light, airy pita, place your dough in a warm, draft-free spot for its first proofing. Cold temperatures will significantly slow down or halt the yeast’s activity. Covering the bowl tightly with plastic wrap or a damp cloth creates a humid environment that prevents the dough from drying out and forming a crust, which could hinder its rise. A successful rise is key to the pita’s signature fluffy texture.
Grill Temperature and Char Marks
Preheating your grill to the specified temperature (450°F / 230°C) is essential for achieving those appealing char marks and ensuring the pita cooks quickly without becoming tough. The high heat creates an immediate crisp exterior while allowing the inside to cook through and puff up. Avoid overcrowding the grill, which can lower the temperature and lead to uneven cooking. If you don’t have a grill, a well-seasoned cast iron pan on the stovetop can mimic the intense heat needed for great results.
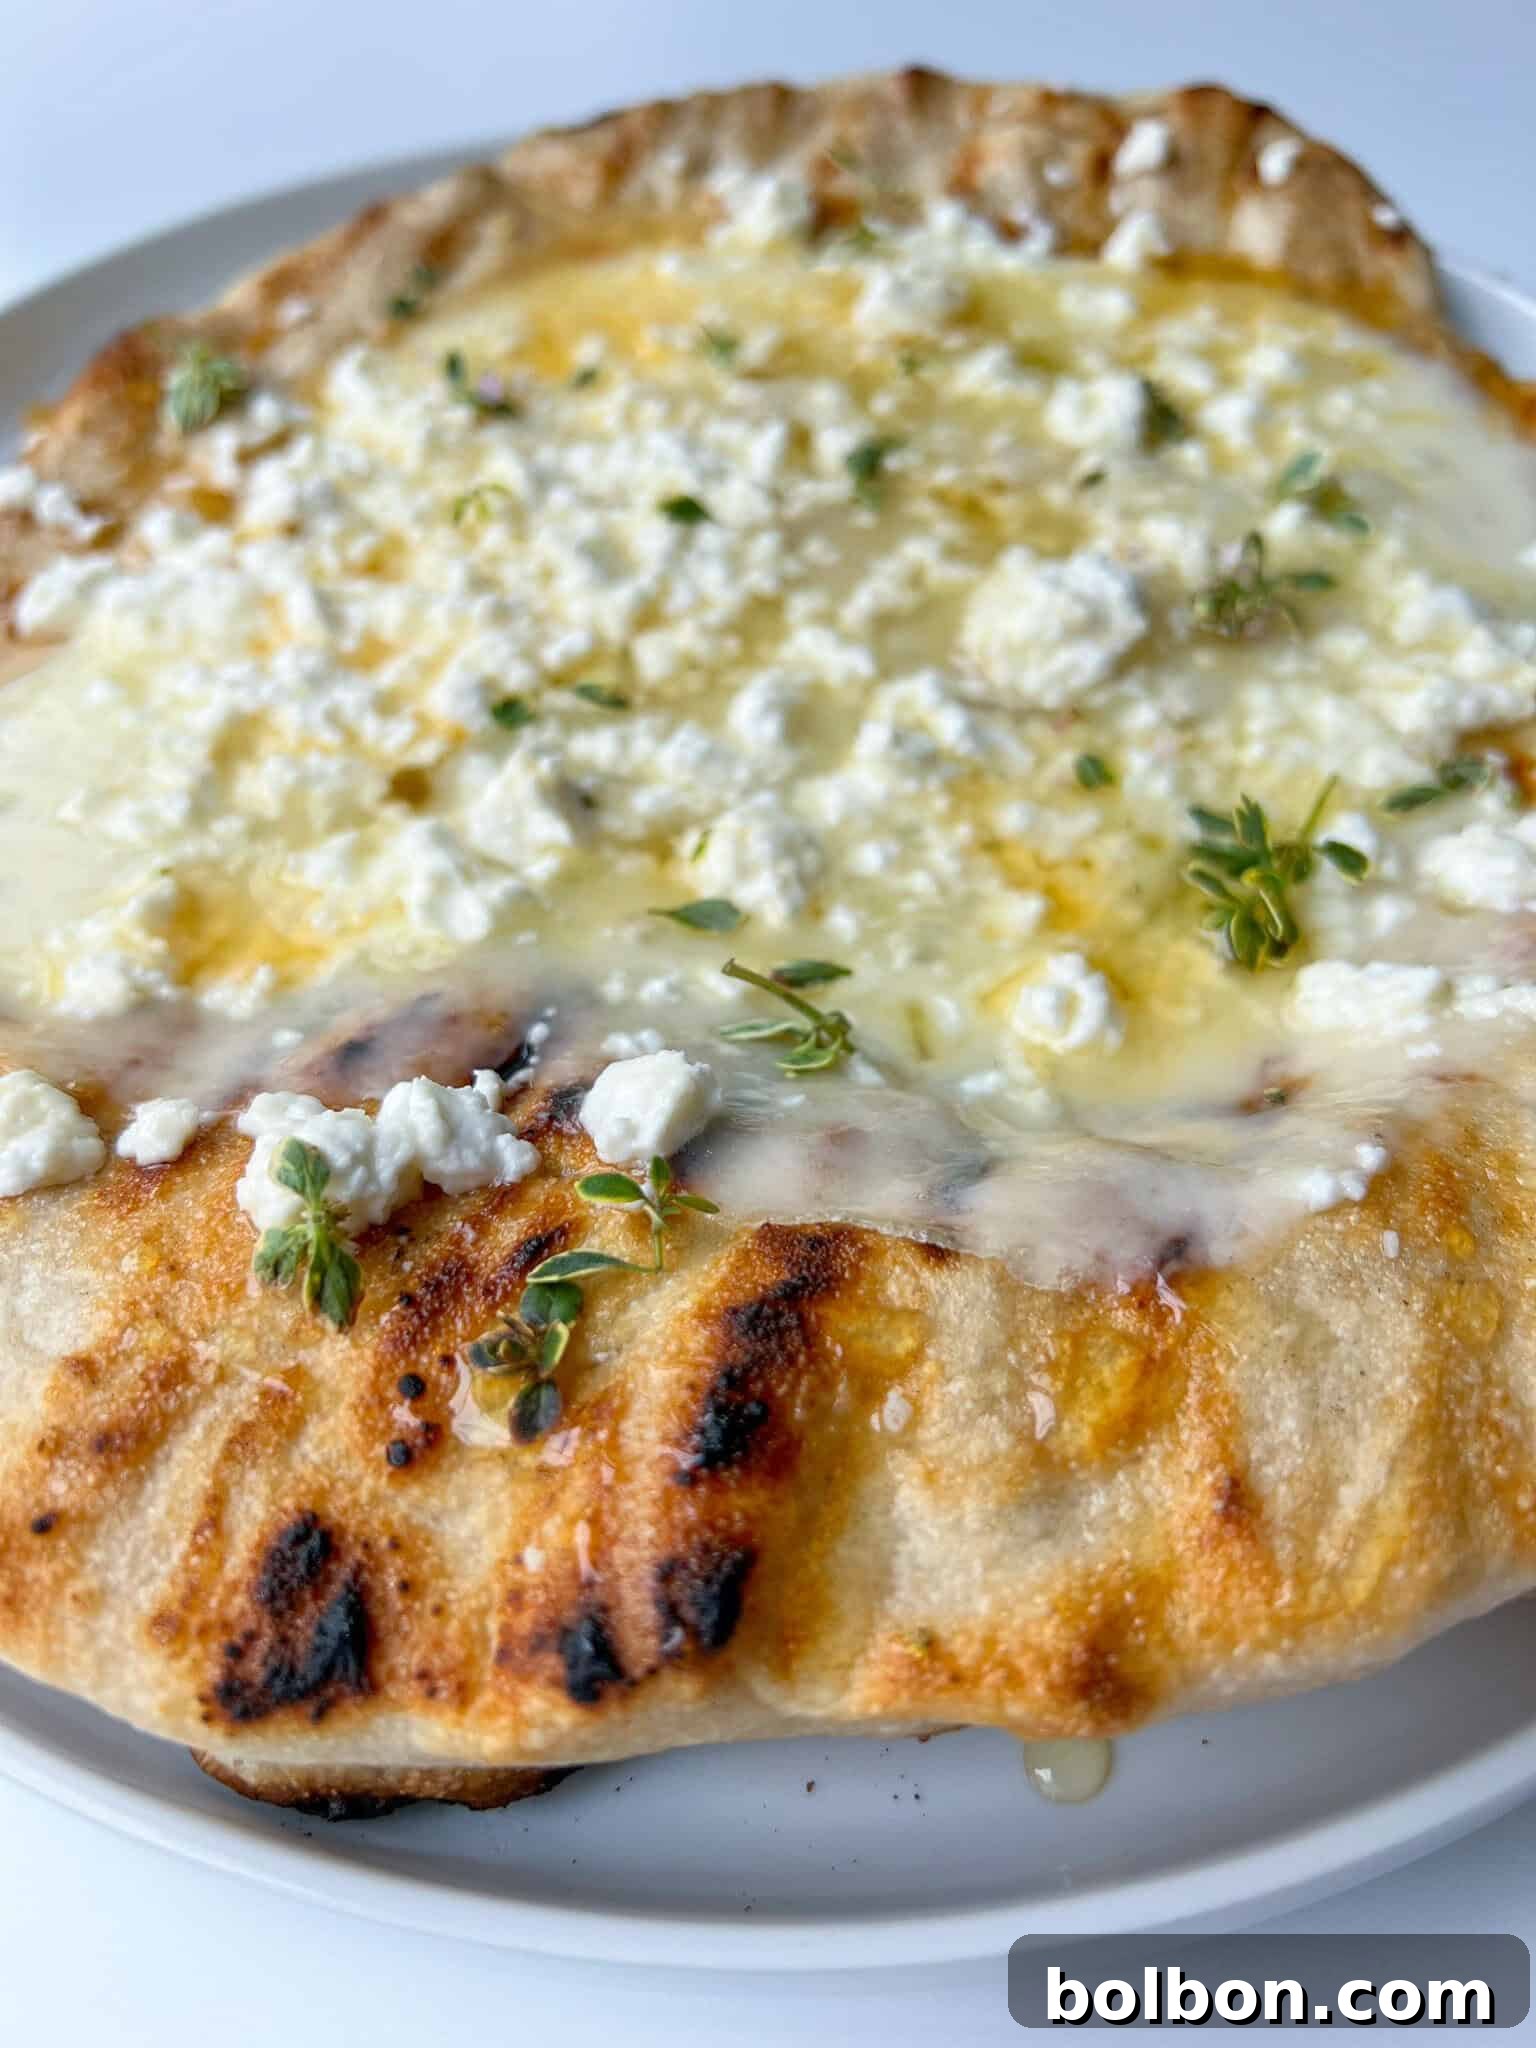
Creative Variations and Smart Substitutions for Your Honey and Feta Pita
One of the true joys of this Honey and Feta Pita recipe is its incredible flexibility. Whether you’re adapting to dietary needs, exploring new flavors, or simply seeking convenience, these variations and substitutions ensure a perfect pita every time.
- Embrace Convenience with Pre-Made Dough: For those days when time is of the essence, or if you’re new to making dough from scratch, effortlessly simplify your preparation. You can absolutely use high-quality store-bought pizza dough, readily available naan bread, or even pre-made pita bread. This shortcut doesn’t diminish the flavor or enjoyment; it simply streamlines the process, allowing you to enjoy this delightful treat with minimal effort. Look for fresh pizza dough in the refrigerated section of your grocery store for the best texture.
- Gluten-Free Adaptations: This recipe is wonderfully accommodating for those with gluten sensitivities or preferences. Easily prepare a delicious gluten-free version by utilizing your favorite prepared gluten-free pizza dough. Many excellent brands offer gluten-free dough that performs beautifully on the grill, ensuring everyone can savor the sweet and savory goodness of this pita. Remember to handle gluten-free dough with care, as it can be a bit more delicate than traditional dough.
- Dairy-Free Delights: To cater to dairy-free diets, simply substitute the traditional feta and provolone with your preferred non-dairy cheese alternatives. The market now offers a wide array of plant-based cheeses that melt and taste remarkably similar to their dairy counterparts. Pair these with a plant-based butter or continue using olive oil, and you’ll achieve a delicious dairy-free Honey and Feta Pita that’s rich in flavor and texture.
- Stovetop Sensation (No BBQ? No Problem!): Don’t have access to a barbecue grill? No worries! This Honey and Feta Pita recipe can be equally delicious when prepared on a hot pan on your stovetop. I highly recommend using a well-seasoned cast iron skillet or a heavy-bottomed non-stick pan. The key is to achieve high heat to get that desirable puffed texture and slight char. Cook the pita until it bubbles, then flip, add toppings, and cover to melt the cheese.
- Unleash Your Inner Chef with Diverse Toppings: The salty-sweet foundation of feta and honey is merely a starting point. The world of toppings is vast and exciting! Consider adding sliced Kalamata olives for a briny kick, sautéed mushrooms for earthy notes, thinly sliced red onions for a sharp contrast, or even crumbled cooked sausage or pepperoni for a heartier option. Fresh herbs like oregano, basil, or a sprinkle of chili flakes for spicy honey pita can also transform the dish. Feel free to explore and personalize your pita to match any craving. Other ideas include sun-dried tomatoes, roasted garlic, or even a sprinkle of sesame seeds.
Perfect Pairings: What to Serve with Your Honey and Feta Pita
The versatile nature of Grilled Honey and Feta Pita makes it an excellent choice for various meals and occasions. Whether you’re looking for a light lunch, a satisfying appetizer, or a unique main course, finding the right accompaniments can elevate your dining experience. Here are some of my favorite ways to serve this delicious dish:
- Fresh and Vibrant Salads: The rich flavors of the pita are beautifully balanced by the crisp freshness of a substantial salad. A bright, tangy salad provides a refreshing counterpoint to the sweet and salty notes of the feta and honey. Consider serving it with a vibrant Green Goddess Salad for a creamy, herbaceous touch, a classic Greek Feta Salad with its cucumbers, tomatoes, and olives, or simply a Simple Green Salad tossed with a light vinaigrette. These salads add essential nutrients and a delightful crunch.
- Grilled or Roasted Vegetables: Complement the smoky flavors of your grilled pita with a colorful assortment of grilled or roasted vegetables. The natural sweetness and slight char of vegetables like zucchini, eggplant, and bell peppers make them ideal partners. Try serving your Honey and Feta Pitas alongside my Grilled Zucchini Recipe for tender, smoky strips, or my Roasted Eggplant Recipe, which offers a rich, melt-in-your-mouth texture. A medley of seasonal vegetables adds depth and creates a well-rounded meal.
- Flavorful Dips and Spreads: Enhance the pita experience by offering a selection of dips. Hummus, tzatziki, or a spicy whipped feta dip can add extra layers of flavor and moisture. The soft pita bread is perfect for scooping up these creamy concoctions.
- As a Hearty Breakfast or Brunch Item: Don’t limit this delicious pita to just lunch or dinner! Its combination of sweet and savory makes it an excellent addition to a weekend breakfast or brunch spread. Serve it alongside scrambled eggs, crispy bacon, or a fresh fruit platter for a unique morning treat.
- A Mediterranean Mezze Platter: For entertaining, integrate these pitas into a larger Mediterranean mezze platter. Surround them with marinated olives, sun-dried tomatoes, dolmades (stuffed grape leaves), cured meats, and various cheeses. This creates a visually stunning and incredibly delicious spread that encourages sharing and sampling.
Frequently Asked Questions About Honey and Feta Pita
Absolutely! Using a stand mixer can simplify the kneading process significantly. To do so, first activate the yeast, sugar, and warm water directly in the stand mixer’s bowl. Once foamy, add the flour and salt to the same bowl. Attach the dough hook and knead on a low speed until all ingredients are well combined and the dough becomes smooth and elastic. If the dough appears too sticky, gradually add flour, one tablespoon at a time, until it starts to pull away cleanly from the sides of the bowl. The entire kneading process with a stand mixer usually takes about 6 to 8 minutes on medium-low speed, saving you manual effort and ensuring a perfectly smooth dough.
Yes, absolutely! Utilizing store-bought dough is a fantastic time-saver without compromising on the delicious outcome. You can purchase fresh pizza dough from your local Italian bakery or the refrigerated section of most supermarkets. Naan bread or pre-made pita bread also work wonderfully. Prepare it following the grilling instructions provided in the recipe. This option makes the Honey and Feta Pita an incredibly quick and convenient meal or appetizer for any occasion.
While I haven’t personally developed a dedicated gluten-free version of this specific dough, this Honey and Feta Pita recipe should adapt well using a 1-to-1 all-purpose gluten-free flour blend. Many reputable brands offer excellent gluten-free flour mixes designed for baking. For pizza and flatbreads, specifically, some brands like Caputo offer Caputo Fioreglut (1kg) – Italian Gluten Free Flour, which often includes a reliable recipe for gluten-free dough on the packaging. Always follow the specific instructions on your chosen gluten-free flour for the best results, as handling and hydration may differ from traditional wheat flour.
Yes, you can certainly use different types of yeast, but there are slight adjustments required. If you opt for instant yeast, its finer granules mean that pre-activation is generally not necessary; you can simply add all the dough ingredients to the bowl simultaneously. For quick-rise yeast, be mindful that it will significantly reduce the rising time, so keep a closer eye on your dough to prevent over-proofing. Alternatively, if you prefer fresh yeast, approximately 21 grams (or 0.75 ounces) would be the equivalent amount for this recipe, and it should be dissolved in the warm water with sugar just like active dry yeast before adding to the flour.
Yeast activation is a cornerstone of successful bread-making. If your yeast isn’t foaming, the most common culprits are temperature or expiry. The water you use must be genuinely warm, neither too hot nor too cold. The ideal temperature range for activating yeast is precisely between 100°F and 110°F (37°C to 43°C). Water that’s too hot will kill the yeast, while water that’s too cold will inhibit its activity. Always use a kitchen thermometer to verify the water temperature. Additionally, ensure your yeast has not expired; old or inactive yeast will simply refuse to rise, regardless of water temperature. If your yeast shows no activity, it’s best to discard the mixture and start fresh with new yeast and correctly tempered water.
Fear not, a BBQ isn’t essential for enjoying delicious Honey and Feta Pita! My grandma often cooked hers on a traditional wood-burning stove, and you can achieve similar fantastic results using a hot pan on your stovetop. A heavy-bottomed pan, especially a cast iron skillet, works exceptionally well. Simply heat the pan to a high temperature, then cook the pita in the pan until it starts to bubble up. Flip it over, quickly add your cheese and toppings, and cover the pan with a lid. Allow it to cook for another 1-2 minutes until the cheese is beautifully melted and the pita is lightly charred. This stovetop method delivers a perfectly cooked, flavorful pita every time.
Yes, freezing the dough is an excellent way to prepare ahead and enjoy fresh pita whenever a craving strikes! After the dough has completed its initial rise and you’ve gently punched it down to deflate, divide it into your desired portion sizes. Wrap each portion loosely but securely in plastic cling film, then place each dough ball into a freezer-safe bag, expelling as much air as possible before sealing. When you’re ready to make a pita, simply thaw the frozen dough. You can do this by transferring it to the refrigerator overnight, or by letting it sit at room temperature for 2 to 3 hours. Once thawed, roll it out and proceed with the grilling instructions as outlined in the recipe above.
Accurate measurement of dry ingredients, particularly flour, is crucial for baking success in this Honey and Feta Pita recipe and any other. The most reliable method is the “spoon and level” technique. Instead of scooping your measuring cup directly into the flour bag (which can compact the flour and lead to using too much), first spoon the flour from its container into your measuring cup. Once the cup is overflowing, use the flat edge of a knife or a straight-edged utensil to level off the top, gently discarding any excess. This ensures you have the precise amount of flour needed, preventing a dense or dry pita.
Honey and Feta Pita Recipe
Facebook Share
Rate Recipe
Print Recipe
Appetizer, Main Course
Bulgarian
4 pitas
The Modern Nonna
15 minutes
4 minutes
2 hours
2 hours 19 minutes
Equipment
Ingredients
For the Yeast Mixture
- 1 packet (2 1/4 teaspoons) active dry yeast
- 1 ¼ cups warm water
- 1 teaspoon sugar
For the Dough
- 3 cups all-purpose flour, plus more for dusting
- ½ teaspoon salt
- 1 tablespoon olive oil
Additional Toppings
- 4 tablespoons olive oil (for brushing)
- 16 slices provolone cheese (or Kashkaval, mozzarella, etc., optional)
- 4 tablespoons crumbled feta (to taste)
- 4 tablespoons honey, or hot honey (for drizzling)
Measurements can be adjusted for US Customary or Metric systems.
Instructions
Activating the Yeast
-
Combine yeast, sugar, and warm water in a bowl. Whisk quickly and let activate for 5-10 minutes until foamy. (Ensure water is 100-110F / 37-43C; otherwise, yeast won’t activate.)
Preparing the Dough
-
Mix flour and salt in a large bowl. Pour in activated yeast mixture and stir until a shaggy dough forms.
-
Knead dough on a clean counter for 8-10 minutes until smooth and elastic (add flour if sticky). Dough is ready when an indent slowly springs back.
-
Shape dough into a ball, coat with olive oil, place in a large bowl, and cover with plastic wrap. Let rise in a warm, draft-free place for about 2 hours, until tripled in size.
-
Punch down risen dough to deflate. Divide into four equal pieces.
-
Roll each piece into a ball, then roll or stretch each pita as thin as possible. Place each on parchment paper.
Grilling and Finishing
-
Prepare all toppings. Brush one side of pitas with olive oil. Preheat BBQ to 450°F (230°C). (Alternatively, use a hot pan on the stove.)
-
Place pita oil-side down on hot grill, peel off parchment. Close lid and cook 2-3 minutes until puffed.
-
Flip pita. Immediately add provolone slices and crumbled feta. Close lid and cook 1-2 minutes until charred and cheese melts.
-
Remove from heat. Generously drizzle with honey or hot honey. Serve warm.
Nutrition Information
Calories: 881 kcal,
Carbohydrates: 93g,
Protein: 32g,
Fat: 42g,
Saturated Fat: 18g,
Polyunsaturated Fat: 3g,
Monounsaturated Fat: 19g,
Cholesterol: 68mg,
Sodium: 1045mg,
Potassium: 244mg,
Fiber: 3g,
Sugar: 19g,
Vitamin A: 742IU,
Vitamin C: 0.1mg,
Calcium: 677mg,
Iron: 5mg
Nutrition information is automatically calculated, so should only be used as an approximation.