
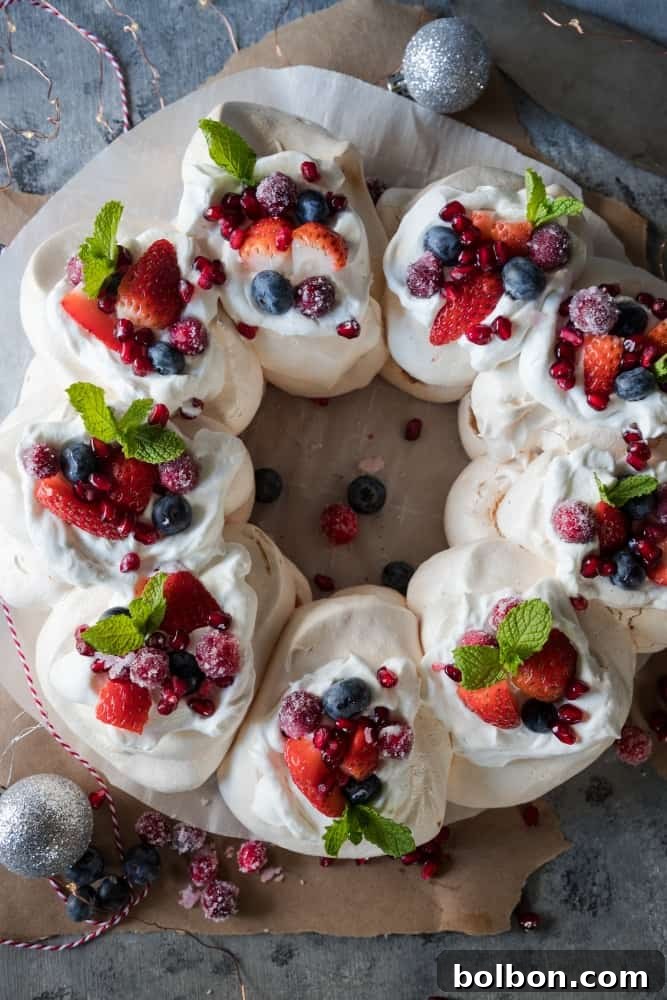
Elevate your holiday table this year with a show-stopping dessert that’s as beautiful as it is delicious: the **Christmas Pavlova Wreath**. This exquisite creation is the ultimate festive treat, guaranteed to impress your guests and become the centerpiece of your holiday spread. With a few simple tips and tricks, you’ll discover how surprisingly achievable it is to master this gorgeous, cloud-like confection.
Welcome to the World of Pavlova!
Hey there, fellow foodies! Georgie here again, from The Home Cook’s Kitchen. I’m absolutely thrilled to share with you one of my all-time favorite holiday recipes: my stunning Christmas Pavlova Wreath. As an Aussie living in the US, I couldn’t let the holiday season pass without celebrating with a classic Australian dessert – the magnificent pavlova!
If you’re new to the magic of pavlova, prepare for an unforgettable culinary experience. Every time I introduce this dessert to my American friends, they are utterly captivated by its unique texture and incredible taste, always asking for my go-to best pavlova recipe. This year, I wanted to create something truly special, a festive pavlova wreath that beautifully merges a touch of Australian charm with American holiday traditions. It’s a delightful way to bring people together around a truly spectacular dessert.
Understanding Pavlova: A Cloud-Like Delight
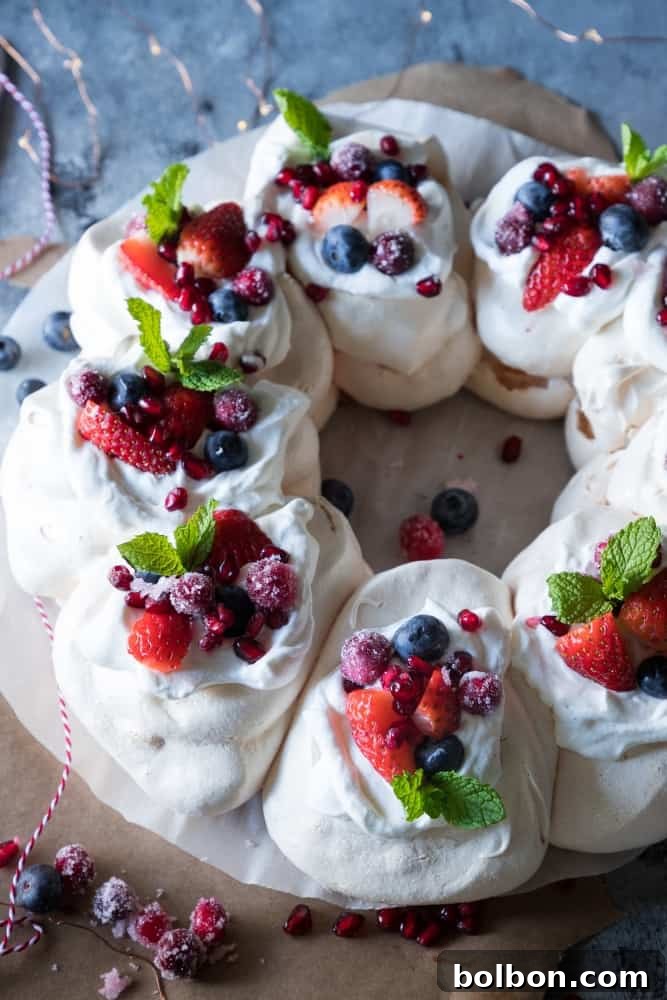
Describing the taste and texture of a perfect pavlova is a joy, but truly, the proof is in the tasting! Picture this: a delicate, incredibly crispy outer shell that yields with the slightest touch, revealing a center that is pure, soft marshmallow. It’s so light and fluffy, you’ll feel like you’re eating sweet clouds. Unlike many desserts, pavlova isn’t excessively sweet on its own, making it the perfect canvas for rich fresh cream and your choice of vibrant fruits.
While the technique for making pavlova might seem a little daunting at first, this dreamy dessert is composed of just a few simple ingredients: egg whites, sugar, vinegar, cornstarch, and vanilla. The good news is, I’ve been making pavlova for years – I’m affectionately known as the ‘pav master’ in my family! I’m here to guide you step-by-step through the entire process, ensuring you can confidently create this gorgeous pavlova wreath in your own kitchen.
How To Make a Festive Pavlova Wreath
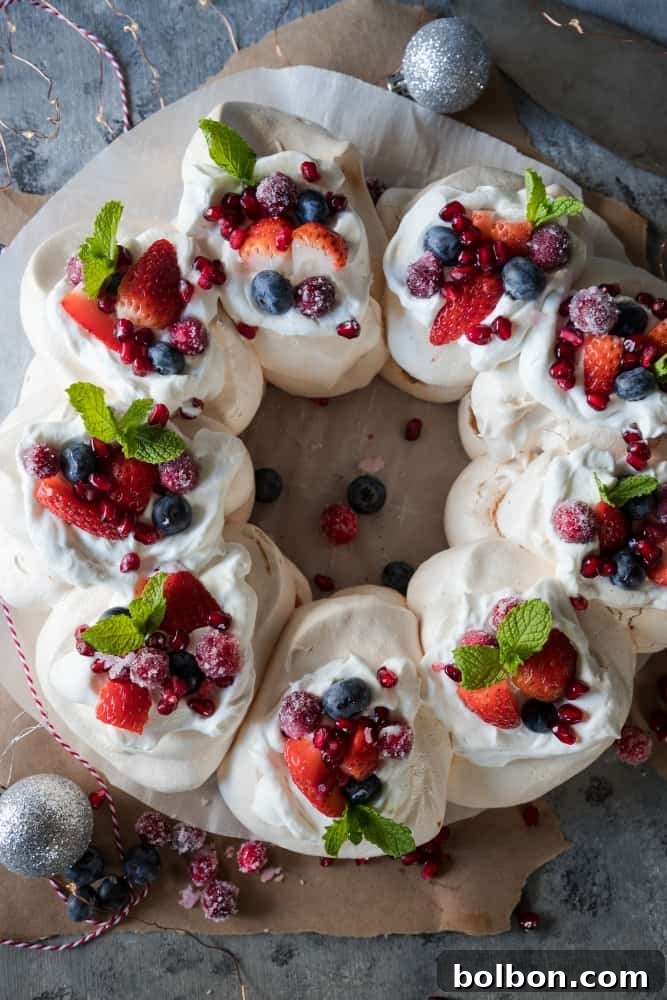
As its name implies, a pavlova wreath is a pavlova meticulously shaped into a festive Christmas wreath. The genius of this design is that you end up with individual mini pavlovas, making slicing and serving an absolute breeze. Beyond its practicality, it’s undeniably festive and will make the most beautiful, edible showstopper for your Christmas Day celebration or any special occasion.
Mastering the Meringue: Your Pavlova Base Guide
The foundation of any great pavlova is its meringue base. Here’s how to create that perfect, ethereal texture:
- Room Temperature Egg Whites: Begin with 6 egg whites brought to room temperature. It’s crucial for achieving maximum volume. I find it quicker to separate the eggs first, then let the whites sit out until they reach room temperature rather than waiting for them in their shells.
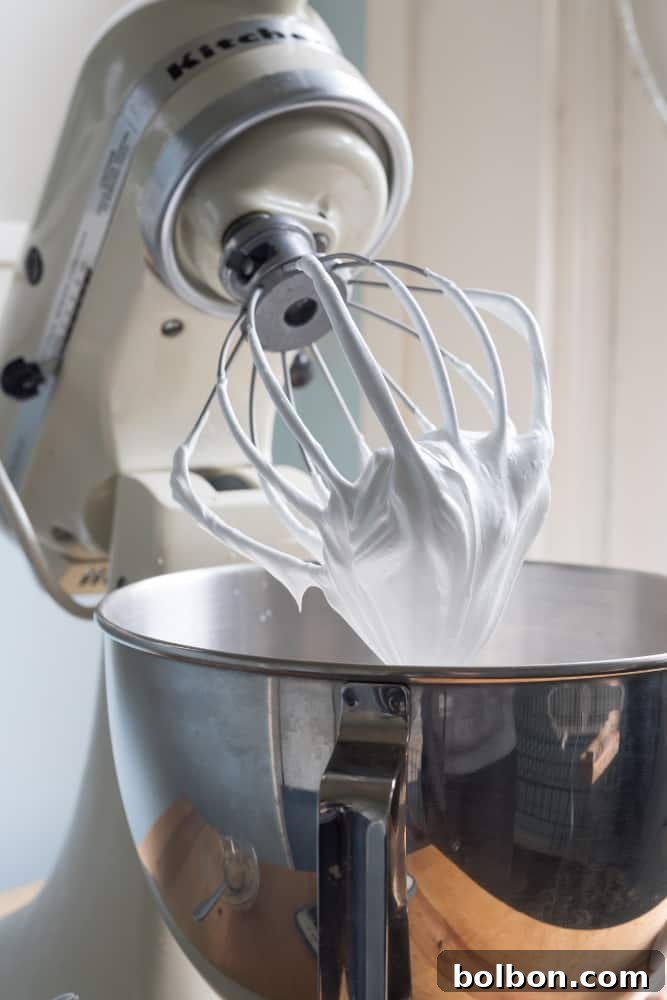
- Whip to Stiff Peaks: Using a stand mixer or a hand mixer, beat the egg whites until they form firm, glossy stiff peaks. This step is critical. Ensure your bowl and mixer attachments are immaculately clean and dry, with absolutely no trace of egg yolk. Even a tiny speck of fat can prevent the whites from stiffening. You can test firmness by carefully tipping the bowl upside down – if the whites don’t budge, you’re good to go!
- Gradual Sugar Addition: Once stiff peaks are achieved, gradually add the sugar, about ¼ cup at a time, beating well after each addition. This ensures the sugar dissolves completely and is evenly incorporated, creating a stable meringue. Continue beating on high for at least 3 minutes after all the sugar is added. To check if the sugar has dissolved, rub a tiny bit of meringue between your thumb and index finger; it should feel perfectly smooth, with no gritty sugar grains.
- The Secret Ingredients: After whisking the egg whites and sugar, gently fold in the cornstarch, white vinegar, and vanilla extract. The cornstarch helps stabilize the meringue and gives it that signature marshmallowy interior, while the vinegar contributes to the crispy crust. Vanilla adds a lovely depth of flavor. Whisk just until combined – overmixing here can deflate your meringue.
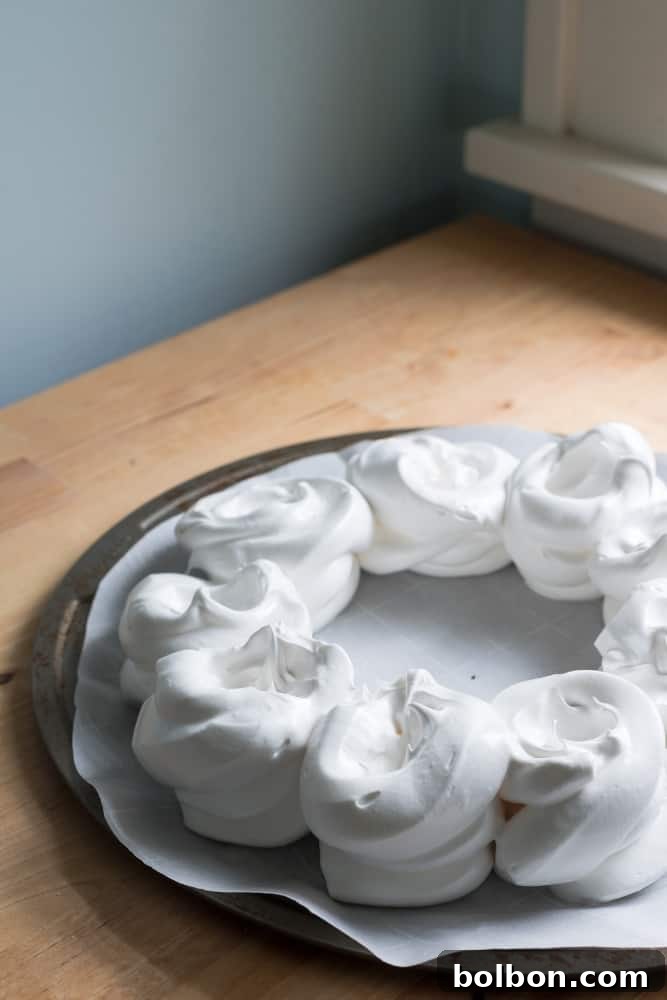
Crafting the Wreath Shape: Preparing Your Baking Tray and Piping
Creating the beautiful wreath shape is simpler than you might think:
- Tray Preparation: The easiest way to form a perfect wreath is by using a round pizza tray or baking sheet larger than 10 inches. On a piece of parchment paper, draw a 10-inch diameter circle. Inside that, draw a smaller 5.5-inch circle. These lines will be your guide. Place the parchment paper (drawn side down to avoid ink transfer) on your baking tray. If the parchment paper tends to slip, dab a tiny bit of meringue on the underside of each corner of the paper before pressing it onto the tray – this acts as a natural “glue.”
- Piping Your Meringue: For piping, a large round tip with a piping bag works wonderfully. However, here’s a fantastic hack if you don’t have one: simply transfer all your meringue mixture into a gallon-sized zip-top bag. Squeeze out the air, gather the mixture into one corner, and snip a large hole in that corner. It provides excellent control, just like a professional piping bag!
- Forming the Wreath: Pipe at least 10 evenly sized mounds of meringue onto the parchment paper, using the traced ring as your guide. Aim to create a continuous ring of individual pavlovas. If you make them slightly larger, you might get 9, but 9-10 is the ideal number for a beautiful wreath. Once your mounds are piped, use the back of a small spoon to gently create a shallow hollow in the center of each pavlova. These indentations will be perfect for holding your whipped cream and fresh fruit later.
Baking Your Perfect Pavlova Wreath
Baking pavlova requires patience and a gentle, slow heat. Here are some critical points to remember for a flawless result:
- Preheat and Adjust: Preheat your oven to 300°F (150°C). Just before placing your pavlova in, reduce the oven temperature to 250°F (120°C). This initial higher heat helps to set the crust, while the lower temperature ensures a slow, even bake without over-browning.
- Centrally Placed: Place your pavlova wreath on the middle rack of your oven. This ensures even heat distribution and prevents one side from cooking faster than the other.
- The Golden Rule: Do NOT Open the Oven Door! This is perhaps the most crucial rule for baking pavlova. Opening the oven door, especially in the first hour, can cause a sudden temperature drop, leading your delicate meringue to collapse or “flop.” Resist the urge to peek!
- Baking Time & Doneness: The pavlova will bake for approximately 1 hour and 10 to 15 minutes. Around the 1-hour mark, you can carefully open the oven for a quick check. Look for two signs: the pavlova should be dry to the touch on the outside, and it should just be starting to acquire a very light, subtle golden brown hue.
- Cooling is Key: Once the baking time is complete, turn off the oven completely. Leave the pavlova inside the closed oven for 1 to 2 hours to cool down gradually. This slow cooling process prevents cracking and helps maintain its structure. After this, remove it from the oven and let it cool completely to room temperature before you even think about decorating. Patience here will be rewarded with a perfect pavlova.
Decorating for Festive Flair
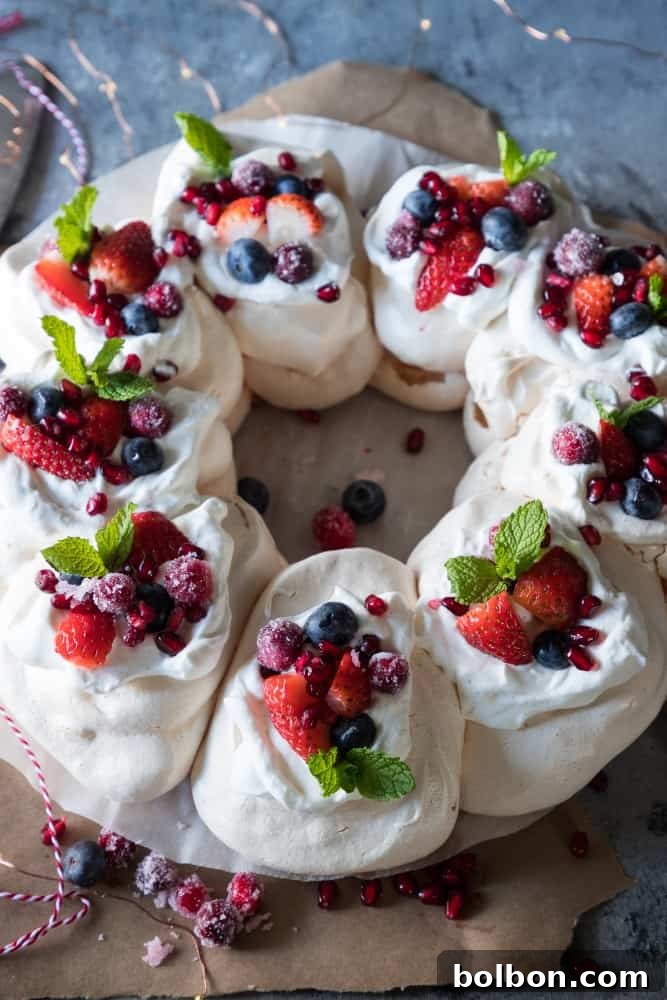
Once your pavlova has cooled completely – and I mean 100% cooled – it’s time for the fun part: decorating! This is where you can truly let your creativity shine and make your pavlova wreath a vibrant Christmas masterpiece. I start by whipping together some heavy cream with a touch of vanilla bean paste, which adds a beautiful depth of flavor. Then, I generously spoon this luscious cream into the hollows of each individual pavlova mound.
To keep the pavlova wreath wonderfully festive and capture the spirit of Christmas, I love to use a mix of red, green, and a touch of blue for contrast:
- Fresh pomegranate arils, sparkling like jewels.
- Sugared cranberries, for a frosty, sweet-tart bite.
- Juicy blueberries, adding a beautiful pop of deep color.
- Sweet quartered strawberries.
- Fresh mint leaves, for a vibrant splash of green and refreshing aroma.
While I adore these festive colors, the type of fruit you choose is entirely up to your preference. Raspberries would also be absolutely stunning, as would tart red currants or even thinly sliced kiwis for another touch of green. Don’t be afraid to experiment with your favorite seasonal fruits to make this pavlova truly yours!
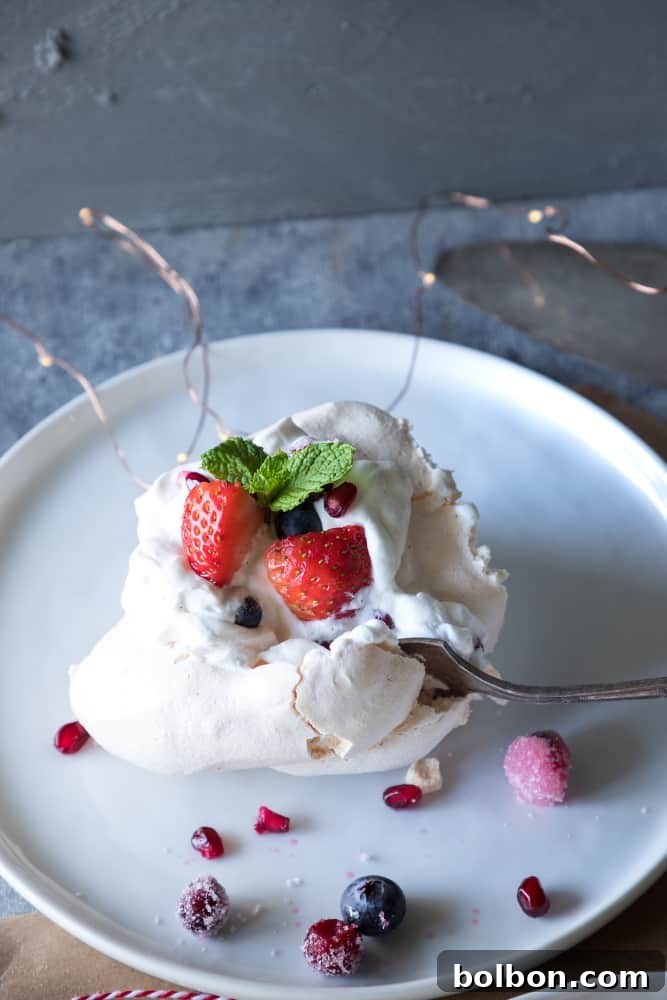
How to Serve Your Showstopper Pavlova Wreath
Serving this beautiful dessert is wonderfully straightforward. Gently slice between each individual pavlova mound, allowing your guests to easily pick up their own perfect portion. If you wish, a light dusting of icing sugar adds a final touch of elegance. Depending on how many pavlovas you were able to pipe onto your wreath, this recipe should generously serve 9-10 people.
This Christmas Pavlova Wreath is more than just a dessert; it’s a truly beautiful experience to share during the holiday season or any gathering where you need a dessert that feeds a crowd. Its elegant presentation and delicate flavors are sure to ‘wow’ your friends, family, and loved ones. Feel free to reach out with any questions about this recipe – I’ll be happy to answer them!
Pavlova Wreath
By Meghan McMorrow | Fox and Briar
Cook 1 hr
Cooling time 4 hrs
Total 1 hr 30 mins
The Christmas desserts of all Christmas desserts! This pavlova wreath is an absolutely gorgeous dessert recipe that will wow your Christmas guests! A beautiful showstopper for the table and with some easy tips and tricks, you’ll be nailing this in no time!
Ingredients
- 6 egg whites at room temperature
- 1 ½ cups sugar
- 3 teaspoons cornstarch/cornflour
- 1 teaspoon white vinegar
- 1 teaspoon vanilla extract
- 1 cup heavy whipping cream
- 1 teaspoon vanilla bean paste
- fresh fruits for decorating – pomegranate aril (sugared cranberries, raspberries, strawberries, blueberries, red currants, or other fresh fruit that you like)
- fresh mint leaves
Instructions
- Preheat oven to 300°F (150°C).
- Trace a 10” diameter circle on a piece of parchment paper with a pen. Trace a 5.5” circle in the centre of the large circle. Place the parchment paper upside down on a pizza tray. Trim the edges of the paper if necessary.
- In a large clean bowl, whisk egg whites until stiff peaks appear.
- Gradually add sugar ¼ of a cup at a time, beating after each addition. Once the sugar has dissolved, beat on high for three minutes.
- Combine the cornstarch, white vinegar and vanilla in a small bowl and stir.
- Add to the egg whites and sugar and whisk until just combined.
- Transfer mixture to a large piping bag or gallon ziplock bag with a hole cut into the corner.
- Pipe 10 evenly spaced mounds onto the parchment paper in the circle, using the traced ring as a guide.
- Once you’ve piped your mounds, use the back of a spoon to create a small hollow in each mound.
- Reduce oven temperature to 250°F (120°C).
- Place the pavlova wreath in the oven, on a centre rack.
- Bake for 1 hour to 1 hour and 10 minutes. The pavlova should be dry to the touch and just starting to brown lightly.
- Turn off the oven and leave the pavlova to cool for one to two hours with the oven door closed.
- Meanwhile, whisk the heavy cream and vanilla until it’s smooth.
- Take pavlova out of the oven and cool for a further hour or until it’s ready to be served.
- To serve, spoon the cream into the hollow of the pavlovas and top with your fresh fruit and mint leaves.
- This pavlova wreath is best eaten on the day, however will keep for one day covered in an airtight container in the fridge. It is best to serve it the day you make it however. Fresh is best!
Notes
This pavlova wreath is best eaten on the day it’s made for optimal freshness and texture. It can be stored covered in an airtight container in the fridge for up to one day, but for the best experience, serve it freshly prepared.
Nutrition facts does not include fruit.
Nutrition information is automatically calculated, so should only be used as an approximation.
Additional Info
Please comment, rate and share! And don’t forget to tag me on Instagram @foxandbriar AND #foxandbriar so I can see what you made!