
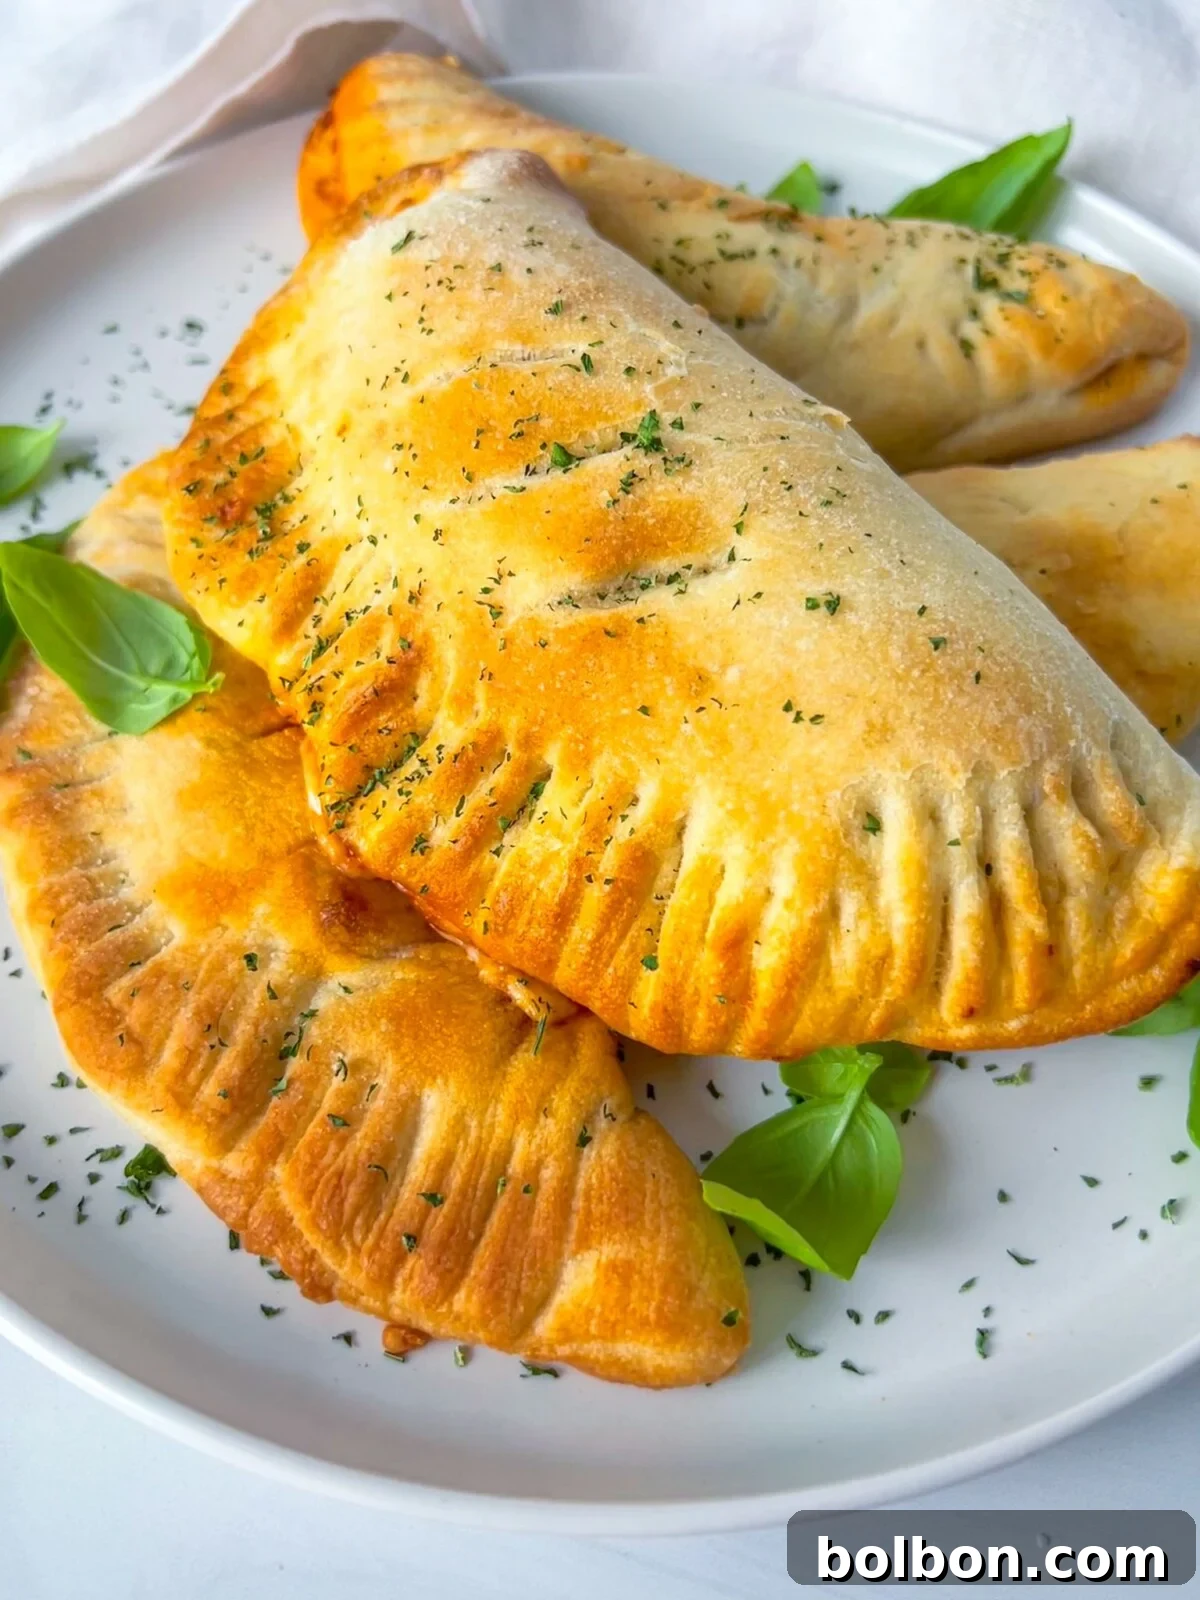
Tired of bland, store-bought frozen pizza pockets that offer little flavor and questionable ingredients? This incredible homemade pizza pockets recipe is here to revolutionize your snack and meal times, promising a delectable upgrade you won’t regret. In just 30 minutes, from start to finish, you can create a batch of warm, gooey, and utterly delicious pizza pockets using only a few simple ingredients found in most kitchens. Say goodbye to preservatives and artificial flavors, and embrace the superior taste and texture of a freshly made pizza pocket. The dough itself is a revelation – perfectly soft and pillowy, encapsulating a burst of rich, savory fillings.
This recipe yields a generous 11 to 12 pizza pockets, or delightful mini pizzas, depending on how thinly or thickly you roll the dough. Think of them as individual, hand-held calzones, making them an ideal choice for a quick yet satisfying lunch, a fun family dinner, or the ultimate after-school snack that kids and adults alike will adore. Their versatility makes them a fantastic addition to any busy household, providing a convenient and delicious option for any occasion.
Why You’ll Fall in Love with This Pizza Pockets Recipe
Our homemade pizza pockets are not just a meal; they’re a make-ahead marvel designed to simplify your life and delight your taste buds. This recipe is a dream come true for busy parents and anyone looking for convenient, delicious food options, especially since the kids will absolutely go nuts for them. Preparing up to 12 pockets at once means you can easily wrap them individually and freeze them, pulling out exactly what you need for school lunch boxes, a quick office meal, or an impromptu after-school treat. This saves precious time during hectic weekdays, ensuring a wholesome and appetizing option is always within reach.
Beyond their convenience, these pizza pockets are incredibly customizable. This flexibility ensures that every family member can enjoy a pocket tailored precisely to their preferences. Whether you’re a fan of classic pepperoni, a veggie enthusiast, or a cheese connoisseur, the options for fillings are virtually endless. It’s also a fantastic way to utilize any leftover vegetables or cheese combinations you have lingering in the fridge, minimizing food waste and maximizing creativity. Each bite promises a pillowy soft pizza crust, giving way to a wonderfully cheesy, gooey interior bursting with flavorful ingredients. The fresh, high-quality components and the joy of homemade goodness truly set these pizza pockets apart from any store-bought alternative, guaranteeing a satisfying culinary experience every time.
Essential Ingredients for Perfect Pizza Pockets
Crafting these homemade pizza pockets requires only a handful of readily available ingredients, proving that delicious doesn’t have to mean complicated. The foundation of our pizza pockets is good quality dough. While you can certainly make your own pizza dough from scratch if you have the time and inclination, a store-bought pizza dough is a fantastic shortcut that keeps this recipe firmly in the 30-minute category without sacrificing flavor or texture. Look for fresh pizza dough in the refrigerated section of your local grocery store.
Next up is the sauce. A classic pizza sauce provides the quintessential flavor, but don’t be afraid to experiment with other options like a rich marinara, creamy Alfredo, or a vibrant pesto for a different twist. For the cheese, freshly shredded mozzarella is highly recommended for its superb melting properties, creating that irresistible gooey stretch we all love. However, any cheese you enjoy that melts well, such as provolone, a blend of Italian cheeses, or even feta or goat cheese for a sharper flavor, can be used. Finally, a touch of avocado oil or olive oil, along with some flour, will be essential to prevent sticking during the preparation process. The beauty of this recipe lies in its simplicity and the ability to adapt it to your pantry and palate.
Step-by-Step Guide: How to Prepare Pizza Pockets
Creating these delightful pizza pockets is a straightforward process, designed for efficiency and enjoyment. Follow these simple steps to bring your homemade pizza pocket dreams to life:
- **Prepare Your Workspace:** Begin by lightly coating your clean counter or a large cutting board with a touch of olive or avocado oil. Alternatively, a generous dusting of flour works just as well. This crucial step prevents your pizza dough from sticking, ensuring a smooth rolling process.
- **Roll the Dough:** Take your store-bought pizza dough and roll it out into a rectangular shape, aiming for a thickness of about 1/8 inch. For consistent pocket sizes, use a large cookie cutter to cut out 12 equal circles from the rolled dough. If you prefer, you can divide the dough into 12 equal balls and roll out each one individually; this method also works perfectly. Gather any dough scraps, gently knead them together, and roll them out again to create additional circles until all the dough is used.
- **Pre-shape the Dough Circles:** Lightly flour each pizza circle. Gently stretch each piece of dough a bit by hand or give it another quick roll with a rolling pin. This ensures they are perfectly sized and ready for filling.
- **Shred the Cheese:** Using a box grater, shred your mozzarella cheese onto a dish. While pre-shredded cheese is convenient, freshly shredded cheese melts more smoothly and offers a superior taste and texture.
- **Fill the Pockets:** Place approximately one tablespoon of pizza sauce directly in the middle of each dough circle. Be mindful not to overfill, as this can make sealing difficult and lead to leaks during baking. Sprinkle about one tablespoon of shredded mozzarella cheese on top of the sauce.
- **Seal the Pockets:** Lightly brush the edges of one half of the dough circle with a tiny bit of water. This acts as an adhesive, helping the dough stick together. Carefully fold the unbrushed half of the dough over the filling to meet the brushed edge, forming a semi-circle. Pinch the edges together firmly with your fingers, then use the tines of a fork to crimp all around the sealed edge. This not only creates a decorative pattern but, more importantly, ensures a secure seal, preventing any delicious filling from escaping. Repeat this step for all your pizza pockets.
- **Create Steam Vents:** To allow steam to escape during cooking and prevent the pockets from puffing up excessively or bursting, use a sharp knife to cut 2-3 small slits on the top of each sealed pocket.
- **Prepare for Air Frying:** Lightly spray the inside of your air fryer basket with avocado oil spray. Carefully arrange the prepared pizza pockets in a single layer within the basket, ensuring they are not overcrowded. If necessary, cook in batches. Lightly spray the tops of the pizza pockets with avocado oil as well, which helps achieve a golden, crispy crust.
- **Air Fry to Golden Perfection:** Air fry the pizza pockets at 360°F (182°C) for approximately 10 minutes. Cooking times may vary slightly depending on your specific air fryer model and the size of your pockets. Some air fryers require preheating; if yours does, preheat it according to the manufacturer’s instructions (typically for 5 minutes). Keep an eye on them towards the end of the cooking time. Once they are beautifully golden brown and the cheese is bubbling, they are ready.
- **Cool and Enjoy:** Remove the hot pizza pockets from the air fryer and let them cool on a wire rack for a few minutes. This brief cooling period allows the filling to set and prevents you from burning your mouth. Then, dig in and savor your homemade creation!
Nonna’s Baking Tip
No air fryer? No problem at all! You can easily **bake** these delightful Pizza Pockets in a conventional oven. Simply preheat your oven to a hot 450°F (230°C). Arrange the prepared pizza pockets on a baking sheet lined with parchment paper. Bake for 12-16 minutes, or until the crust is golden brown and the filling is hot and bubbly. The exact baking time may vary based on their size and your oven’s calibration.
Creative Variations and Delicious Substitutions for Your Pizza Pockets
The beauty of this pizza pockets recipe lies in its incredible adaptability. Once you master the basic technique, you can unleash your creativity and tailor them to any craving or dietary preference. Here are some fantastic ideas to inspire your next batch:
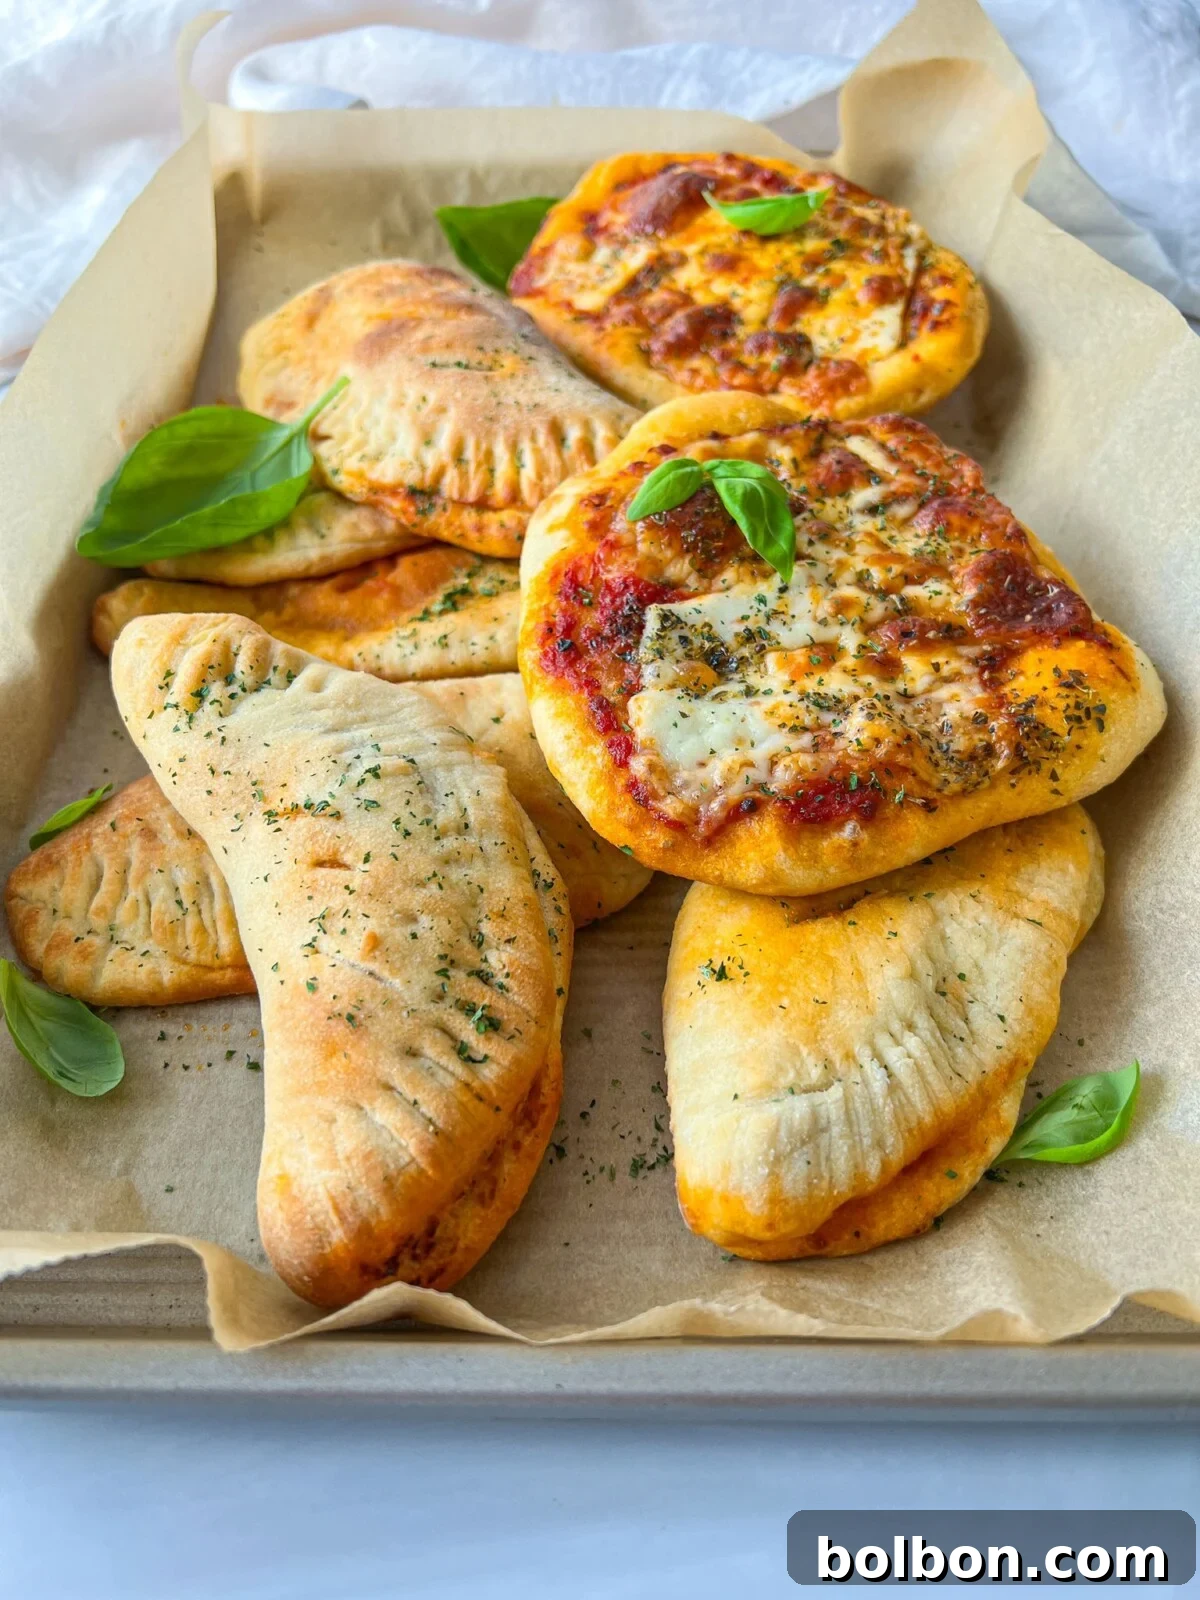
- **Transform into Mini Pizzas:** Instead of folding the dough into pockets, you can leave them as open-faced **round** mini pizzas. Simply roll out the dough, cut into circles, add sauce and toppings, and bake or air fry until golden and bubbly. These are perfect for parties or as bite-sized appetizers.
- **Experiment with Diverse Fillings:** The possibilities for **fillings** are truly endless! Beyond the classic cheese and sauce, consider adding chopped pepperoni, cooked ham, sliced black olives, sautéed bell peppers, mushrooms, finely diced onions, cooked sausage, spinach, or even grilled chicken. Ensure any meat fillings are pre-cooked and that vegetables are chopped finely or lightly sautéed to prevent excessive moisture.
- **Mix and Match Your Cheeses:** While mozzarella is a staple, feel free to use whatever **cheese** you love or have on hand. Provolone offers a milder, meltier experience, while Parmesan adds a salty, nutty depth. For a tangy twist, try crumbled feta or goat cheese. A blend of cheeses, such as a four-cheese Italian mix, can also create a more complex flavor profile. For those avoiding dairy, an excellent quality **non-dairy** cheese that melts nicely will work wonderfully.
- **Play with Different Sauces:** Don’t limit yourself to just pizza sauce! Experiment with other flavorful bases. Marinara sauce is a natural fit, offering a rich tomato foundation. For something unique, try a creamy Alfredo sauce, a vibrant basil **pesto** for an herbaceous kick, or even a spicy arrabiata sauce for those who enjoy a little heat.
- **Add Fresh Herbs and Spices:** A sprinkle of dried oregano, Italian seasoning, garlic powder, or fresh basil (added after cooking) can significantly enhance the flavor of your pizza pockets.
More Delicious Pizza-Inspired Recipes
Naan Pizza
Time: 13 mins
Pizza Bites Recipe
Time: 20 mins
Easy Homemade Pizza
Time: 1 hr 55 mins
Heart Shaped Pizza
Time: 20 mins
Low Carb Pizza
Time: 45 mins
Perfect Pairings: Best Served With Your Pizza Pockets
While these homemade pizza pockets are undeniably delicious on their own, pairing them with the right sides can elevate your meal and make it even more satisfying. Their rich, savory flavors are beautifully complemented by fresh, light accompaniments.
- For a balanced and refreshing meal, serve your pizza pockets alongside a crisp, vibrant green salad. The coolness and slight bitterness of the greens provide a wonderful contrast to the warm, cheesy pockets.
- Enhance the dipping experience by offering various sauces. A classic marinara sauce is always a hit, adding another layer of tomato goodness. For a creamy, tangy option, try a homemade ranch dressing. Other great choices include garlic aioli, a spicy sriracha mayo, or even a simple balsamic glaze.
- Consider serving with a bowl of warm tomato soup for a comforting and hearty lunch combination, especially on a chilly day.
- A side of roasted vegetables like broccoli or asparagus can also add nutritional value and a delicious earthy flavor.
Common Questions About Pizza Pockets
I personally use the COSORI Pro II Air Fryer Oven Combo, and I absolutely love it for its performance and versatility. However, it’s important to remember that every air fryer model is different. I recommend monitoring your pizza pockets as they cook to prevent overcooking. Also, be sure to follow your specific air fryer’s instructions regarding preheating, as some models require it while others do not, for the best possible results.
Absolutely! If you don’t have an air fryer, or simply prefer baking, these pizza pockets bake beautifully in a conventional oven. Place them on a baking sheet lined with parchment paper. Preheat your oven to a hot 450°F (230°C) and bake for 12-16 minutes. Keep an eye on them; the exact timing will depend on the size of your pockets and the calibration of your oven. They’re ready when golden brown and the filling is bubbly.
These pizza pockets are fantastic for meal prepping! You can store them in an airtight container in the refrigerator for up to 3 days. For longer storage, they freeze exceptionally well for up to 3 months. To freeze, ensure they are completely cooled, then place a small piece of parchment paper between each pocket to prevent them from sticking together. Store them in a freezer-safe bag or container. This way, you can easily pull out and reheat just what you need.
To ensure your filling stays put and you avoid any messy leaks, there are a couple of key steps. First, be careful not to overfill the pizza pockets; a tablespoon of sauce and cheese per pocket is usually sufficient. Second, and most importantly, make sure the edges are pressed together very firmly after folding. Using a fork to crimp the edges creates a strong, secure seal that will withstand the cooking process.
Preventing the dough from sticking is crucial for easy handling. My preferred method is to drizzle a little avocado or olive oil directly onto my work surface and then lightly dust it with flour. This combination creates a non-stick barrier that allows the dough to be rolled out smoothly without any frustrating sticking.

Homemade Pizza Pockets Recipe
Facebook Share
Rate Recipe
Print Recipe
Bread, Side Dish, Snack
Italian
12 pockets
The Modern Nonna
20 minutes
10 minutes
30 minutes
Equipment
Ingredients
- 1 store-bought pizza dough
- Dusting of flour or oil to avoid sticking
- 1 teaspoon avocado oil (for counter)
- 12 tablespoons pizza sauce (1 tablespoon in each pocket)
- 12 tablespoons grated mozzarella cheese (1 tablespoon in each pocket, or more to taste)
- Water to seal the edges
Instructions
- Remember to add a touch of oil to the counter to prevent the pizza dough from sticking. Alternatively, you can use flour. Roll out the dough into a rectangular shape about 1/8 inch thick. Another option is to divide the dough into 12 equal balls and roll out each one individually. The choice is yours for ease of preparation.
- I sprinkled some flour on top of the dough and rolled it out into a rectangular shape. Then, I used a large cookie cutter to create equal circles. Collect any remaining dough scraps and roll them out again, repeating the same steps until you have used up all the dough. Lightly flour each pizza circle, then either stretch it out a bit or roll it out gently.
- Add about one tablespoon of pizza sauce in the center of each dough circle and sprinkle one tablespoon of grated mozzarella cheese on top. Be careful not to overfill.
- Lightly brush the edges of one half of the dough circle with water. Fold the dough over to one side to cover the filling and seal by pinching the edges together firmly with your fingers, then pressing with a fork. Repeat this step for all the pizza pockets.
- Cut 2-3 small slits with a knife on top of each pocket. This allows steam to escape during cooking, preventing the pockets from bursting and ensuring a perfect crust.
- Spray the air fryer basket with avocado oil spray to prevent sticking. Carefully place the pizza pockets inside the basket in a single layer, ensuring not to overcrowd them. Lightly spray the tops of the pockets with avocado oil for a golden finish.
- Air fry at 360°F (182°C) for 10 minutes. My air fryer has preheating instructions, so I preheated it for five minutes prior. Your air fryer may not require preheating, so follow its specific instructions. Once they are golden brown and the cheese is melted and bubbly, remove them. Let them cool a bit before enjoying!
Nutrition
Calories:
195kcal
,
Carbohydrates:
29g
,
Protein:
8g
,
Fat:
6g
,
Saturated Fat:
2g
,
Polyunsaturated Fat:
1g
,
Monounsaturated Fat:
1g
,
Cholesterol:
12mg
,
Sodium:
586mg
,
Potassium:
56mg
,
Fiber:
1g
,
Sugar:
4g
,
Vitamin A:
165IU
,
Vitamin C:
1mg
,
Calcium:
77mg
,
Iron:
2mg
Nutrition information is automatically calculated, so should only be used as an approximation.
Additional Info
Bread, Side Dish, Snack
Italian
✨
These homemade pizza pockets are more than just a quick meal; they’re a testament to how simple ingredients and a little effort can transform everyday staples into something truly special. Ditch the frozen aisle and embrace the joy of creating warm, cheesy, and utterly satisfying pockets of deliciousness right in your own kitchen. Whether you’re making them for a busy weeknight dinner, a fun snack for the kids, or an easy lunch to grab on the go, these pizza pockets are guaranteed to become a beloved favorite in your home. Their customizable nature, ease of preparation, and fantastic taste make them a perfect culinary companion for any occasion. Get ready to enjoy the ultimate comfort food, made with love and fresh ingredients!