
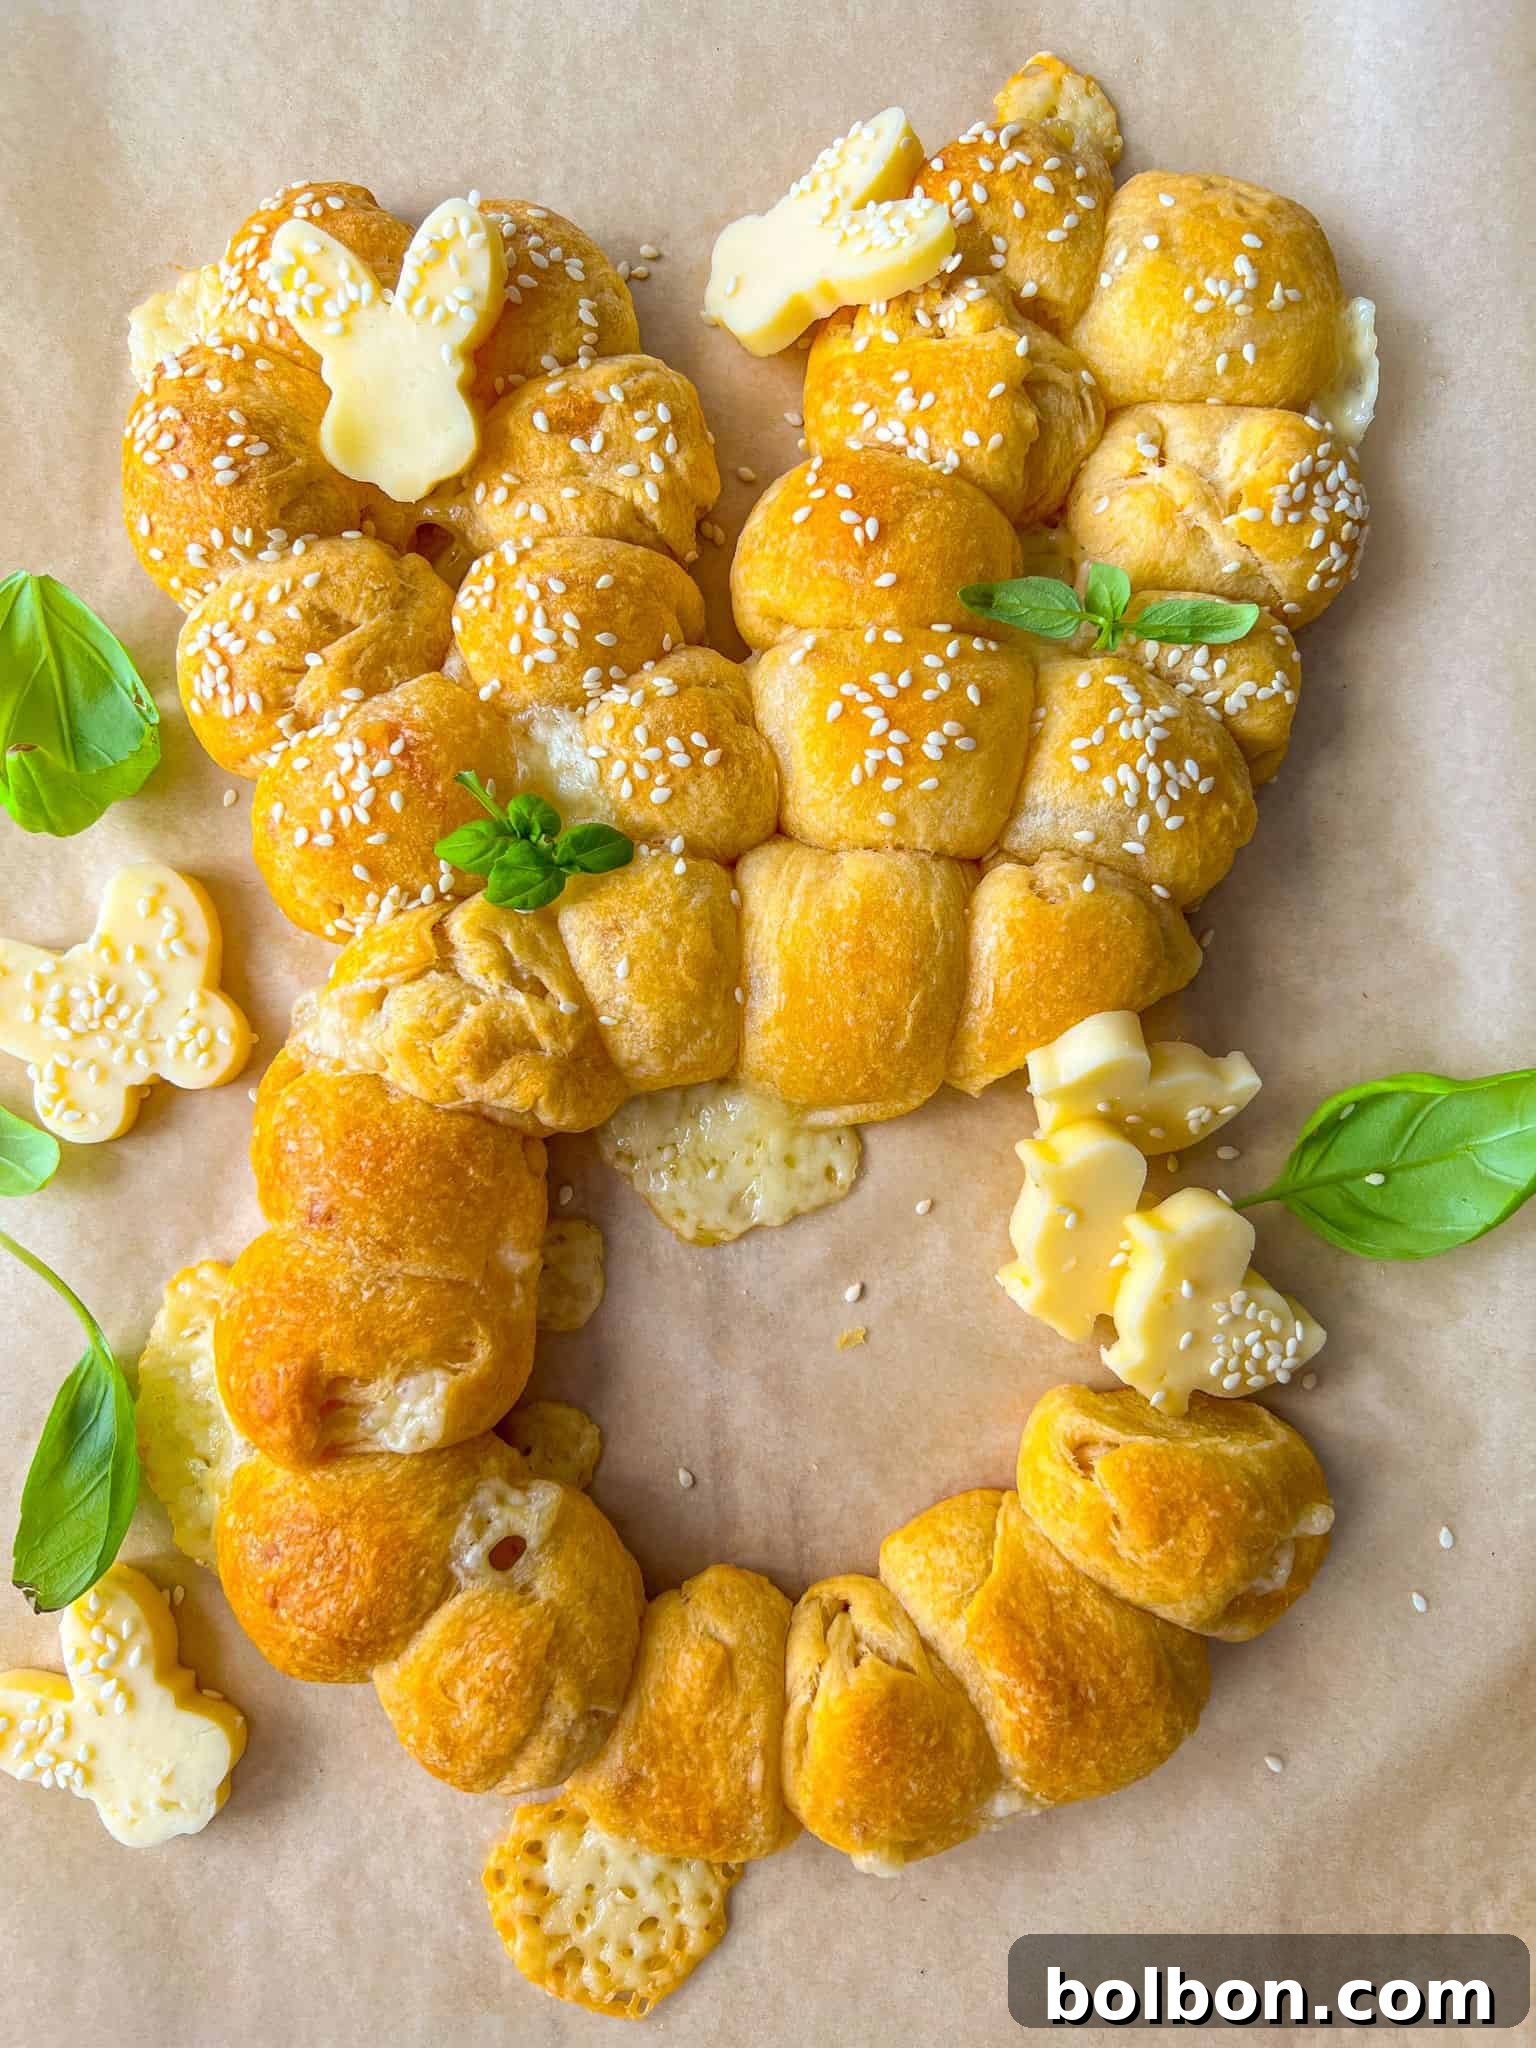
Welcome to a delightful and irresistibly cute culinary adventure that promises to become your new favorite Easter tradition: our Easy 2-Ingredient Easter Bunny Bread! Forget complicated baking; this recipe proves that extraordinary festive food can be incredibly simple. Imagine warm, soft, and pillowy bread rolls, bursting with creamy Havarti cheese, all artfully arranged into the shape of an adorable Easter bunny. It’s a guaranteed showstopper that requires just two main ingredients and about 30 minutes of your time, making it perfect for busy holiday preparations.
This charming pull-apart bread is more than just a dish; it’s an experience. Each tender bite offers a luscious burst of flavor, centered around the star of our show: exquisitely creamy Havarti cheese. Whether served as a delightful appetizer to kick off your Easter feast or as an eye-catching centerpiece that sparks conversation, this bunny bread will undoubtedly bring smiles and joy to your table. Its enchanting presentation combined with its effortless preparation makes it a truly special treat that everyone, from the youngest guest to the most discerning palate, will adore.
Why This Easter Bunny Bread Will Charm Everyone
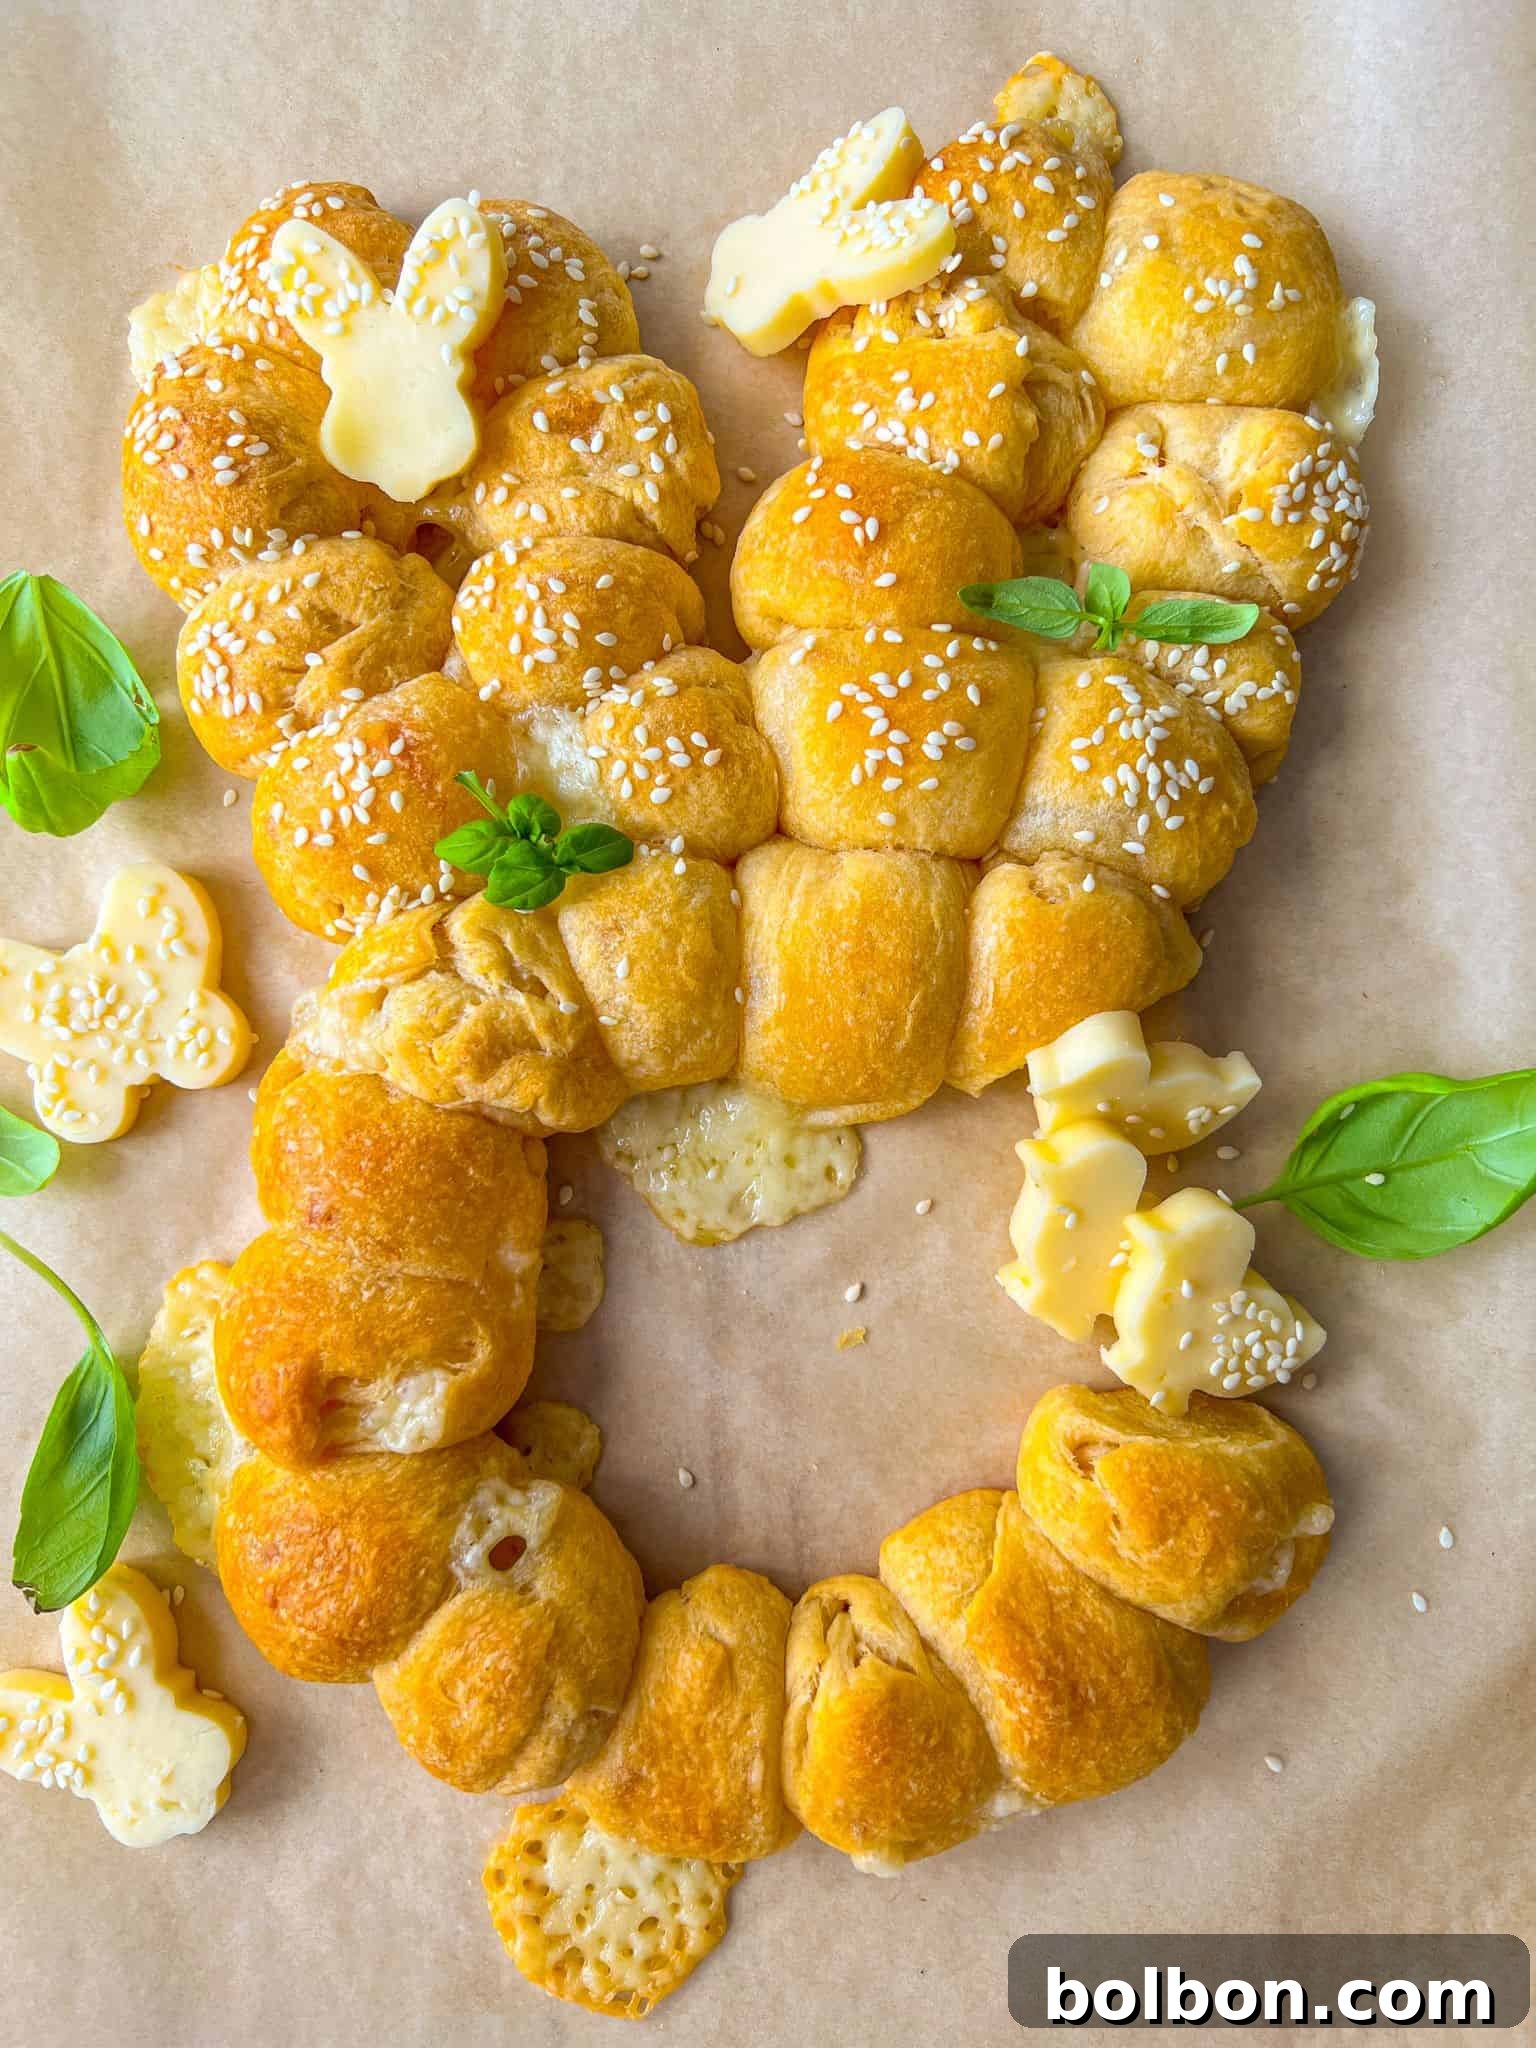
Prepare to fall in love with this Easter Bunny Bread for countless reasons, but let’s start with the absolute essentials: it uses ONLY 2 primary ingredients and takes a mere 30 minutes from start to finish! In the whirlwind of holiday cooking, a recipe this quick and delightful is a true gift. But the magic doesn’t stop there. This isn’t just a simple recipe; it’s a versatile base that invites creativity, allowing you to tailor it to your family’s preferences or whatever ingredients you have on hand.
Imagine the delight as everyone gathers around, eager to pull apart these tender, fluffy, and utterly pillowy rolls. The soft texture and rich filling create a perfect little bite every time. It’s more than just bread; it’s an interactive and engaging addition to your meal that fosters togetherness. Whether you’re serving it as a savory appetizer with its cheesy core or transforming it into a sweet indulgence with a decadent filling like Nutella or sweetened cream cheese, this bunny bread is incredibly adaptable.
Its whimsical bunny shape instantly adds a festive touch to any Easter table, making it especially appealing to children and adults alike. It’s an effortless way to elevate your holiday decor with something edible and delicious. This recipe offers the best of both worlds: gourmet appeal with minimal effort, ensuring you spend less time in the kitchen and more time celebrating with loved ones. It’s truly a recipe designed for enjoyment, convenience, and creating cherished memories.
A Closer Look at the Simple Ingredients
The beauty of this Easter Bunny Bread lies in its elegant simplicity, requiring just a handful of readily available ingredients to create something truly spectacular. Here’s a closer look at what makes this recipe so exceptional:
- Pillsbury Crescent Rolls: The Dough Hero
The foundation of our bunny bread is the humble yet mighty store-bought crescent roll dough. These pre-made dough sheets are a game-changer, eliminating the need for kneading, rising, or extensive prep work. They bake up incredibly light, flaky, and golden, providing the perfect tender base for our cheesy filling. Their convenient triangular perforations make them easy to unroll and reshape into a seamless rectangle, ready for cutting and stuffing. Using crescent rolls means you get that delicious homemade taste and texture without any of the traditional bread-making fuss. Look for the classic refrigerated tubes in your grocery store’s dairy or refrigerated dough section. - Creamy Havarti Cheese: The Flavor Star
For the filling, we’ve chosen creamy Havarti cheese, and for good reason. Havarti is a semi-soft Danish cheese known for its buttery, mild flavor and incredibly smooth, melt-in-your-mouth texture. When baked, it becomes wonderfully gooey and rich, creating a luxurious pocket of cheese within each bread ball. Its subtle tang perfectly complements the slight sweetness of the crescent roll dough without overpowering it. While any good melting cheese will work, Havarti truly elevates this dish, providing a gourmet touch that is simply irresistible. We particularly love Castello’s Creamy Havarti for its consistent quality and delightful flavor. - Canola Oil (or Neutral Oil): The Non-Stick Secret
A small amount of canola oil, or any other neutral cooking oil like vegetable or grapeseed oil, is key to preventing the dough from sticking to your countertop during preparation. This ensures a smooth and frustration-free experience when unrolling, connecting, and cutting your dough. - Sesame Seeds (Optional): The Decorative Touch
For a little extra visual appeal and a hint of nutty flavor, sesame seeds are a fantastic optional garnish. Sprinkled over the bunny’s “ears,” they add a charming detail and a pleasant textural contrast to the soft bread. White or black sesame seeds both work beautifully.
These simple components come together in harmony to create a dish that is far greater than the sum of its parts—a testament to how a few quality ingredients, prepared thoughtfully, can yield truly remarkable results.
Crafting Your Adorable Easter Bunny Bread: A Step-by-Step Guide
Making this delightful Easter Bunny Bread is an absolute breeze. Follow these clear, simple steps to bring your festive edible masterpiece to life:
Step 1: Preheat and Prepare Your Workspace
First things first, let’s get the oven ready. Preheat your oven to a welcoming 375°F (190°C). While the oven heats, prepare your countertop. To prevent the crescent roll dough from sticking, which can sometimes be a challenge, add a touch of canola oil (or any neutral oil) to your clean counter and spread it lightly. This creates a non-stick surface, making the next steps much smoother.
Step 2: Unroll and Connect the Dough
Carefully unroll the dough from both Pillsbury Crescent Roll packages. You’ll notice they come in pre-cut triangles. Gently arrange these triangles on your oiled countertop, overlapping the sides slightly where they meet. Now, using your fingertips, gently pinch and press all the seams and perforations together. The goal here is to form one large, seamless rectangle of dough. Take your time to ensure the connections are secure so your dough squares hold together during filling and baking.
Step 3: Cut, Fill, and Roll
Once you have your large dough rectangle, it’s time to create individual portions. Using a sharp knife or, for even easier and cleaner cuts, a pizza cutter, make five long cuts lengthwise down the dough. Then, make six horizontal cuts across the width. This should yield approximately 30 small, evenly sized squares of dough.
Next, it’s filling time! Take a small cube of creamy Havarti cheese and place it squarely in the center of each dough square. Now, carefully bring the corners and edges of each square up and around the cheese, pinching them together tightly to completely seal the cheese inside. It’s crucial that the cheese is fully encased to prevent it from oozing out during baking. Once sealed, gently roll the stuffed dough into a smooth, round ball. Repeat this process for all 30 dough squares.
Step 4: Assemble the Adorable Bunny Shape
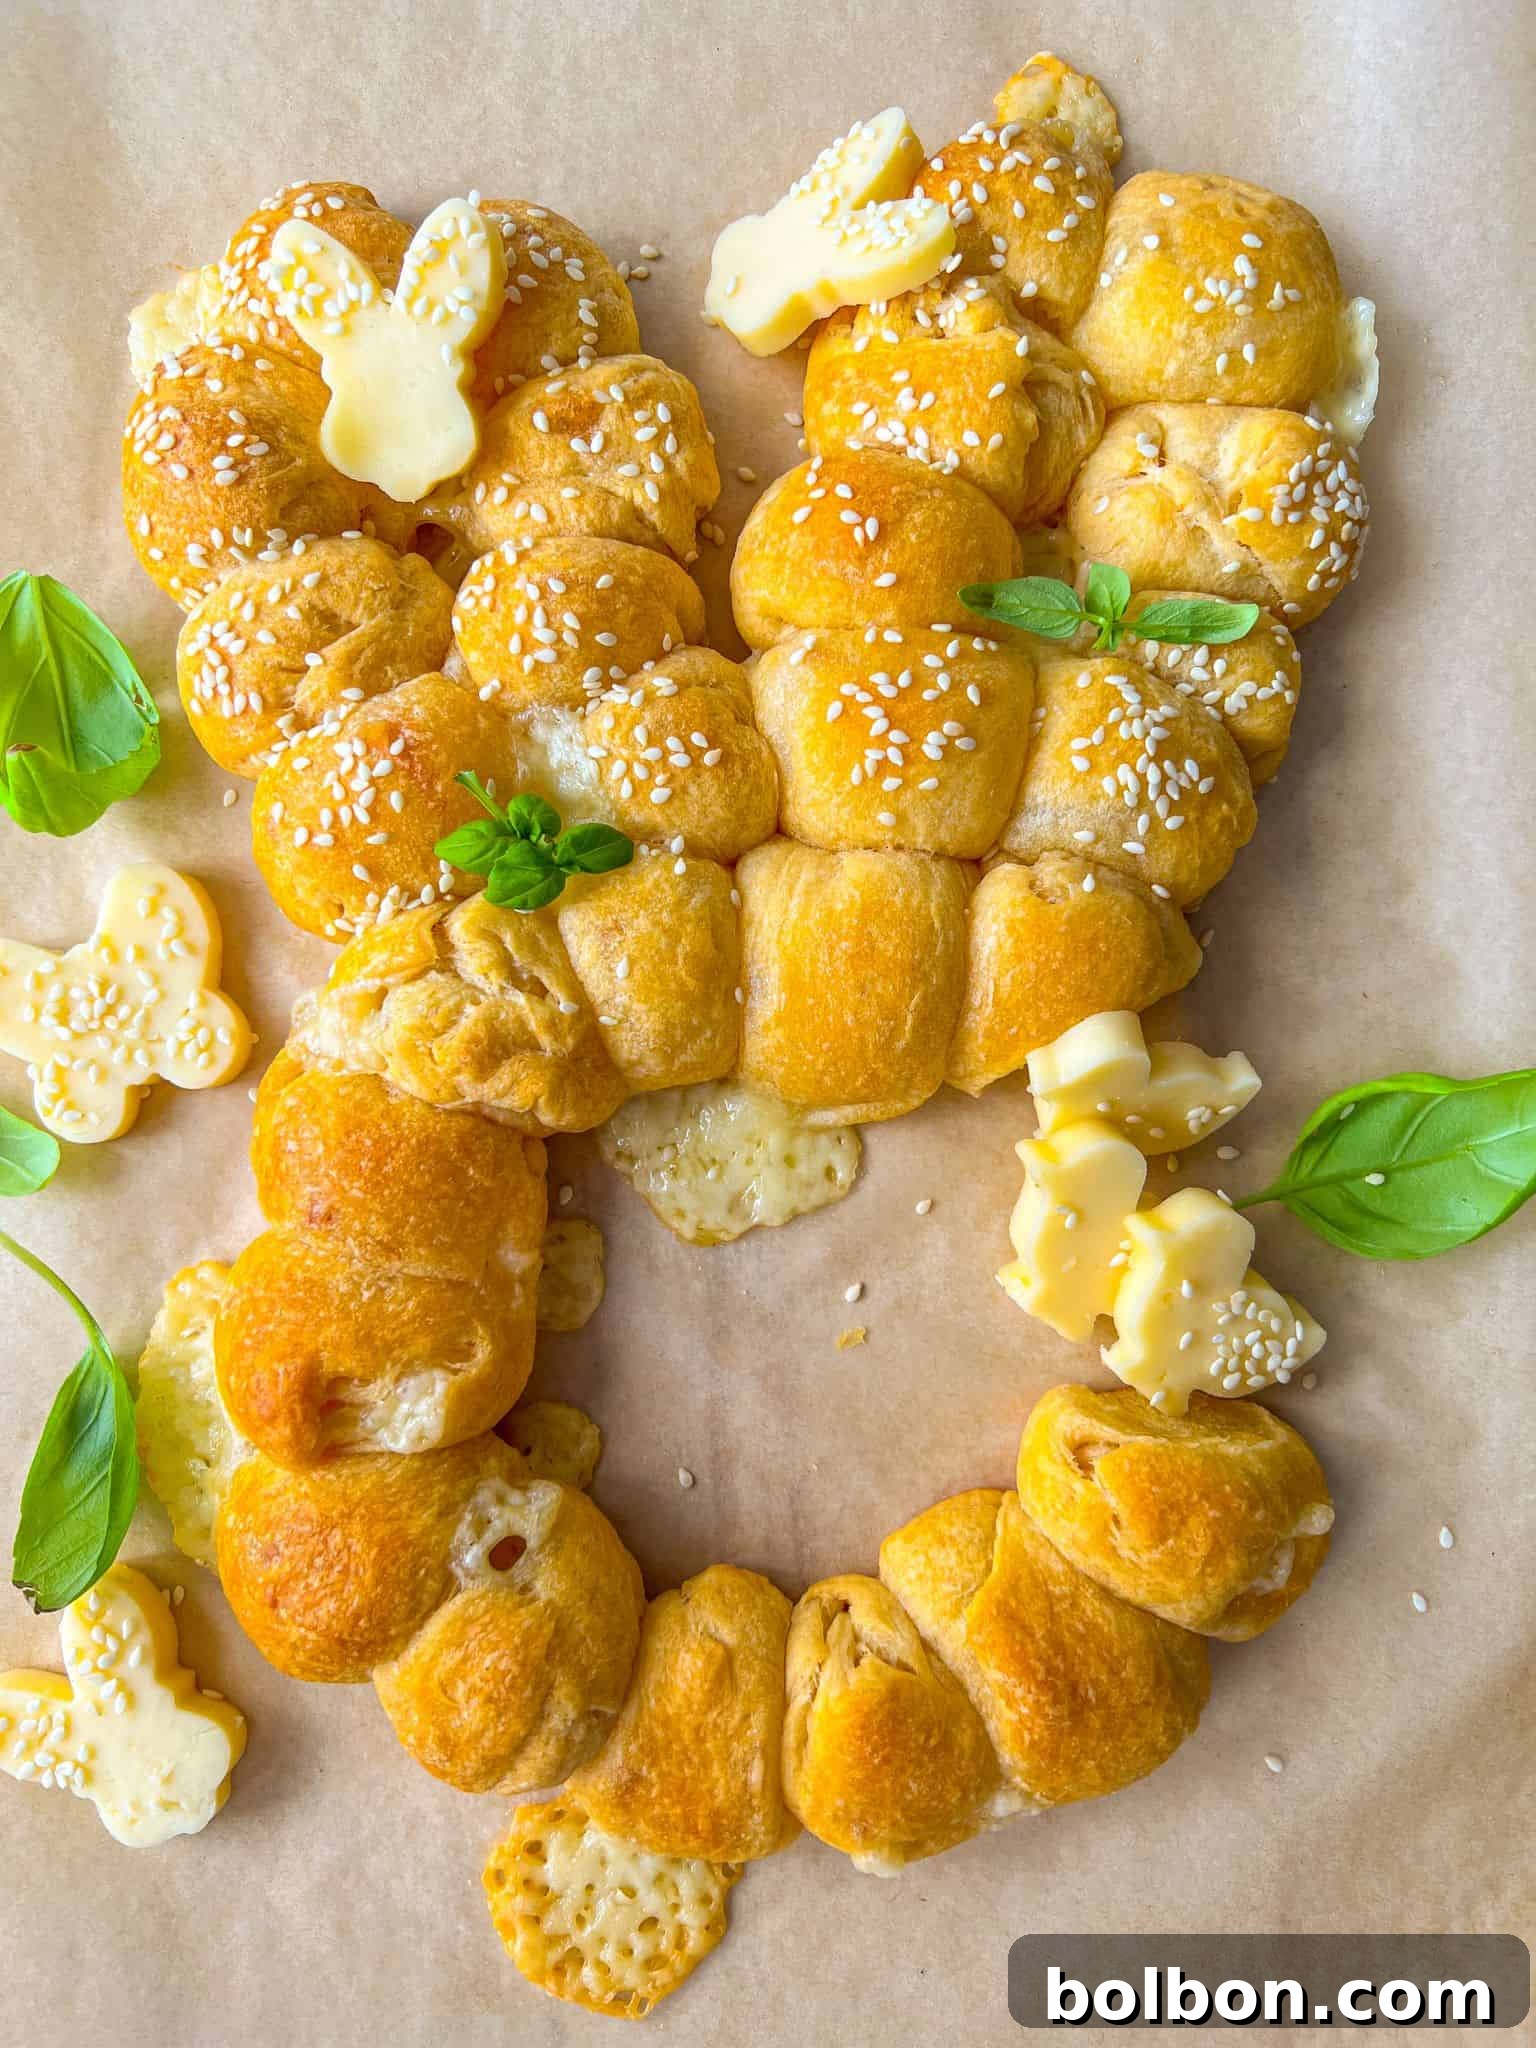
Line a baking sheet with parchment paper. This will prevent sticking and make cleanup a breeze. Now, it’s time to arrange your cheese-stuffed dough balls into the shape of a charming rabbit head. You’ll need 14 dough balls to form a circular face for the bunny. Arrange these closely together to create a cohesive shape. For each ear, you’ll use 8 dough balls, placing them above the face in an ear-like configuration. Once the bunny shape is formed, gently press the balls together slightly to ensure they touch, allowing them to bake into a pull-apart loaf. If desired, sprinkle some sesame seeds onto the bunny’s ears for an extra decorative touch and a subtle nutty crunch.
Step 5: Bake to Golden Perfection
Carefully transfer your assembled bunny bread to the preheated oven. Bake for approximately 15 to 20 minutes, or until the rolls are beautifully golden brown and puffed up. Keep an eye on them towards the end of the baking time, as oven temperatures can vary.
Step 6: Cool and Serve
Once baked to perfection, remove the bunny bread from the oven. Let it cool on the baking sheet for a few minutes before transferring it to a serving platter. This allows the cheese to set slightly and the bread to become easier to handle. For an extra festive touch, consider using Easter-themed cookie cutters to cut decorative shapes from a slice of hard cheese (like cheddar or provolone) and arrange them around your cooled bunny bread on the platter. Now, it’s ready to be pulled apart and enjoyed by all!
Nonna’s Tip: Assembling Your Bunny 🐇
This Easter Bunny Bread recipe will yield approximately 30 dough balls. When assembling your adorable rabbit, use 14 dough balls to create a perfectly circular face and 8 dough balls for each of the two bunny ears. This specific count ensures a well-proportioned and recognizable bunny shape!
Expert Tips for Perfect Pull-Apart Bunny Rolls
While this recipe is incredibly straightforward, a few expert tips can ensure your Easter Bunny Bread turns out perfectly every time:
- Don’t Skimp on the Oil: The initial step of lightly oiling your countertop is crucial. Crescent roll dough can be sticky, and a thin layer of neutral oil will prevent frustration and tearing when you’re unrolling and connecting the dough.
- Ensure a Tight Seal: This is perhaps the most important tip to prevent cheesy mishaps! When enclosing the Havarti cheese in each dough square, make absolutely sure to pinch the edges together firmly and completely. Any small gap can lead to melted cheese oozing out during baking, making a mess and leaving your rolls less cheesy.
- Small Cheese Cubes are Best: Avoid cutting your Havarti cheese cubes too large. Remember, cheese melts and expands in the oven. A smaller piece is easier to fully encase in the dough and less likely to burst through the seams. Less is often more when it comes to the initial size of the cheese cube.
- Evenly Sized Dough Balls: Try to make your dough balls roughly the same size. This promotes even baking, ensuring all your rolls are golden and cooked through at the same time. It also helps create a more uniform and attractive bunny shape.
- Don’t Overcrowd: While you want the dough balls to touch when forming the bunny, avoid excessively pushing them together or overcrowding the baking sheet. Give them a little space to puff up and brown nicely.
- Watch for Golden Brown: Oven temperatures can vary. Keep a close eye on your bunny bread during the last few minutes of baking. You’re looking for a beautiful golden-brown color, which indicates the bread is fully cooked and the cheese inside is perfectly melted.
- Cool Slightly Before Serving: Resist the urge to pull apart the bread straight from the oven. Letting it cool for 5-10 minutes allows the melted cheese to set slightly, making it less messy to handle and enjoy.
By following these simple guidelines, you’ll consistently achieve a perfectly baked, beautifully shaped, and utterly delicious Easter Bunny Bread that will impress everyone!
Creative Variations & Delicious Substitutions
One of the many charms of this Easter Bunny Bread is its incredible versatility. While the Havarti version is a crowd-pleaser, don’t hesitate to get creative with fillings and dough options. Here are some fantastic variations and substitutions to inspire you:
- Sweet Dessert Bunny Bread: Easily transform this savory delight into a decadent dessert! Instead of cheese, fill each dough square with a dollop of rich 🍫 Nutella, a spoonful of sweetened cream cheese, or even a luscious pistachio cream. Imagine serving a warm, chocolatey or creamy sweet bunny bread after dinner – pure bliss!
- Pizza Dough Alternative: If you prefer a chewier texture or want to try a different base, store-bought, frozen (and then defrosted) pizza dough works wonderfully in place of crescent rolls. Just unroll, connect, and proceed with the cutting and filling steps as usual.
- Add a Meaty Bite: For a more substantial appetizer, introduce savory meats to your filling. Before sealing the dough balls, add a small piece of cooked ham, crispy pancetta, or crumbled bacon alongside the Havarti cheese. The combination of salty meat and creamy cheese is simply divine.
- Pizza Roll-Style Fun: Turn your bunny bread into a playful pizza roll appetizer! Fill the dough with classic mozzarella cheese, sprinkle a little grated Parmesan cheese on top before baking, and serve the warm pull-apart bread with a side of simple marinara sauce for dipping.
- Gluten-Free Option: Don’t let dietary restrictions keep you from this festive treat. For gluten-free Easter Bunny Bread, simply swap out the traditional crescent roll dough for your favorite brand of gluten-free pizza dough. The preparation steps remain the same!
- Garlic Loaf Appetizer: Elevate the savory experience by turning this into a fragrant garlic loaf. Before baking, brush the uncooked, assembled bunny bread generously with a mixture of melted butter, finely minced garlic, and fresh herbs like parsley or chives. This adds an incredible aroma and depth of flavor.
Serving Suggestions to Complete Your Easter Spread
This Easter Bunny Bread is delightful on its own, but pairing it with a few complementary dishes can truly elevate your holiday spread. Here are some ideas to make your presentation even more special:
- Decorative Cheese Accents: For an extra festive touch, use Easter-themed cookie cutters to cut shapes (like eggs, flowers, or smaller bunnies) from a slice of hard cheese (cheddar or provolone works well). Arrange these charming cheese cut-outs around the cooled Bunny Bread on your serving platter for a whimsical display.
- Simple Green Salad 🥗: A light and refreshing green salad with a zesty vinaigrette provides a wonderful contrast to the rich, cheesy bread. It adds a touch of freshness and color to your Easter table.
- Warm Marinara or Pesto Dip: If you’ve gone for a savory or pizza-style variation, a small bowl of warm marinara sauce, or even a vibrant pesto, makes for an excellent dipping companion.
- Crudités with Herb Dip: A platter of crisp fresh vegetables (carrots, cucumbers, bell peppers) served with a creamy herb dip offers another fresh component and a textural counterpoint to the soft bread.
- Fruit Skewers: For a balance of flavors, especially if you’ve made a sweet version, serve alongside colorful fruit skewers featuring berries, melon, and grapes.
No matter how you choose to serve it, your homemade Easter Bunny Bread is sure to be a beloved addition to your holiday celebration!
Storing and Reheating Your Easter Bunny Bread
While this bunny bread is undeniably best enjoyed fresh from the oven, any leftovers can be stored and reheated for continued deliciousness. Here’s how to keep it tasting great:
- Storage: Allow any leftover Easter Bunny Bread to cool completely to room temperature. Once cool, transfer the bread to an airtight container or wrap it tightly in plastic wrap or aluminum foil. Store it in the refrigerator for up to 2-3 days.
- Reheating in the Oven: For the best results, reheating in the oven is recommended to restore that lovely crispy exterior and gooey interior. Preheat your oven to 300°F (150°C). Place the bunny bread (covered loosely with foil to prevent over-browning) on a baking sheet and heat for 10-15 minutes, or until warmed through and the cheese is melted again.
- Reheating in the Microwave: While convenient, the microwave can sometimes make bread a bit chewy. If you’re in a hurry, microwave individual portions for 15-30 seconds, or until warm. Be careful not to overheat.
- Freezing (Unbaked Option): You can also prepare the dough balls (filled and rolled) and assemble the bunny shape on a parchment-lined baking sheet. Freeze the entire sheet until the balls are solid, then transfer them to a freezer-safe bag or container. They can be frozen for up to 1 month. When ready to bake, place the frozen dough balls on a parchment-lined baking sheet and let them thaw in the refrigerator overnight or at room temperature for a couple of hours before baking as directed. Baking from frozen might require a few extra minutes.
With proper storage and reheating, you can extend the joy of your homemade Easter Bunny Bread!
Frequently Asked Questions (FAQs) About Easter Bunny Bread
The easiest trick is to lightly oil your clean countertop with a neutral oil like canola or vegetable oil. A small amount goes a long way to create a non-stick surface. Alternatively, you could try rolling the dough on a piece of parchment paper, which provides a naturally non-stick barrier.
If sesame seeds aren’t your preference or you don’t have any on hand, there are plenty of delicious alternatives! You could sprinkle with poppy seeds for a different texture, a mix of dried herbs like oregano or Italian seasoning for an aromatic touch, or even a dusting of grated Parmesan cheese for an extra savory kick. All would be delicious additions to your Easter Bunny Bread!
This is a common concern! The key is two-fold: First, ensure that your cheese cubes are not too large. Remember, cheese melts and expands significantly when heated, so “less is more” in this case. Second, and most importantly, when forming the dough balls, make sure to completely encase the piece of cheese. Pinch the edges of the dough together very tightly to create a secure seal all around the cheese. Double-check for any tiny gaps!
Absolutely! While nothing beats the experience of this bread coming piping hot right out of the oven, you can certainly prepare it in advance. You can have all the dough balls assembled and arranged into the bunny shape on your baking sheet. Then, simply cover it loosely with plastic wrap and keep it refrigerated until you’re ready to bake. This makes holiday entertaining much less stressful!
Feel free to experiment with different cheese fillings to suit your taste! Brie or Camembert would offer a similarly rich, creamy, and truly delicious experience. For a milder cheese flavor, cheddar or mozzarella would be excellent choices. If you enjoy a smoky note, smoked gouda would also be a fantastic and unique option. The possibilities are endless!
The fun doesn’t have to stop at Easter! This recipe is wonderful for baking to a theme. For Christmas, you could arrange the dough balls into the shape of a festive Christmas tree. For Valentine’s Day, a heart shape would be absolutely charming. You could also create numbers for birthdays or simple circles for everyday pull-apart rolls.
While I haven’t tried baking them specifically as individual dinner rolls, I don’t see why it wouldn’t work beautifully. I think arranging the stuffed dough balls nestled into loaf pans (perhaps 15 dough balls per pan) would be a fantastic idea. Just be sure to watch the baking time closely, as it might vary slightly compared to the bunny shape on an open baking sheet.
Conclusion: Your New Favorite Easter Tradition
This Easy 2-Ingredient Easter Bunny Bread is more than just a recipe; it’s an invitation to create joy and lasting memories with minimal effort. Its delightful appearance, coupled with its simple preparation and irresistible flavor, makes it an instant classic for your holiday table. Whether you stick to the classic cheesy version or explore one of the many creative variations, this pull-apart bread is sure to be a conversation starter and a beloved treat. So, gather your ingredients, embrace the festive spirit, and get ready to bake a culinary masterpiece that everyone will adore. Happy Easter baking!
Explore More Easter Delights
Looking for more inspiration to complete your Easter menu? These recipes are perfect companions to your festive feast:
Similar Easter Recipes
Sweet Easter Bread
2 hrs 45 mins
Cadbury Chocolate Chip Cookies
22 mins
Deviled Egg Chicks
25 mins
Roasted Leg of Lamb (Foolproof)
4 hrs 45 mins
Easter Bunny Bread
⭐
⭐
⭐
⭐
Facebook Share
Rate Recipe
Print Recipe
Appetizer, Bread, Side Dish
American
8 servings
The Modern Nonna
15 minutes
20 minutes
35 minutes
Video
Equipment
Ingredients
-
1
teaspoon
canola oil,
(or any neutral oil) -
200
grams
havarti cheese ,
(I used Castello’s Creamy Havarti Cheese) -
2
packages
Pillsbury Crescent Rolls ,
(8 ounces or 225 grams each) -
sesame seeds,
(optional)
Metric
Instructions
-
Preheat the oven to 375°F (190°C). Add a touch of oil to your clean countertop so that the dough doesn’t stick.
-
Unroll the dough from the Pillsbury packs and connect all the pieces together by gently pinching all the sides to form one large rectangle.
-
Cut five lines lengthwise and six lines horizontally. You should have 30 small squares of dough. Place a small piece of creamy Havarti cheese into each square. Take each square and pinch it together so that the cheese is sealed and roll the stuffed dough into a ball.
-
Line a baking sheet with parchment paper. Arrange the cheese-stuffed balls into the shape of a rabbit head. You will need 14 dough balls to make a circular face and 8 dough balls for each ear. Sprinkle some sesame seeds onto the ears for decoration, if desired.
-
Bake for 15 to 20 minutes, or until golden. Let cool.
-
If you’d like, using an Easter-themed cookie cutter, cut some hard cheese into shapes. Once the bread is cool, transfer it to a serving platter. Decorate the plate with the cut-out cheese. Enjoy!
Nutrition
Serving:
1
serving
,
Calories:
287
kcal
,
Carbohydrates:
23
g
,
Protein:
8
g
,
Fat:
19
g
,
Saturated Fat:
9
g
,
Polyunsaturated Fat:
4
g
,
Monounsaturated Fat:
4
g
,
Trans Fat:
0.3
g
,
Cholesterol:
22
mg
,
Sodium:
632
mg
,
Potassium:
17
mg
,
Sugar:
6
g
,
Vitamin A:
198
IU
,
Vitamin C:
0.1
mg
,
Calcium:
152
mg
,
Iron:
1
mg
Nutrition information is automatically calculated, so should only be used as an approximation.
Additional Info
Appetizer, Bread, Side Dish
American