
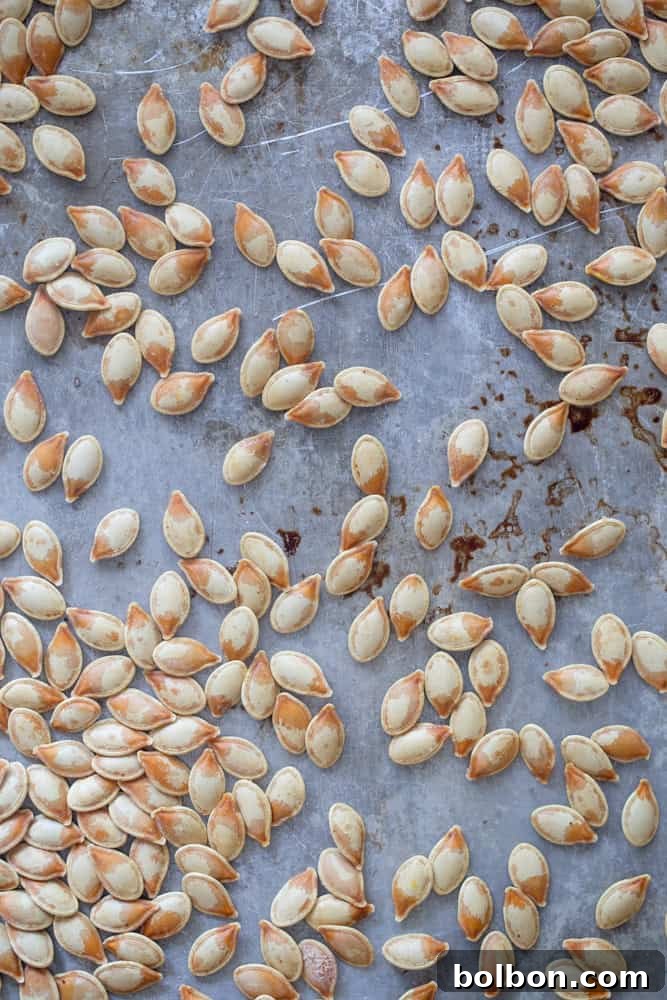
Homemade Roasted Pumpkin Seeds: Your Ultimate Guide to a Crunchy Fall Snack
Don’t let those precious pumpkin seeds go to waste this Halloween or Thanksgiving season! Whether you’re meticulously carving a spooky Jack O’ Lantern or preparing fresh pumpkin puree for your favorite recipes, the journey to a deliciously crunchy, salty snack begins with saving those seeds. This comprehensive guide will walk you through transforming humble pumpkin seeds into an irresistible treat, perfect for snacking, garnishing, or adding a delightful crunch to any dish.
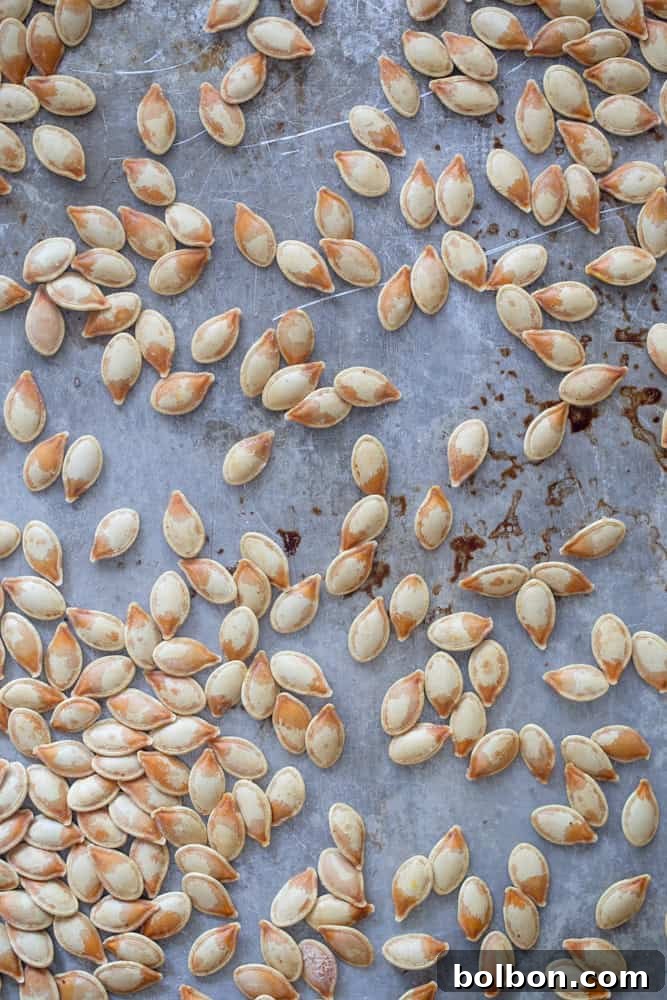
The Joy of Autumn and Sustainable Snacking
The arrival of autumn brings with it a kaleidoscope of colors, cozy sweaters, and, of course, pumpkins! For many, it’s a cherished family tradition to visit pumpkin patches, select the perfect gourd, and bring it home for decoration or culinary adventures. My own family, including my children, eagerly anticipate the summer months watching our garden pumpkins ripen from vibrant green to deep orange. The excitement builds as we finally bring them indoors to transform them into luscious pumpkin puree, which finds its way into comforting treats like homemade Pumpkin Pie or wholesome Pumpkin Muffins.
But the pumpkin fun doesn’t stop there! An often-overlooked treasure lies within: the seeds. Instead of discarding them, we embrace the “nose-to-tail” philosophy of the pumpkin, roasting the seeds to create a truly satisfying, salty, and crunchy snack. This isn’t just about reducing waste; it’s about unlocking another layer of flavor and nutrition that pumpkins generously offer. Even if you’re not growing your own pumpkins, the seeds from your Halloween carving or a store-bought cooking pumpkin are perfectly suitable for this delicious endeavor.
Why Roast Pumpkin Seeds? More Than Just a Snack!
Beyond their delightful crunch and versatile flavor, pumpkin seeds (also known as pepitas when hulled) are a nutritional powerhouse. They are packed with essential nutrients that contribute to overall well-being:
- Rich in Magnesium: A vital mineral for over 300 bodily functions, including muscle and nerve function, blood sugar control, and blood pressure regulation.
- Good Source of Zinc: Important for immune function, cell growth, sleep, mood, and eye and skin health.
- High in Antioxidants: Pumpkin seeds contain various antioxidants, including carotenoids and vitamin E, which help reduce inflammation and protect your cells from harmful free radicals.
- Excellent Source of Fiber: Promotes digestive health and can help keep you feeling full, aiding in weight management.
- Healthy Fats: They provide heart-healthy monounsaturated and polyunsaturated fats, including omega-3s.
- Plant-Based Protein: A great snack for vegetarians and vegans, offering a significant amount of protein per serving.
Roasting your own pumpkin seeds ensures you have control over the ingredients, allowing you to avoid excessive additives often found in store-bought versions. Plus, the aroma of freshly roasted seeds filling your kitchen is an autumn bonus in itself!
Step-by-Step Guide: How to Roast Pumpkin Seeds to Perfection
Achieving perfectly crispy, flavorful roasted pumpkin seeds is surprisingly simple. Follow these detailed steps to transform your raw seeds into an irresistible snack.
Essential Equipment:
- Large bowl
- Colander
- Small saucepan
- Clean kitchen towels or paper towels
- Baking sheet
- Foil or parchment paper (for easy cleanup)
- Prepare Your Workspace and Oven: Begin by preheating your oven to 350 degrees F (175 degrees C). Line a large baking sheet with foil or parchment paper. This simple step makes cleanup a breeze and prevents sticking.
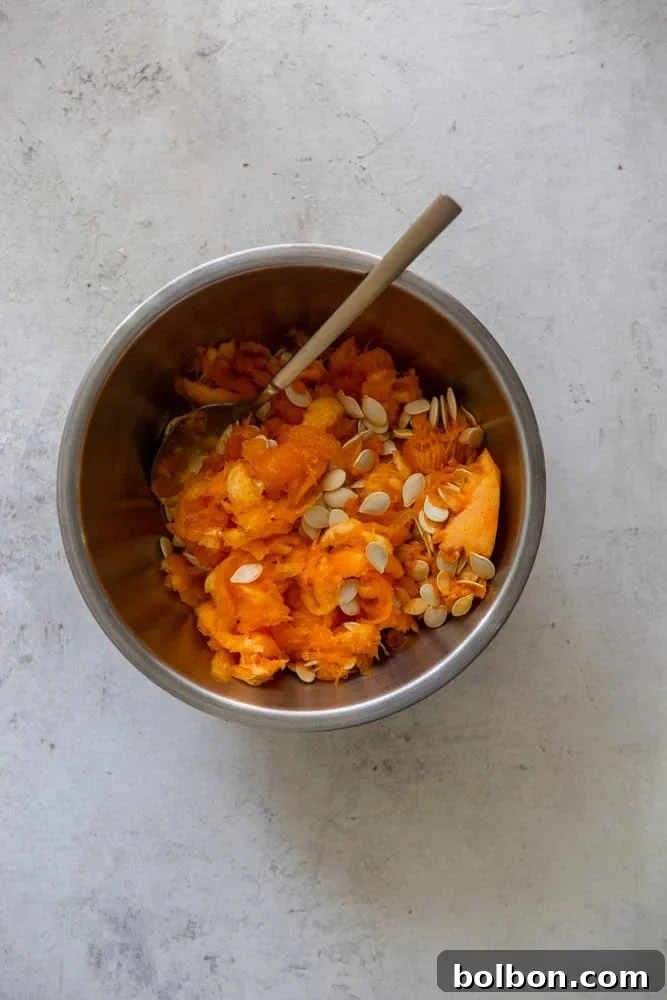
- Extract the Seeds: Carefully scoop out the seeds and the stringy, fibrous flesh from the pumpkin. A large spoon or an ice cream scoop works best for this. Place the entire messy mixture into a large bowl or directly into a colander.
- Initial Cleaning: Submerge the seeds and pulp in water in the bowl. Use your hands to thoroughly separate the larger pieces of pumpkin flesh from the seeds. It’s often easier to do this under running water.
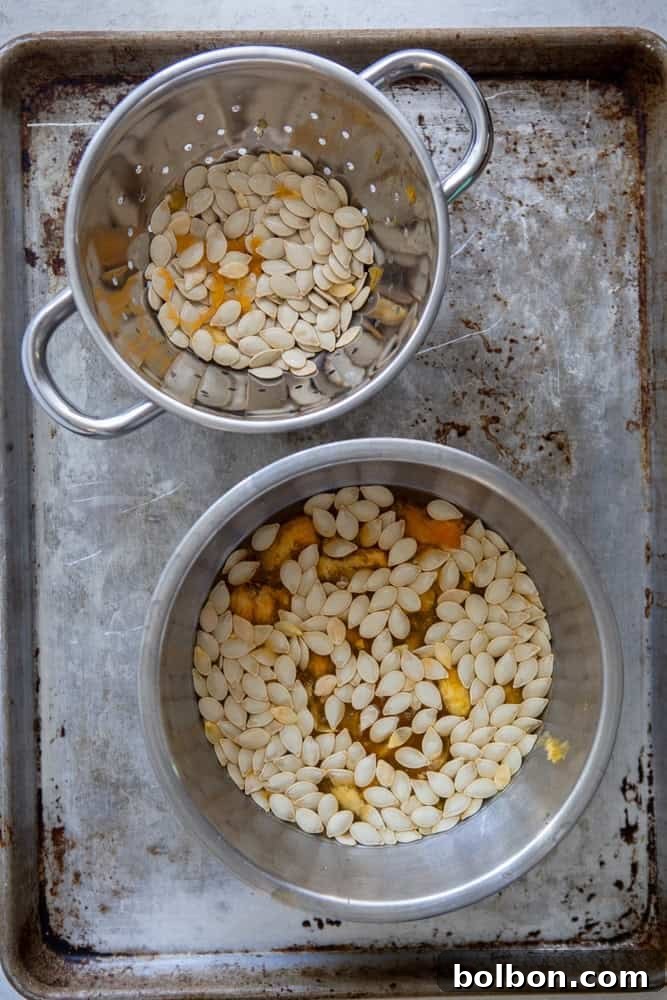
- Thorough Rinse: Transfer the separated seeds to a colander. Rinse them under cold running water, shaking and using your fingers to remove any remaining stubborn stringy bits or pulp. Don’t worry if a few tiny strands remain; they will crisp up in the oven. The goal is to get them as clean as possible for the best texture and flavor.
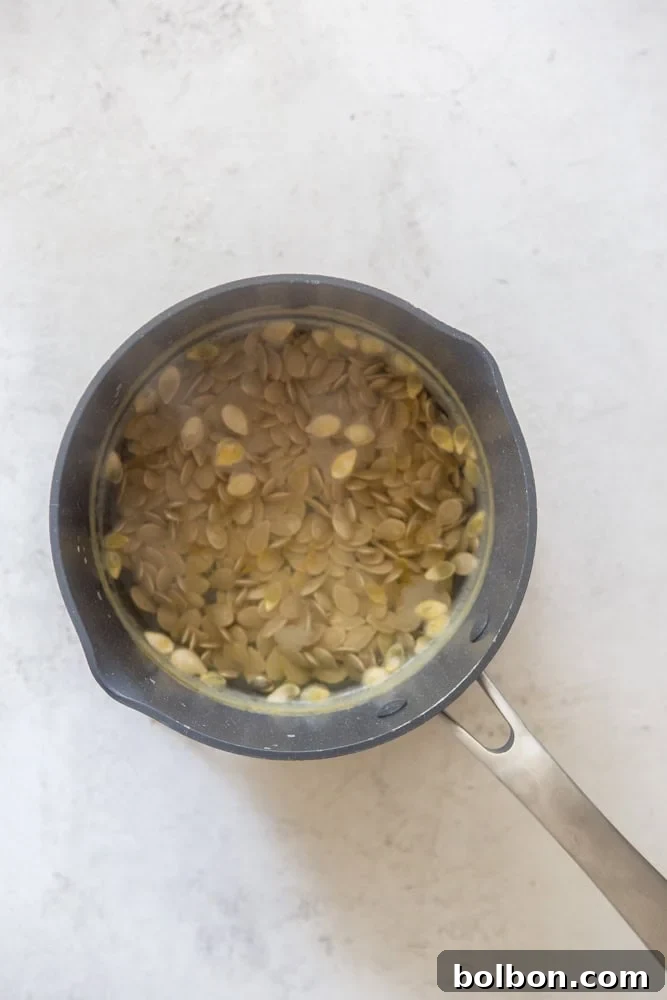
- The Boiling Secret for Perfect Crunch: This step is often overlooked but is key to achieving uniformly crisp seeds. Bring a small saucepan of water to a rolling boil. Add 2 teaspoons of sea salt to the boiling water. The salt infuses the seeds from the inside out, leading to a more profound and even seasoning.
- Boil the Seeds: Once the water is boiling, add the cleaned pumpkin seeds and boil for 5-10 minutes. Boiling helps to tenderize the shells, ensuring they become perfectly crunchy when roasted, rather than brittle or burnt. It also helps to pre-season them.
- Crucial Drying Step: Drain the boiled seeds thoroughly in a colander. Transfer them to a clean kitchen towel or several layers of paper towels, spreading them out in an even, single layer. Place another towel on top and pat them as dry as possible. This step is critical; moist seeds will steam instead of roast, resulting in a chewy texture instead of a crisp one. For best results, you can even let them air dry for an hour or two, or even overnight, after patting them dry.
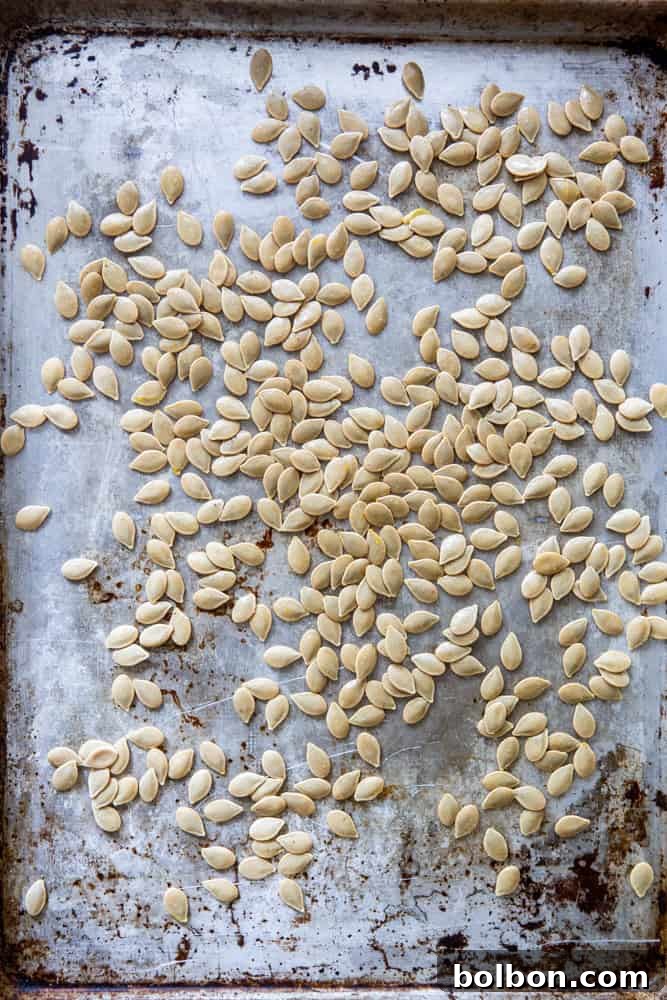
- Season and Oil: Once the seeds are thoroughly dry, transfer them to the prepared baking sheet. Drizzle with 2 teaspoons of avocado oil (or your oil of choice, such as olive oil or grapeseed oil) and sprinkle with an additional 1/4 teaspoon of salt. Toss the seeds gently with your hands to ensure they are evenly coated with oil and seasoning. This helps them crisp up and prevents burning.
- Roast to Golden Perfection: Place the baking sheet in the preheated oven. Roast for approximately 15-20 minutes, stirring the seeds halfway through (around the 7-10 minute mark). Keep a close eye on them, as oven temperatures can vary, and seeds can go from perfectly golden to burnt very quickly. They are ready when they are golden brown, fragrant, and delightfully crisp.
- Cool Completely: Remove the baking sheet from the oven and allow the roasted pumpkin seeds to cool completely on the sheet. As they cool, they will become even crispier.
Flavor Variations: Get Creative with Your Roasted Pumpkin Seeds
While classic salty roasted pumpkin seeds are undeniably delicious, they are also a fantastic canvas for a wide array of flavors. Don’t be afraid to experiment after the initial oil and salt coating before roasting!
- Sweet & Spicy: After coating with oil, sprinkle with a mix of cinnamon, a pinch of nutmeg, a dash of cayenne pepper, and a teaspoon of brown sugar.
- Garlic & Herb: Add garlic powder, onion powder, dried rosemary, thyme, or Italian seasoning along with the salt.
- Smoky BBQ: Mix in smoked paprika, a touch of chili powder, a little cumin, and a tiny bit of brown sugar.
- Spicy Chili Lime: For a zesty kick, add chili powder, cumin, a pinch of cayenne, and the zest of one lime.
- Maple Glazed: Toss seeds with oil, then drizzle lightly with maple syrup and a sprinkle of sea salt before roasting.
- Curry Delight: Mix with curry powder and a hint of turmeric for an exotic flavor profile.
Troubleshooting Common Roasted Pumpkin Seed Issues
Even though it’s a simple recipe, sometimes things can go awry. Here are solutions to common problems:
- Seeds aren’t crispy enough: The most common culprit is insufficient drying after boiling. Ensure your seeds are as dry as possible before oiling. Also, your oven might not be hot enough, or they need a few more minutes of roasting.
- Seeds are burnt: This usually means the oven was too hot or the seeds were roasted for too long without stirring. Keep a close eye on them, especially during the last few minutes. Adjust oven temperature if necessary.
- Seeds are too salty/not salty enough: Adjust the amount of salt added to the boiling water and the final sprinkle before roasting based on your preference. Remember that boiling pre-seasons them.
- Uneven roasting: Make sure seeds are spread in a single layer on the baking sheet and stirred halfway through roasting. Crowding the pan can lead to steaming instead of roasting.
Oven Roasted Pumpkin Seeds
By Meghan McMorrow | Fox and Briar
20 mins
20 mins
12 servings
Print Recipe
Ingredients
- 1 cup fresh pumpkin seeds (from about 1 medium pumpkin)
- 2 tsp sea salt (for boiling water)
- 2 tsp avocado oil or other oil of choice
- 1/4 tsp additional sea salt (for roasting, or to taste)
- Optional seasonings: garlic powder, paprika, cinnamon, cayenne pepper, etc.
Instructions
- Preheat your oven to 350 degrees F (175 degrees C).
- Scoop out the seeds and stringy flesh from the pumpkin into a colander or large bowl. Remove as many of the larger pieces of pumpkin flesh as possible using your hands.
- Rinse the seeds under cold running water, continuing to use your fingers to remove any remaining orange flesh and strings. It’s okay if a few tiny bits remain.
- Bring a small saucepan of water to a boil. Add 2 teaspoons of sea salt to the boiling water.
- Add the cleaned pumpkin seeds to the boiling salted water and boil for 5-10 minutes. This step helps to tenderize the shells and pre-season the seeds.
- Drain the seeds thoroughly in a colander. Transfer them to a clean kitchen towel and spread them out in an even layer. Place a second towel over them and pat dry completely. For best crispiness, ensure they are very dry.
- Line a baking sheet with foil or parchment paper. Spread the thoroughly dried seeds evenly on the baking sheet. Drizzle with 2 teaspoons of avocado oil and season with 1/4 teaspoon of additional salt (or more, to taste). Toss to coat well. If adding other spices, do so now.
- Bake for 15-20 minutes, stirring the seeds halfway through (around 7-10 minutes) to ensure even roasting. Roast until they are golden brown and crisp. Keep a close eye on them to prevent burning.
- Allow the roasted pumpkin seeds to cool completely on the baking sheet before storing or serving. They will crisp up further as they cool.
Nutrition Information
Serving: 1 serving | Calories: 36kcal | Carbohydrates: 1g | Protein: 2g | Fat: 3g | Saturated Fat: 1g | Polyunsaturated Fat: 1g | Monounsaturated Fat: 1g | Trans Fat: 0.003g | Sodium: 388mg | Potassium: 43mg | Fiber: 0.3g | Sugar: 0.1g | Vitamin A: 1IU | Vitamin C: 0.1mg | Calcium: 3mg | Iron: 0.5mg
Nutrition information is automatically calculated and should be used as an approximation.
Additional Info
Course: Snacks
Cuisine: American
How to Store Roasted Pumpkin Seeds
Proper storage is key to maintaining the crispness and flavor of your homemade roasted pumpkin seeds.
- Room Temperature: Once completely cooled, store your roasted pumpkin seeds in a tightly sealed, airtight container at room temperature. A glass jar with a lid or a zip-top bag works well. They will stay fresh and crunchy for up to 2 weeks.
- Refrigeration: For even longer freshness, especially in humid climates, you can store them in an airtight container in the refrigerator for up to 1 month.
- Freezing: For extended storage, roasted pumpkin seeds can be frozen. Spread them in a single layer on a baking sheet and freeze until solid, then transfer to a freezer-safe bag or container. They can be stored for several months. Thaw at room temperature before enjoying.
Always ensure they are fully cooled before storing to prevent condensation, which can make them soft or moldy.
Serving Suggestions: Enjoy Your Crunchy Creation
Roasted pumpkin seeds are incredibly versatile. Here are some ideas for how to enjoy them:
- Straight Up Snack: The most obvious and often best way! Perfect for a quick, healthy snack on the go.
- Salad Topping: Add a fantastic crunch and nutty flavor to any salad, from garden salads to grain bowls.
- Soup Garnish: Sprinkle over creamy soups like butternut squash soup, tomato soup, or even chili for added texture.
- Yogurt or Oatmeal Topping: For a delightful breakfast, add them to your morning yogurt, granola, or oatmeal.
- Trail Mix Component: Incorporate them into homemade trail mixes with dried fruits, nuts, and other seeds.
- Baking Ingredient: Mix them into bread dough, muffins, or cookies for a unique texture and flavor.
- Casserole Topping: Use them as a crunchy topping for savory casseroles.
Did You Love This Recipe?
We hope you enjoyed crafting these delicious homemade roasted pumpkin seeds! If you tried this recipe, please take a moment to comment below, rate it, and share your creations. Don’t forget to tag me on Instagram @foxandbriar and use the hashtag #foxandbriar so I can see what you’ve made!
More Recipes You Will Love
- How to make pumpkin puree
- How to cut a butternut squash