
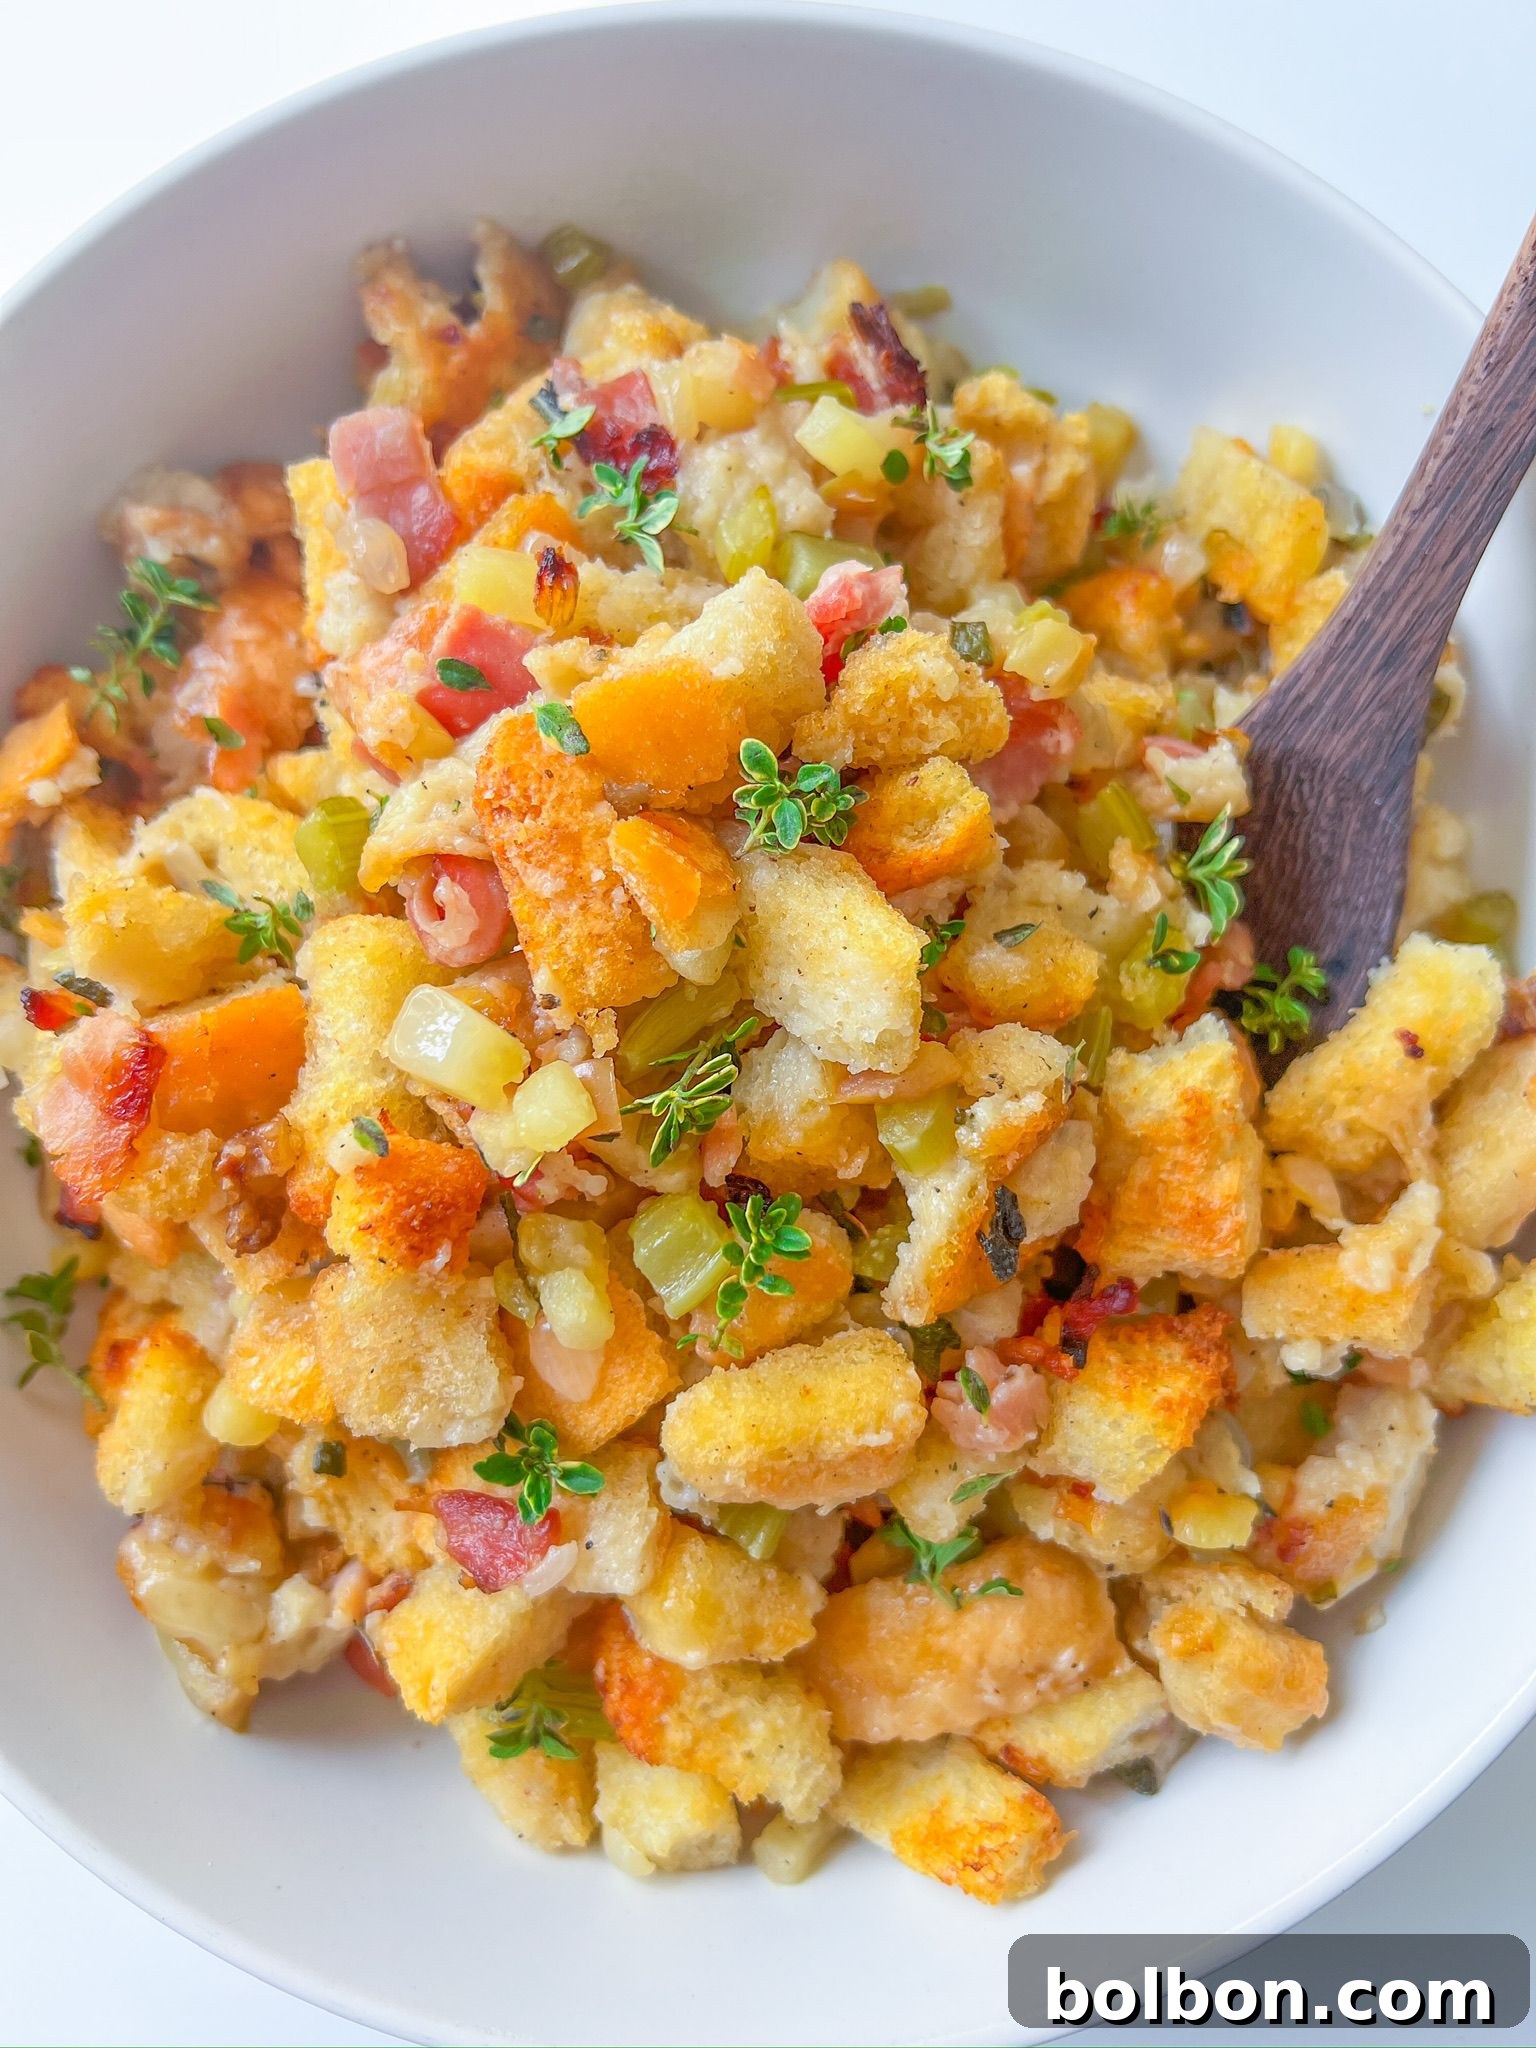
Thanksgiving, a time for gratitude, family, and most importantly, incredible food. While the turkey often takes center stage, it’s the comforting, aromatic side dishes that truly complete the holiday feast. Among these, Thanksgiving Stuffing (or dressing, as it’s often called when cooked outside the bird) stands out as an undeniable favorite. This recipe promises a dish so profoundly flavorful and perfectly textured that it will undoubtedly become the star of your holiday spread, leaving everyone at the table eager for seconds. Imagine a harmonious blend of savory, juicy, and buttery goodness, featuring a golden, slightly crispy top yielding to a soft, moist, herb-infused interior. It’s more than just a side; it’s a cherished tradition, elevated, offering both nostalgic warmth and gourmet appeal.
Why This Classic Thanksgiving Stuffing Recipe Will Become Your Holiday Essential
Forget dry, crumbly, or bland stuffing. This recipe delivers an exceptionally moist and flavor-packed dish that redefines what homemade stuffing can be. Designed to serve a generous six, it’s a practical yet show-stopping addition to any holiday table, from an intimate family gathering to a larger celebration. Its irresistible aroma will fill your kitchen, signaling the start of a truly memorable meal. Guests won’t just enjoy it; they’ll rave about it long after the last bite, eagerly anticipating its return year after year. What makes this recipe an absolute must-have for your festive spread?
- Unmatched Moisture and Tenderness: The meticulous balance of rich butter and savory broth ensures every single bread cube is tender and succulent, preventing any hint of dryness. This creates a melt-in-your-mouth experience that is truly unforgettable.
- Deep, Rich Savory Flavor: A robust combination of perfectly sautéed aromatic vegetables, crispy, savory bacon, and a generous infusion of fresh herbs creates a complex and comforting flavor profile. It’s both familiar and sophisticated, hitting all the right notes of holiday nostalgia.
- Irresistible Textural Contrast: Baking in a casserole dish allows for the formation of a glorious golden-brown, slightly crispy top crust. This perfectly complements the soft, moist interior, offering an exciting textural journey with every forkful.
- Incredibly Versatile and Adaptable: Whether you need a vegetarian option, crave a hint of sweetness, or prefer to experiment with different types of bread, this recipe is a blank canvas for your culinary creativity. It’s easily customizable to suit any taste or dietary preference.
- Effortless Preparation, Exceptional Results: Despite its gourmet taste, this stuffing recipe is remarkably straightforward to prepare. Clear, step-by-step instructions ensure success for cooks of all experience levels, allowing you to focus on enjoying the holidays rather than stressing in the kitchen.
- A Guaranteed Crowd-Pleaser: This stuffing recipe is a universal hit. Its comforting flavors and satisfying texture appeal to both adults and children, securing its place as a perennial favorite and the dish everyone looks forward to.
The Heart of the Holiday: Understanding Stuffing vs. Dressing
The terms “stuffing” and “dressing” are often used interchangeably, leading to good-natured debates around the holiday table. However, there’s a subtle yet important culinary distinction, particularly in how they are prepared. Traditionally, “stuffing” refers to a savory bread mixture that is cooked *inside* the cavity of a turkey or other poultry. As it cooks, it absorbs the rich juices and flavors directly from the bird, creating a deeply integrated taste.
On the other hand, “dressing” is prepared and baked *separately* in a casserole dish. While it features many of the same beloved ingredients and flavors, cooking it outside the bird offers distinct advantages that contribute to its consistent popularity:
- Enhanced Food Safety: Cooking dressing separately eliminates concerns about foodborne illness. Stuffing cooked inside a bird must reach a higher internal temperature (165°F / 74°C) to be safe, which can sometimes lead to an overcooked or dry turkey if not carefully managed. Dressing, cooked independently, offers peace of mind.
- Superior Texture Control: When baked in a dish, dressing develops that coveted golden, slightly crispy top crust that many adore. This textural contrast, with a perfectly tender and moist interior, is much harder to achieve when the mixture is confined within a bird. The exposed surface allows for wonderful caramelization.
- Consistent Moisture Level: You have precise control over the amount of broth and butter, allowing you to fine-tune the moisture level to your exact preference – from a drier, crumbly style to a lush, moist, almost “soggy” (in the best way) consistency. This consistency is often more challenging to regulate with traditional stuffing.
- Increased Quantity and Versatility: Preparing dressing in a separate baking dish allows you to make a much larger quantity, essential for feeding a hungry crowd during festive gatherings. Furthermore, it means you can easily create both a meat-based and a vegetarian version, catering to all guests without cross-contamination.
Our recipe proudly falls into the “dressing” category, embracing all the classic flavors while ensuring consistent, delectable results every time. This method simplifies your holiday meal prep and guarantees a perfect side dish.
Essential Ingredients for the Ultimate Stuffing: Flavor Profile Breakdown
The magic of a truly great homemade stuffing is built upon a foundation of simple, high-quality ingredients, each playing a crucial role in creating the layered flavors and varied textures that make this dish so incredibly satisfying. Understanding the contribution of each component helps in appreciating the harmony of the final dish and encourages creative substitutions.
- The Foundation: Dried Bread Cubes (8 cups)
The cornerstone of any great stuffing. Using stale or dried bread is paramount; fresh bread is too soft and will become soggy and dense. Rustic white bread, sourdough, or a good quality sandwich loaf that has been left out overnight or lightly toasted provides the ideal structure and absorption capability. The bread soaks up all the rich liquids and flavors without turning to mush, ensuring a delightful chewiness. - The Flavor Bomb: Bacon (5 slices, 140 grams)
While optional for a vegetarian version, bacon is a game-changer for depth of flavor. When diced and cooked, it renders savory fat that then becomes the cooking medium for the vegetables, infusing them with smoky, salty, and umami notes. The crispy bacon bits stirred back in add a delightful textural contrast. - The Richness Factor: Unsalted Butter (1 stick, 113 grams)
Butter is indispensable for that luxurious mouthfeel, golden crust, and overall richness. Using unsalted butter is recommended as it gives you complete control over the total salt content, especially when combining with bacon and salted broths. It’s the secret to that irresistible “buttery goodness.” - The Aromatic Core: Yellow Onion & Celery (1 onion, 2 ribs)
This classic duo forms the aromatic backbone, or soffritto, for most savory dishes. Finely diced, they soften and release their natural sugars when sautéed, building a sweet, savory, and earthy foundation. They are the quiet heroes that enhance every other flavor in the stuffing. - The Sweet Surprise: Optional Apple (1 apple)
A finely diced apple, such as Fuji or Honeycrisp, introduces a subtle, natural sweetness and a hint of fruitiness. This unexpected addition beautifully complements the savory elements, providing a refreshing counterpoint without overpowering the traditional flavors. It adds moisture and a delicate complexity. - The Essential Seasoning: Salt & Pepper (½ tsp salt, ¼ tsp pepper)
These fundamental seasonings are crucial for balancing and enhancing all the other ingredients. Start with the recommended amounts and taste the mixture before baking, adjusting as needed. Remember that bacon and broth will also contribute to the overall saltiness. Freshly ground black pepper offers a more vibrant flavor. - The Herbaceous Heart: Fresh Sage Leaves (5 grams) & Fresh Thyme Leaves (1 tsp)
These two herbs are the quintessential flavors of Thanksgiving. Fresh sage, with its earthy and slightly peppery notes, and fresh thyme, with its subtle lemon and mint undertones, infuse the entire dish with an unmistakable holiday aroma and taste. Finely chopped, they distribute their fragrance throughout. While dried herbs can be used, fresh provides a superior, more vibrant flavor. - The Binding Liquid: Unsalted Broth (1.5 cups)
Homemade chicken, vegetable, or even turkey broth is the liquid that brings all the elements together, moistening the bread cubes and infusing them with a deep, savory flavor. Using unsalted broth is key to controlling the overall seasoning of your stuffing. The amount can be adjusted based on your desired level of moisture.
Mastering Your Thanksgiving Stuffing: A Comprehensive Step-by-Step Guide
Crafting the perfect, moist, and flavorful stuffing is an achievable culinary goal, even for novice cooks. Follow these detailed steps carefully, and you’ll create a holiday side dish that everyone will adore. Remember, patience in each stage builds profound flavor.
- Step 1: Preheat the Oven and Meticulous Prep Work (Prep Time: 5 minutes)
Begin by preheating your oven to 375°F (190°C). This ensures your oven is at a consistent temperature when the stuffing goes in, leading to even baking. Next, dedicate time to finely dice your yellow onion and celery stalks. The smaller and more uniform the dice, the better they will meld into the stuffing and cook evenly. If you’re incorporating the optional apple, ensure it’s also finely chopped. For the bacon, dice it into small, manageable pieces. Finally, gather your 8 cups of bread cubes, confirming they are adequately dried or stale; this is a critical factor for the stuffing’s final texture. - Step 2: Render the Bacon and Build a Flavorful Base (Cook Time: 5-7 minutes)
In a generously sized, heavy-bottomed pan or skillet (a cast-iron skillet is ideal for even heat distribution), cook the diced bacon over medium heat. Fry until the bacon bits are beautifully golden and delightfully crispy. As the bacon cooks, it will render its fat, creating a wonderfully rich and savory base in the pan. Once the bacon reaches your desired crispiness, use a slotted spoon to transfer the cooked bits to a plate lined with paper towels, allowing excess grease to drain. Leave the rendered bacon fat in the pan—this is liquid gold for flavor! - Step 3: Sauté the Aromatics to Perfection (Cook Time: 3-5 minutes)
Reduce the heat in your pan to medium-low. Add the full stick of unsalted butter to the pan, allowing it to melt slowly and combine with the residual bacon fat. Once the butter is fully melted, add your finely chopped onion, celery, and the optional apple to the pan. Sauté this aromatic mixture gently. The goal here is to soften the vegetables until they become translucent and release their sweet, earthy aromas. Don’t rush this stage; allowing the vegetables to truly soften and lightly caramelize will build a profound and complex flavor foundation for your stuffing. - Step 4: Infuse with Fragrant Herbs and Season Generously (Cook Time: 1 minute)
Now, it’s time to add the soul of Thanksgiving stuffing: the fresh herbs. Stir in the finely chopped fresh sage and thyme into the sautéed vegetable mixture. At this point, add your initial seasoning of ½ teaspoon of salt and ¼ teaspoon of freshly ground black pepper. You have the flexibility to adjust these seasonings to your palate – whether you prefer to add them now or towards the end of the sautéing process. Continue to cook for just about one minute more, allowing the warmth of the pan to awaken the vibrant oils and aromas of the herbs. Then, remove the pan from the heat. - Step 5: Combine Ingredients and Achieve Optimal Moisture (Prep Time: 3 minutes)
In a very large mixing bowl, combine the sautéed aromatic mixture (including the flavorful bacon fat from the pan, if desired) with the crispy bacon bits and your dried bread cubes. Toss everything gently but thoroughly to ensure the bread cubes are evenly coated with the seasoned vegetables and herbs. Next, gradually pour in your preferred unsalted broth – whether it’s homemade chicken, vegetable, or turkey broth. Start with approximately 1.5 cups and add more in small increments if you prefer a moister stuffing (refer to Nonna’s Tip for guidance). Stir gently until the bread cubes are moistened but not overly saturated or mushy. The ideal consistency is when most bread pieces are damp and flavorful. - Step 6: Bake to a Golden-Brown Finish (Bake Time: 30-45 minutes)
Carefully transfer the entire stuffing mixture into your generously greased 9 by 13-inch casserole or baking dish. Spread the mixture out evenly to ensure consistent cooking. Place the dish into your preheated 375°F (190°C) oven. Bake for 30-45 minutes. The baking time may vary based on your oven’s calibration and your desired level of crispiness. Look for the top of the stuffing to turn a beautiful golden-brown hue, and the edges to be slightly crispy. The interior should be heated through and moist. - Step 7: The Final Touch for Extra Crispiness (Optional: 20-30 seconds Broil)
For that highly sought-after, extra-crispy top layer, you can briefly utilize your oven’s broil setting. Move the stuffing dish to the top rack and broil for the last 20-30 seconds. This step requires your undivided attention! Broilers work incredibly fast, and stuffing can go from perfectly golden to unfortunately burnt in mere seconds. Watch it constantly until the desired crispness is achieved, then remove immediately. - Step 8: Rest, Serve, and Savor
Once the stuffing is baked to perfection, remove it from the oven. Allow it to rest for about 5-10 minutes before serving piping hot. This resting period allows the flavors to further meld and the texture to set, making it easier to scoop and even more enjoyable to eat. Serve proudly alongside your other holiday favorites!
Nonna’s Essential Tip for Perfect Stuffing Texture
Achieving your preferred stuffing texture is arguably the most crucial step, and it all boils down to expertly managing the liquid content. The amount of broth you incorporate before baking will largely dictate how moist or crumbly your stuffing turns out. If you lean towards a drier, more distinct bread-crumbly stuffing, start with a slightly conservative amount of broth (perhaps 1.25 cups) and only add more if truly needed. Conversely, if your heart desires a more moist, tender, almost “soggy” (in the most delightful, flavorful sense!) stuffing, feel free to add a bit more liquid, ensuring the bread cubes are well-saturated but not swimming in broth. The dryness of your bread also plays a factor here—very stale bread will absorb more. Don’t be afraid to adjust gradually, tasting as you go, until it feels just right to you!
Pro Tip for Optimal Flavor: Always, always taste your stuffing mixture before it goes into the oven! This is your absolute last opportunity to correct and fine-tune seasonings like salt, pepper, or additional herbs. Remember that flavors often mellow slightly during the baking process, so a mixture that tastes a little boldly seasoned when raw will likely be perfect once baked.
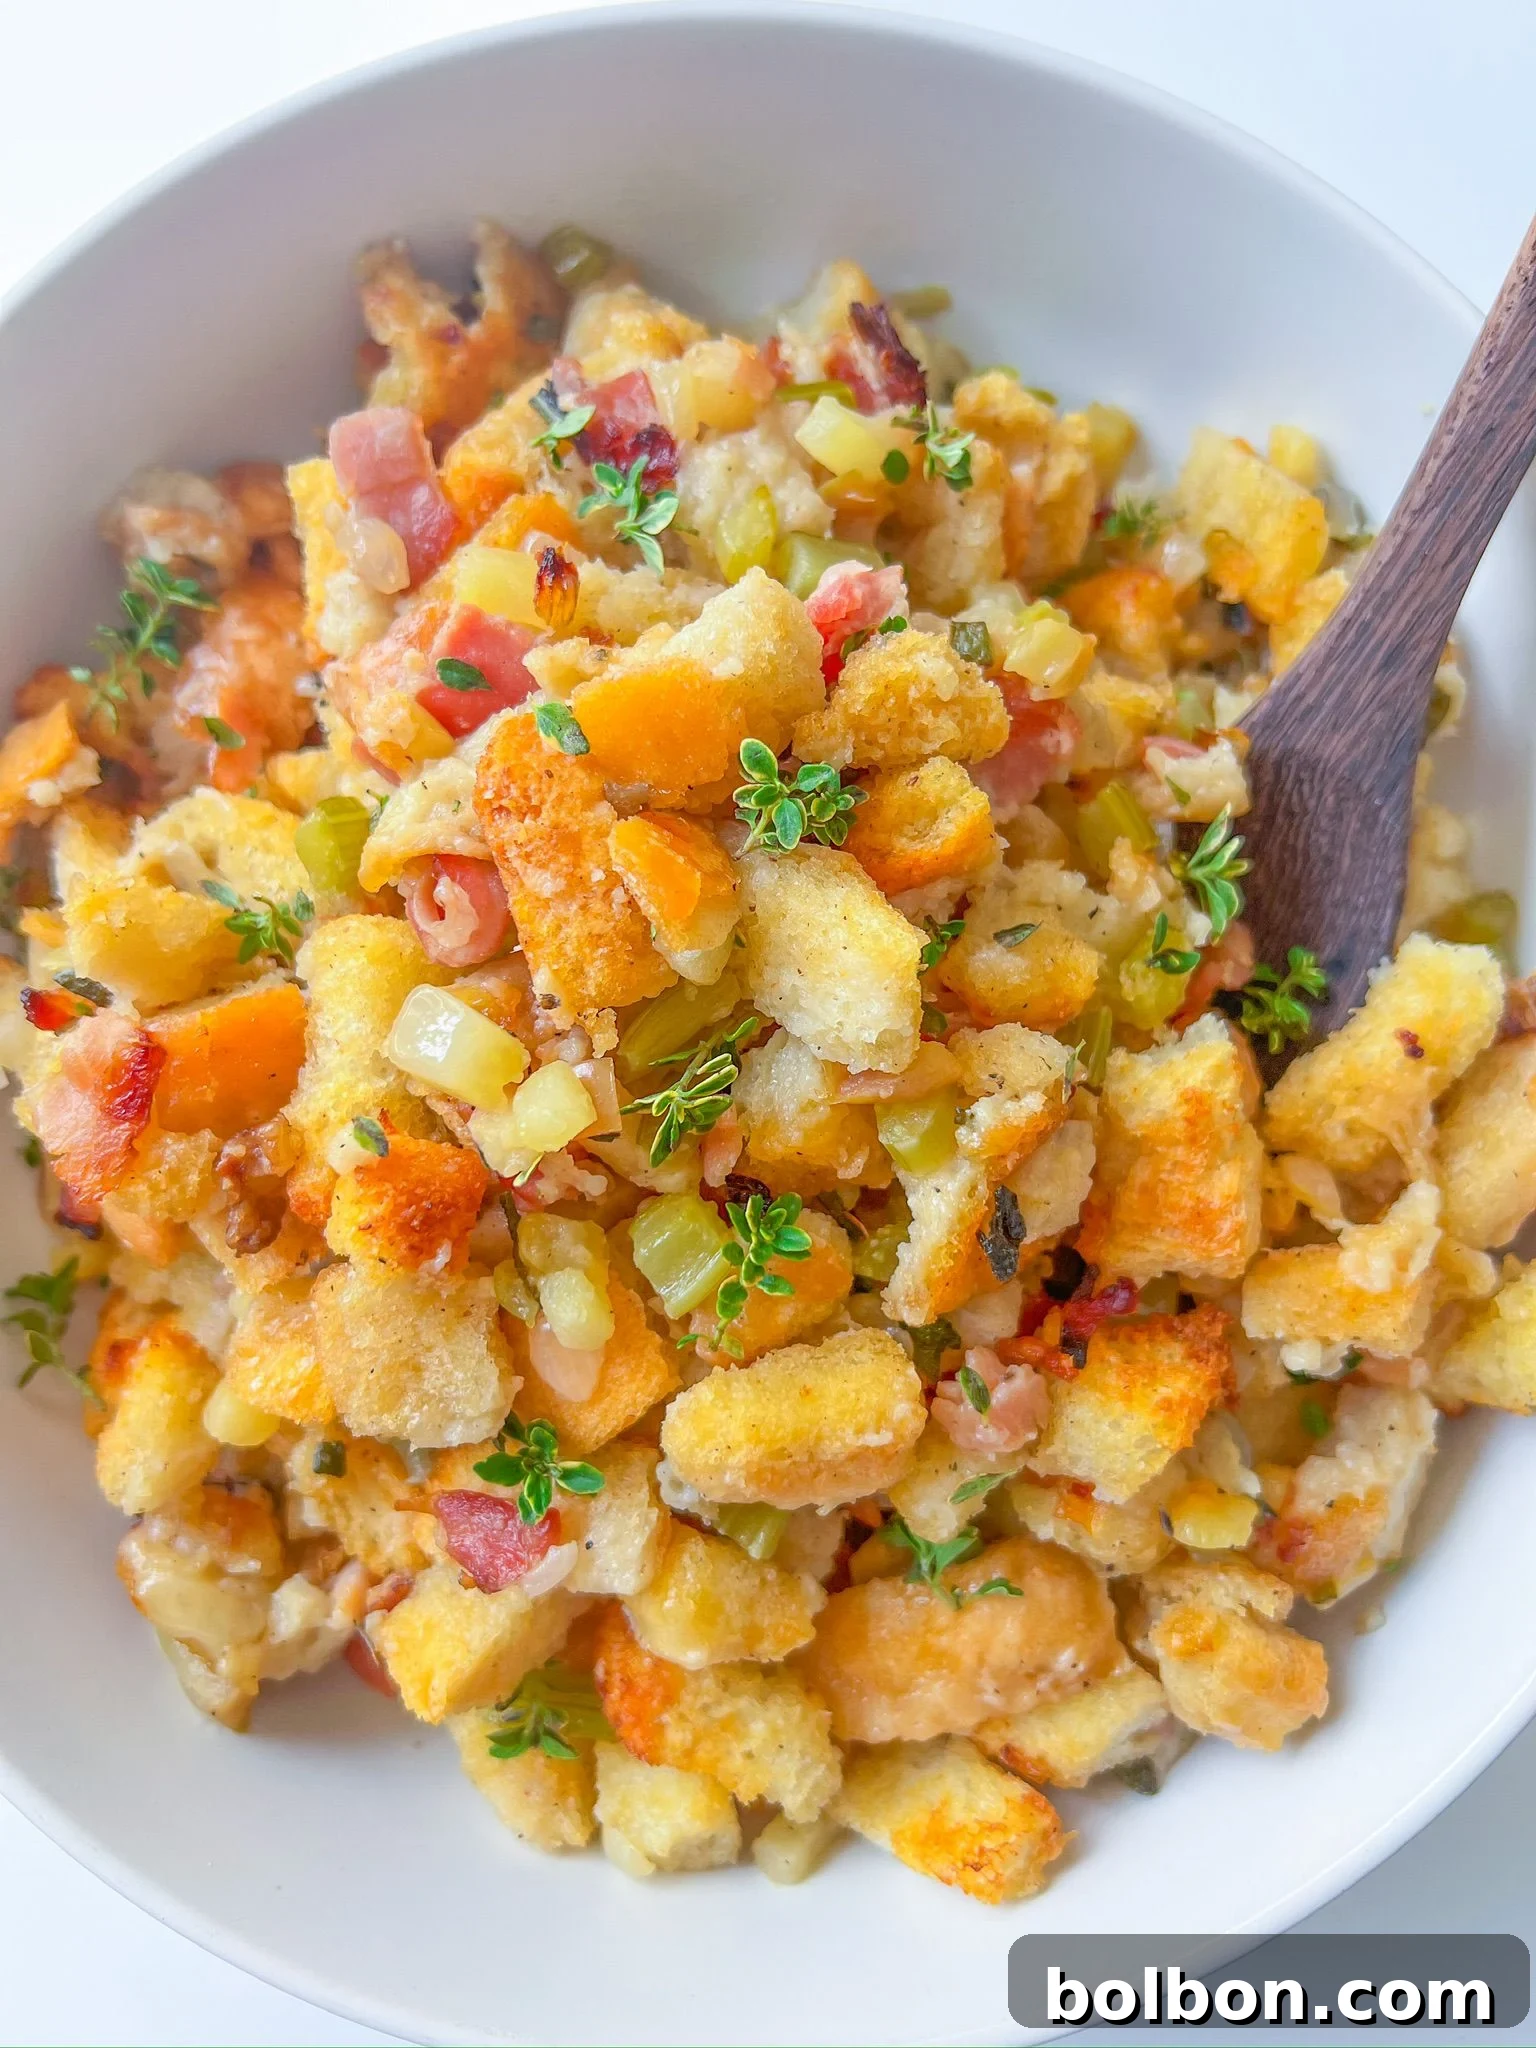
Endless Possibilities: Customizing Your Stuffing Recipe to Your Liking
One of the most appealing aspects of this classic Thanksgiving stuffing recipe is its incredible versatility. It serves as a perfect base that can be easily adapted to suit various dietary preferences, introduce new flavor dimensions, or simply utilize ingredients you already have on hand. Feel empowered to tailor this dish to your liking, transforming it into a unique and memorable standout on your holiday table or for any special occasion.
- Experiment with Different Breads for Unique Textures & Flavors: The choice of bread can dramatically alter the stuffing’s character.
- Sourdough Bread: Adds a delightful tang and a chewier texture that holds up well.
- Cornbread: Infuses a subtly sweet, slightly crumbly, and distinct Southern charm.
- Whole Wheat or Multigrain Bread: Offers a nuttier flavor profile and a heartier, more substantial texture.
- Challah or Brioche: Creates an incredibly rich, soft, and almost custardy stuffing, perfect for a truly decadent feel.
- Gluten-Free Bread: For guests with dietary restrictions, ensure you use certified gluten-free bread cubes and meticulously check that all other ingredients (such as broth and seasonings) are also gluten-free.
- Elevate with Protein or Keep it Vegetarian:
- Omit Bacon: To create a completely vegetarian stuffing, simply leave out the bacon. You can replace the bacon fat with an additional tablespoon or two of butter or olive oil for richness, and ensure you use vegetable broth.
- Add Savory Sausage: Diced sweet or spicy Italian sausage, cooked and crumbled before adding to the vegetables, contributes a robust, meaty flavor and makes the stuffing a heartier dish.
- Ground Meats: Cooked and seasoned lean ground turkey or chicken can be browned with the vegetables for an alternative protein boost.
- Mushroom Power: Sautéed wild mushrooms or finely diced cremini mushrooms add a wonderful umami depth and a “meaty” texture for a vegetarian-friendly option.
- Herb & Spice Enhancements for Aromatic Complexity:
- Dried vs. Fresh Herbs: While fresh sage and thyme are highly recommended for their vibrant taste, dried herbs can be used. Remember that dried herbs are more potent; as a general rule, use about one-third of the amount of fresh herbs.
- Additional Herbs: Introduce finely chopped fresh rosemary for a piney, earthy note, or fresh parsley for a touch of bright, peppery freshness. Marjoram also pairs exceptionally well with traditional poultry flavors.
- Warm Spices: A tiny pinch of ground nutmeg, a dash of allspice, or a hint of smoked paprika can add subtle complexity and warmth to the overall flavor profile.
- Boost Your Vegetable Variety:
- Beyond the classic onions and celery, consider incorporating other finely diced vegetables such as carrots, colorful bell peppers (red, yellow, or orange for visual appeal), leeks for a milder onion flavor, or additional sautéed mushrooms for extra flavor, texture, and nutrients.
- Sweet and Savory Notes:
- Dried Fruits: For a delightful touch of sweetness and chewiness, stir in dried cranberries (often called craisins), golden raisins, or finely chopped dried apricots with the bread cubes. These burst with flavor and moisture.
- Nuts: Toasted pecans, walnuts, or chestnuts add a wonderful crunch and a rich, earthy, nutty flavor that complements the savory herbs beautifully.
- Alternative Liquids for Added Depth:
- While chicken or vegetable broth are standard, feel free to use homemade turkey broth (especially if you have it from a previous roast) or a rich mushroom broth for an even deeper, more earthy flavor. A small splash of dry white wine or apple cider, cooked down with the vegetables, can also add an intriguing layer of acidity and sweetness.
Pro Tips for Stuffing Perfection: Secrets to a Flawless Side Dish
Achieving truly exceptional Thanksgiving stuffing involves more than just following the steps; it’s about understanding the subtle nuances that elevate your dish from good to unforgettable. Incorporate these pro tips into your cooking process for a consistently flawless side dish:
- The Golden Rule: Use Stale or Dried Bread: This is arguably the most critical tip. Fresh bread contains too much moisture and is too soft, leading to a gummy, dense, or mushy stuffing that lacks structure. Day-old bread, or bread that has been cut into cubes and lightly toasted in a low oven (around 250°F / 120°C for 15-20 minutes) until dried out, is ideal. It acts like a sponge, perfectly absorbing the flavorful broth and retaining its texture.
- Avoid Overmixing: Once you’ve added the broth to your bread and vegetable mixture, mix just enough to ensure all the bread cubes are moistened. Overmixing can crush the bread, releasing starches that result in a heavy, dense, and unappealing texture rather than the desired light, fluffy interior with a crispy exterior. Use a gentle hand or a large spoon.
- Always Taste and Adjust Seasoning Before Baking: This is your final opportunity to perfect the flavor. Since this recipe doesn’t contain raw eggs, you can safely taste a small portion of the mixture before it goes into the oven. Adjust salt, pepper, or add a pinch more herbs as needed. Remember, flavors can sometimes mellow during baking, so a slightly bold seasoning upfront often translates to perfection post-bake.
- Generously Butter the Baking Dish: Don’t skimp on this step! Generously greasing your casserole dish with butter not only prevents the stuffing from sticking but also contributes significantly to those coveted crispy, buttery edges and a rich, golden crust. It adds another layer of delicious flavor.
- Master the Art of Covering vs. Uncovering: Your choice here impacts the final texture. For a moister stuffing throughout, cover the dish tightly with aluminum foil for the majority of the baking time, uncovering only for the last 10-15 minutes to allow the top to brown. For maximum crispiness all over, bake uncovered from the start. Our recipe strikes a good balance by starting uncovered and suggesting a brief broil at the end for ultimate crunch.
- Allow for Resting Time After Baking: Like a perfectly roasted turkey or a tender steak, stuffing benefits from a short resting period after it comes out of the oven. Letting it sit for 5-10 minutes allows the internal steam to redistribute, the flavors to meld further, and the texture to set, making it easier to scoop and even more enjoyable to eat.
- Pre-Sauté Your Vegetables Thoroughly: Don’t rush the sautéing of your onions, celery, and apple. Cooking them until they are genuinely soft and translucent, perhaps even lightly caramelized, unlocks their full flavor potential, which will deeply infuse the entire stuffing.
Serving Suggestions and Leftover Magic: Extending the Delight
This versatile Thanksgiving stuffing isn’t just a once-a-year dish; it’s a fantastic accompaniment to a variety of meals and truly shines in its own right, especially when it comes to creative uses for leftovers. Don’t let a single delicious crumb go to waste!
- Classic Holiday Pairings:
- The Ultimate Thanksgiving Feast: Naturally, this stuffing is the quintessential partner for roasted turkey, glazed ham, or a succulent roast chicken. Serve it alongside creamy mashed potatoes, rich homemade gravy, tangy cranberry sauce, and other roasted root vegetables for a complete, traditional festive meal.
- Beyond the Bird: It’s also an excellent side for roasted pork loin, grilled sausages, or even a hearty vegetarian main course like a mushroom Wellington.
- Elevate Everyday Meals:
- Sunday Roast Companion: Don’t reserve this flavor for holidays! It makes a superb side dish for a casual Sunday roast chicken or beef, elevating a simple family meal into something special.
- Weeknight Wonder: Serve a small portion alongside pan-seared pork chops or a juicy steak for an unexpected burst of savory, comforting flavor.
- Creative Leftover Ideas (The Magic Continues!):
- The Legendary Leftover Sandwich: Layer cold stuffing with slices of leftover turkey, a smear of cranberry sauce, and a drizzle of gravy between two slices of bread for the ultimate post-Thanksgiving sandwich experience.
- Crispy Stuffing Waffles: Press leftover stuffing into a hot waffle maker until golden and crispy. These savory waffles are surprisingly delicious and a fun, innovative twist for breakfast or brunch, often served with a fried egg.
- Stuffing Patties or Fritters: Form cooled leftover stuffing into small patties and pan-fry them in a little butter or oil until crispy on both sides. Serve them as a side, with a dollop of applesauce, or alongside a fried egg for breakfast.
- Savory Casserole Topping: Use leftover stuffing as a flavorful and textural topping for other casseroles, such as chicken pot pie or shepherd’s pie, instead of mashed potatoes or pastry.
- Stuffing Stuffed Vegetables: Hollow out bell peppers or large mushrooms and fill them with leftover stuffing, then bake until heated through and tender.
Other Holiday Recipes to Complete Your Feast
Planning your ultimate holiday menu? These complementary recipes will help you create an unforgettable spread that perfectly pairs with your delicious homemade stuffing:
- Rich & Velvety Homemade Gravy
- Tangy & Sweet Cranberry Sauce
- Perfectly Juicy Thanksgiving Turkey
- Creamy Baked Mac and Cheese
- Sweet Potato Donuts
- Classic Pumpkin Pie
- Crispy Brussels Sprouts with Bacon
- Herb Roasted Sweet Potatoes
- Creamy Garlic Mashed Potatoes
- Simple Roasted Delicata Squash
- Hearty Turkey Noodle Soup (Great for Leftovers!)
- Creamy Butternut Squash Pasta
- Warm Spiced Baked Apples
- Perfectly Sautéed Mushrooms
- Crisp Asian-Style Green Beans
- Whole Roasted Sweet Potato
Common Questions about Thanksgiving Stuffing
Yes, absolutely! Preparing components of your stuffing ahead of time is a fantastic way to minimize holiday stress and streamline your cooking on the big day. You have two main options for making it in advance:
- Fully Assembled, Unbaked: You can follow all the steps of the recipe up to the point of baking. Transfer the fully assembled stuffing mixture into your greased baking dish, cover it tightly with aluminum foil, and refrigerate it for up to 24 hours. When you’re ready to serve, simply bake it in a preheated oven as directed, allowing an additional 10-15 minutes of baking time since it will be going into the oven cold from the fridge.
- My Preferred Method (Partial Prep): For the freshest taste and best texture, I recommend chopping and sautéing all the vegetables (onion, celery, apple) with the butter and bacon a day or two in advance. Let this flavorful mixture cool completely, then store it in an airtight container in the refrigerator. The following day, simply combine the cooled vegetable mixture with the dried bread cubes and broth, then proceed with baking as per the instructions. This method keeps the bread fresher and allows for quicker, more efficient assembly on Thanksgiving Day.
Absolutely! This homemade stuffing freezes exceptionally well, allowing you to savor the flavors of the holidays long after the main event. Ensure the leftover stuffing cools completely to room temperature before freezing. Portion it into airtight freezer-safe containers or heavy-duty freezer bags, pressing out as much air as possible to prevent freezer burn. It can be stored in the freezer for up to 2-3 months without a significant loss of quality or flavor. To reheat, transfer the frozen stuffing to the refrigerator overnight to thaw. Once thawed, you can reheat it in the oven (covered with foil at 350°F until warmed through), or in the microwave in short intervals, stirring occasionally, until heated evenly. Adding a splash of extra broth or water before reheating can help restore moisture and prevent drying out.
Certainly! This Thanksgiving stuffing recipe is designed to be highly adaptable to your personal taste preferences. Feel free to adjust the seasonings as you see fit to create your perfect flavor profile. If you prefer a stuffing with a bit more kick, consider adding a touch more freshly ground black pepper, a pinch of cayenne pepper, or a dash of red pepper flakes during the sautéing process. These will provide a subtle warmth and heat. Conversely, if you prefer a milder flavor, simply reduce the amount of salt and pepper used from the recommended quantities. Remember to taste the mixture before baking to ensure it’s seasoned perfectly to your liking – this is your last chance to fine-tune!
Reheating leftover stuffing effectively ensures it remains moist, flavorful, and develops that delightful crispy exterior once again. You have a few great options, depending on your desired outcome and available kitchen equipment:
- Oven Method (Recommended for Best Texture): This is generally the preferred method for reheating, as it helps maintain moisture while re-crisping the exterior. Preheat your oven to 350°F (175°C). Place the stuffing in an oven-safe dish, adding a tablespoon or two of broth or water to the dish to prevent it from drying out. Cover the dish tightly with aluminum foil to trap moisture. Bake for 20-30 minutes, or until it’s heated through to your satisfaction. For a crispy top, remove the foil for the last 5-10 minutes of reheating.
- Microwave Method (Quickest): For a quicker reheat, especially for individual portions, place the stuffing in a microwave-safe dish. Add just a tiny splash of broth or water (about a teaspoon) and cover the dish with a damp paper towel or microwave-safe lid. Heat in short 1-minute intervals, stirring in between to ensure even heating, until it’s warmed through. Be careful not to overheat, as this can easily make the stuffing dry.
- Stovetop Method (Good for Crispy Bits): If you enjoy some extra crispy bits, the stovetop is a great option for smaller portions. Place the stuffing in a non-stick pan over medium-low heat. Add a bit of broth or water to prevent drying. Stir occasionally, gently breaking up the stuffing, until it’s heated through. You can let it sit undisturbed for a minute or two to develop some delicious caramelized, crispy patches on the bottom.
The ideal bread for crafting a truly exceptional stuffing is typically day-old or stale bread. This is crucial because dry bread acts like a sponge, readily absorbing the flavorful broth and aromatic liquids without collapsing into a mushy texture. Good choices include rustic white loaves, Italian bread, French bread, sourdough, or even a basic firm sandwich bread. The key is to avoid very fresh, soft, or extremely dense breads that may not hold their shape or absorb moisture effectively. If your bread is fresh, simply cut it into 1-inch cubes and spread them on a baking sheet. Then, toast them in a low oven (around 250°F / 120°C) for about 15-20 minutes, stirring occasionally, until they are dried out but not overly browned. This quick drying step will vastly improve your stuffing’s texture.
Best Thanksgiving Stuffing Recipe
⭐
⭐
⭐
⭐
Facebook Share
Rate Recipe
Print Recipe
Recipe Video
Watch a video demonstration of how to make this Best Thanksgiving Stuffing Recipe:
Click here to watch the full recipe video

Equipment
Ingredients for 6 servings
- 5 slices bacon, 140 grams, finely diced (optional)
- 1 stick unsalted butter, 113 grams
- 1 yellow onion, finely diced
- 2 celery ribs, finely diced
- 1 apple, optional, finely diced (e.g., Fuji or Honeycrisp for sweetness)
- ½ teaspoon salt, to taste
- ¼ teaspoon freshly ground black pepper, to taste
- 5 grams fresh sage leaves, (approximately 1/4 cup chopped)
- 1 teaspoon fresh thyme leaves, (finely chopped)
- 8 cups bread cubes, dried or stale rustic white bread, sourdough, or similar
- 1.5 cups unsalted broth , homemade chicken, vegetable, or turkey broth; adjust for desired moisture
Instructions for the Best Stuffing
-
Preheat your oven to 375°F (190°C). Finely dice the yellow onion, celery stalks, bacon (if using), and the optional apple. Ensure your 8 cups of bread cubes are dried or stale.
-
In a large, heavy-bottomed pan over medium heat, cook the diced bacon until it’s golden and crispy. Remove the bacon bits to a paper towel-lined plate, leaving the rendered fat in the pan. If omitting bacon, add 1-2 tablespoons of butter or olive oil.
-
Reduce the heat to medium-low. Add the full stick of unsalted butter to the pan (if not already present from bacon fat), allowing it to melt. Add the finely diced onion, celery, and apple (if using) to the pan.
-
Sauté the vegetable mixture gently for 3-5 minutes, or until the vegetables are soft and translucent, releasing their aromatic flavors. This step is crucial for building a rich flavor base.
-
Stir in the finely chopped fresh sage and thyme, along with the salt and freshly ground black pepper. Cook for an additional minute to allow the herb flavors to bloom. Remove the pan from the heat.
-
In a very large mixing bowl, combine the sautéed vegetable and herb mixture (and the crispy bacon bits, if using) with the dried bread cubes. Toss everything gently to ensure even distribution.
-
Gradually pour in 1.5 cups of your preferred unsalted broth, stirring gently until the bread cubes are thoroughly moistened. Adjust the amount of broth to achieve your desired moisture level (refer to Nonna’s Tip).
-
Transfer the entire stuffing mixture into a generously greased 9 by 13-inch casserole or baking dish, spreading it out evenly.
-
Bake in the preheated 375°F (190°C) oven for 30-45 minutes, or until the top is beautifully golden brown and the stuffing is heated through and bubbling.
-
For an extra crispy top, carefully switch to the broil setting for the last 20-30 seconds. Watch it very closely to prevent burning. Serve this delectable dish piping hot and enjoy!
Nutrition Information (per serving, approx.)
Carbohydrates: 42g,
Protein: 12g,
Fat: 26g,
Saturated Fat: 13g,
Polyunsaturated Fat: 3g,
Monounsaturated Fat: 8g,
Trans Fat: 1g,
Cholesterol: 53mg,
Sodium: 690mg,
Potassium: 261mg,
Fiber: 4g,
Sugar: 8g,
Vitamin A: 502IU,
Vitamin C: 3mg,
Calcium: 108mg,
Iron: 3mg
Nutrition information is automatically calculated and should be used as an approximation only, as values can vary based on specific ingredients and preparation methods.