The Best & Easiest Homemade Peanut Butter: A Recipe You’ll Never Forget
Are you ready to transform your pantry staples into a creamy, dreamy delight that will make you ditch store-bought varieties forever? This guide reveals how to make the best and easiest homemade peanut butter right in your own kitchen. Prepare for a revelation!
My Journey to the Ultimate Homemade Peanut Butter
My love affair with peanut butter started early. I confess, it’s been a lifelong, unwavering obsession. There was a time when I’d happily eat it straight from the jar with a spoon – a habit I only realized was peculiar when my college roommate looked at me in sheer astonishment. For years, I gravitated towards conventional, sweetened supermarket peanut butter, preferring it over the “natural” versions that often separated into an oily, gloopy mess. That all changed the moment I discovered the magic of making my own.
On this blog, I’ve previously shared recipes for other delightful nut spreads, such as this incredible Cashew Butter and a richly flavored Toasted Coconut Almond Butter. But I’m genuinely surprised it took me this long to finally share the recipe for the spread I prepare most frequently in my home: this incredibly simple and utterly delicious homemade peanut butter. It’s a game-changer.
Jump to Recipe
Why Homemade Peanut Butter Reigns Supreme
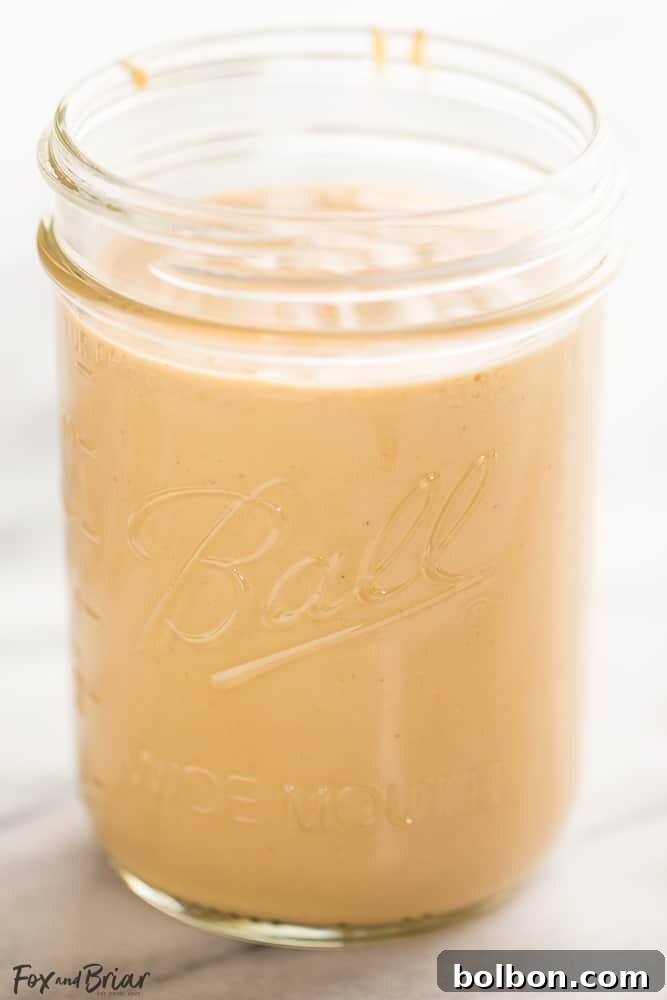
I can confidently tell you that this homemade peanut butter surpasses anything you’ll find on a grocery store shelf. The secret lies in perfectly roasted peanuts combined with just the right touch of salt. The result is a lusciously smooth, spreadable consistency that stays perfect straight from the fridge, without the frustrating oil separation often found in natural store-bought brands. Since I began making my own about five years ago, I can count on one hand the number of times I’ve purchased a jar from the store. It’s incredibly easy, surprisingly quick, and the taste is immeasurably superior.
Beyond the phenomenal taste and texture, crafting your own peanut butter offers several compelling benefits:
- Control Over Ingredients: You dictate what goes in. No added sugars, unhealthy oils, or preservatives. Just pure peanuts and a pinch of salt.
- Unmatched Freshness: The flavor of freshly made peanut butter is incomparable. The vibrant, nutty aroma and taste are simply divine.
- Cost-Effective: Buying raw or roasted peanuts in bulk is often more economical than purchasing premium natural peanut butter.
- Dietary Customization: Easily adjust salt levels, add sweeteners, or experiment with different flavor profiles to suit your personal preferences or dietary needs.
- Simple & Rewarding: The process itself is surprisingly straightforward, requiring minimal effort for maximum reward. It’s a fantastic kitchen project for beginners and seasoned cooks alike.
The Simple Secrets to the Best Homemade Peanut Butter
My recipe relies on a few key tricks to achieve that unparalleled flavor and perfect consistency:
- Choose the Right Peanuts: Opt for roasted unsalted peanuts – but not dry roasted. The distinction is crucial. Roasted peanuts that aren’t dry roasted retain a slight hint of their natural oils, which is essential for achieving that silky-smooth texture without needing to add extra oil.
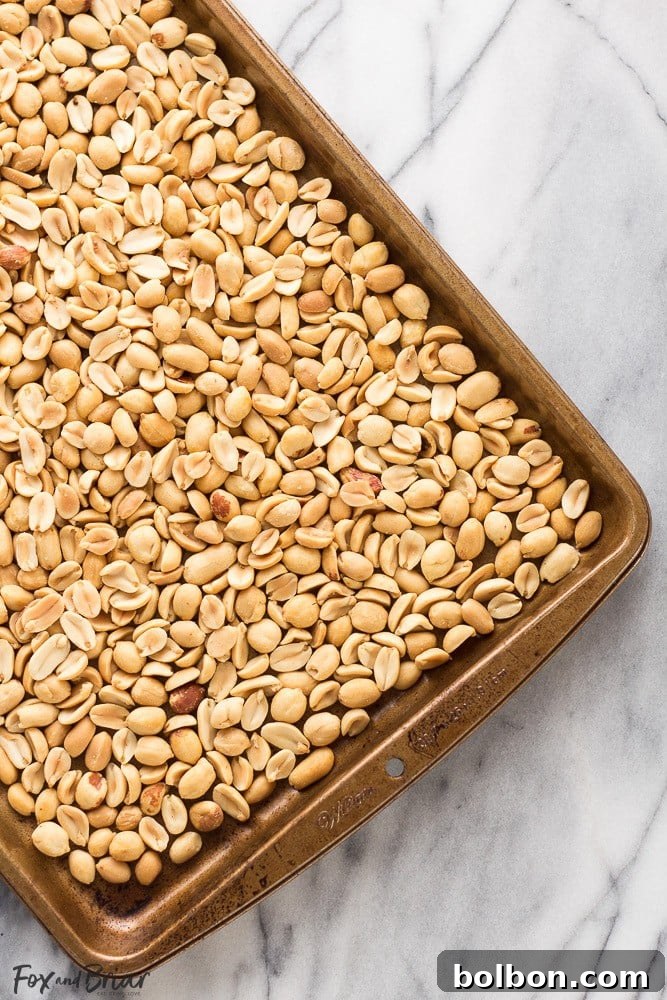
- Double Roasting for Deep Flavor: Even though the peanuts are already roasted, I highly recommend a quick re-roast in your oven for about 20 minutes. This step is a game-changer! It intensifies their nutty flavor, making your peanut butter incredibly aromatic and delicious. Watch them carefully, aiming for a slightly darker hue and a wonderfully fragrant aroma filling your kitchen.
- Salt to Taste: Starting with unsalted peanuts gives you complete control over the seasoning. I typically add between 1/4 to 1/2 teaspoon of salt, tasting and adjusting as needed. This allows you to achieve that perfect balance of sweet and savory that elevates the peanut butter experience.
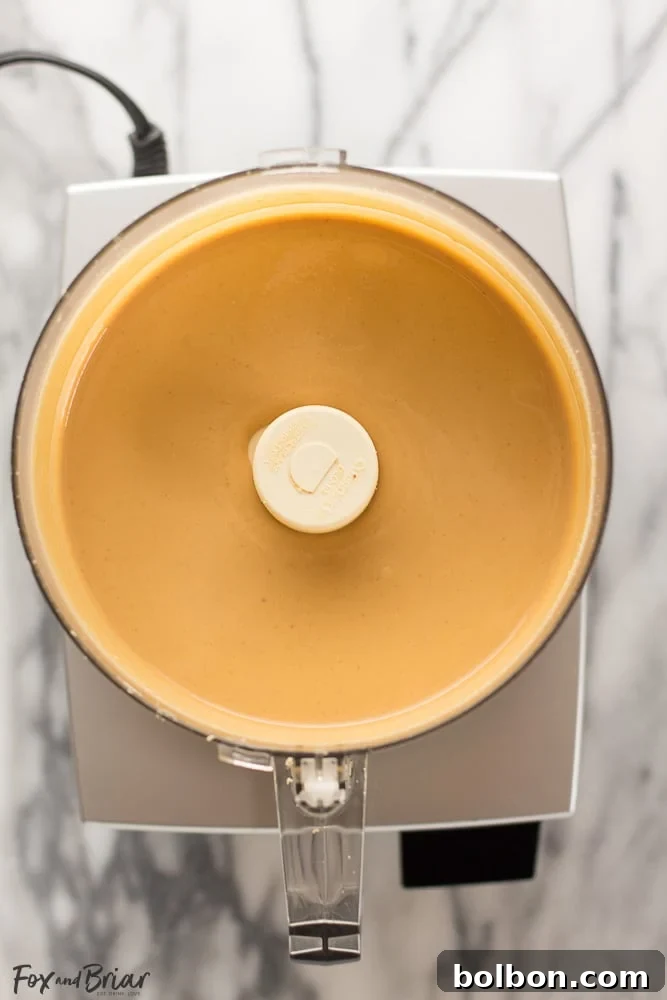
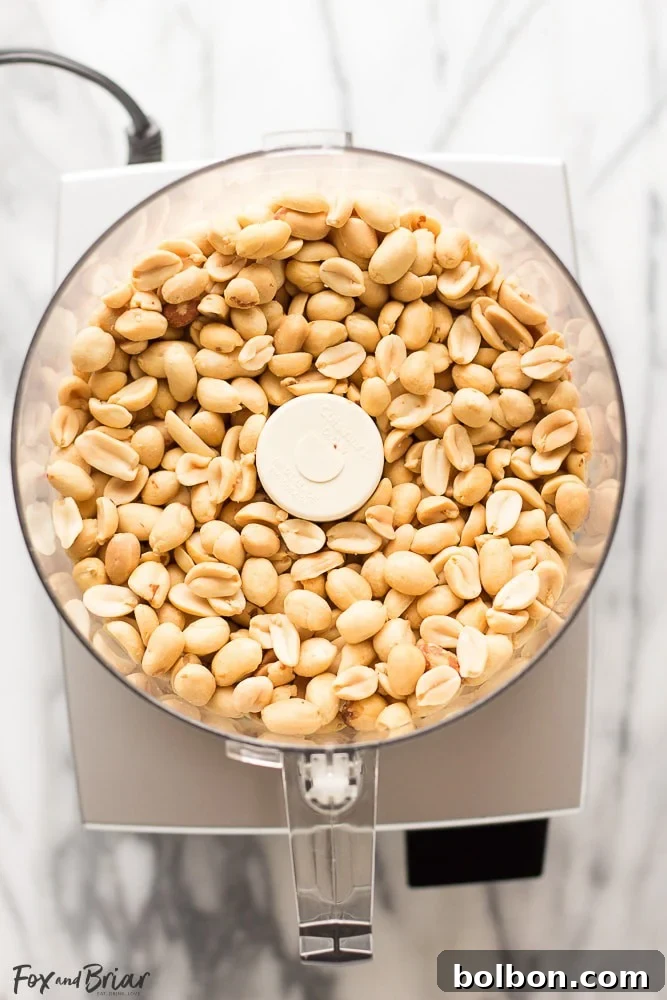
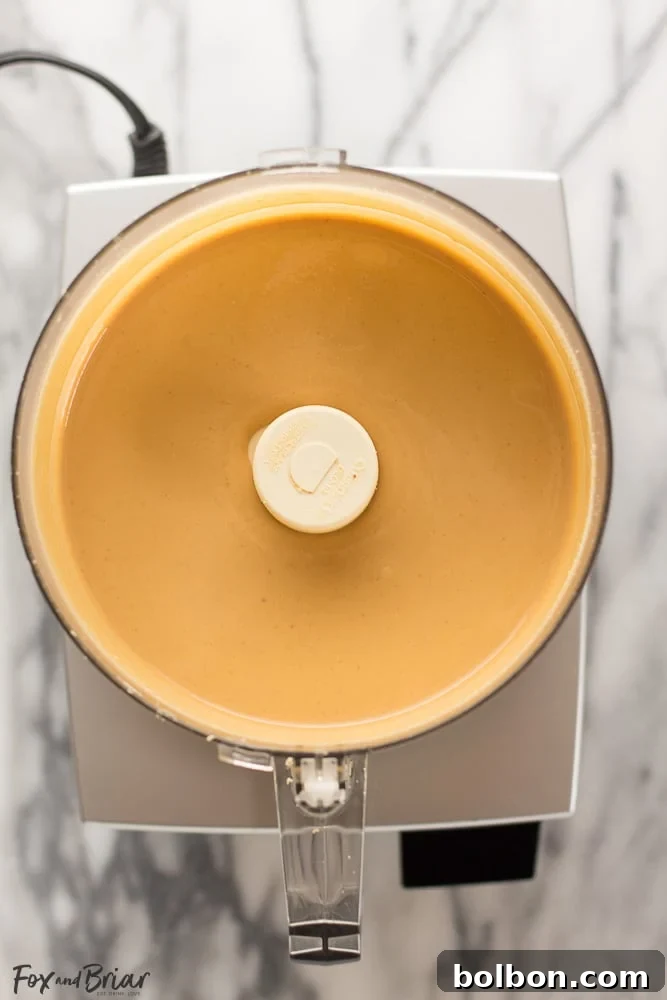
- Patience with the Food Processor: The transformation from whole peanuts to creamy butter happens right before your eyes in a good food processor. It takes about five minutes, but you’ll witness several stages:
- Crumbly: The peanuts will first break down into coarse crumbs.
- Sticky Ball: They’ll then clump together, forming a sticky ball that rotates around the blade.
- Thick Paste: Slowly, this ball will begin to break down into a thick, pasty consistency.
- Creamy & Smooth: Finally, as the oils release, the mixture will become beautifully smooth, shiny, and pourable. Resist the urge to add oil if it seems too thick – just keep processing!
Once your homemade peanut butter reaches that luscious, creamy stage in the food processor, feel free to grab a spoon and taste test! I certainly won’t judge – it’s practically irresistible at this point.
The Best and Easiest Homemade Peanut Butter Recipe
By Meghan McMorrow | Fox and Briar
Prep time: 5 minutes
Cook time: 20 minutes
Total time: 25 minutes
Servings: Approximately 32 servings (16 oz jar)
Print Recipe
Learn how to make rich, creamy homemade peanut butter in just 25 minutes! This easy recipe uses only two ingredients and tastes far better than any store-bought variety.
Ingredients
- 16 ounces roasted unsalted peanuts (not dry roasted)
- 1/4 – 1/2 teaspoon salt, or to taste
Equipment
- Baking sheet
- Food processor
- 16-ounce jar with lid for storage
Instructions
- Preheat your oven to 250°F (120°C). Spread the roasted unsalted peanuts evenly in a single layer on a baking sheet.
- Roast the peanuts for about 20 minutes, or until they are slightly darker in color and release a wonderfully fragrant, warm aroma. This step enhances their natural flavor significantly.
- Carefully transfer the warm roasted peanuts to the bowl of a food processor. Process for 3 to 5 minutes. During this time, the peanuts will go through several stages: from coarse crumbs to a sticky ball, then a thick paste, and finally a smooth, creamy butter as their natural oils are released. Be patient and allow the food processor to work its magic.
- Once the peanut butter has reached a creamy, spreadable stage, add 1/4 teaspoon of salt. Process for another minute to fully incorporate. Taste and add more salt in small increments (up to 1/2 teaspoon total) until you achieve your desired flavor.
- Pour the freshly made peanut butter into a clean 16-ounce jar with a tight-fitting lid. Refrigerate immediately. Enjoy your superior homemade spread!
Nutrition (per serving)
(Based on 32 servings per 16oz batch)
- Calories: 19 kcal
- Protein: 3g
- Fat: 1g
- Saturated Fat: 1g
- Cholesterol: 9mg
- Sodium: 25mg
- Potassium: 53mg
- Calcium: 1mg
- Iron: 0.1mg
Nutrition information is automatically calculated and should be used as an approximation.
Additional Info
- Course: Breakfast, Brunch, Dips/Spreads, Snacks
- Cuisine: American
Tips for Perfect Homemade Peanut Butter Every Time
Making peanut butter at home is straightforward, but a few pointers can ensure consistent success:
- Don’t Add Oil (Unless Necessary): The key to natural, creamy peanut butter is allowing the peanuts’ own oils to release. Resist the urge to add external oil too early. Only if your peanut butter is extremely stiff after 5-7 minutes of processing, and your food processor is struggling, consider adding a tablespoon of neutral oil (like grapeseed or peanut oil) at a time, but this is rarely needed with good quality, roasted unsalted peanuts.
- Adjust Texture:
- For extra creamy peanut butter, process for a few more minutes until it’s super smooth.
- For chunky peanut butter, reserve about 1/4 cup of the roasted peanuts. Pulse them briefly in the food processor first until coarsely chopped, then set aside. Process the remaining peanuts until creamy, then stir in the reserved chopped peanuts by hand at the end.
- Flavor Variations:
- Sweetened: Add 1-2 tablespoons of honey, maple syrup, or powdered sugar along with the salt.
- Spicy: A pinch of cayenne pepper or a small dash of chili oil can add an exciting kick.
- Chocolate Peanut Butter: Melt 2-3 tablespoons of dark chocolate and add it to the food processor during the last minute of processing.
- Vanilla Bean: Scrape the seeds from half a vanilla bean into the food processor for a gourmet touch.
- Food Processor Power: A good quality food processor with a strong motor is essential. Lesser models might overheat or struggle to achieve the desired creamy consistency.
- Scrape Down the Sides: Periodically stop your food processor and scrape down the sides with a spatula to ensure all peanuts are evenly processed.
Storage Suggestions
Homemade peanut butter, free from preservatives, requires proper storage to maintain its freshness and quality:
- Refrigeration: Always store your homemade peanut butter in an airtight jar or container in the refrigerator. This is crucial for extending its shelf life.
- Shelf Life: When refrigerated, homemade peanut butter can last for up to 3-4 weeks. Always check for any off smells or mold before consuming.
- Separation: While this recipe is designed to minimize separation, a slight amount of oil might rise to the top over time. Simply stir it back in before serving.
Ways to Enjoy Your Freshly Made Peanut Butter
Beyond the classic PB&J, homemade peanut butter elevates countless dishes:
- Classic Spreads: On toast, bagels, rice cakes, or English muffins.
- Smoothies: Add a dollop for protein and creaminess.
- Baking: Perfect for cookies, brownies, or energy balls.
- Sauces: Use as a base for savory Asian-inspired dressings or dipping sauces for spring rolls or chicken satay.
- Snacks: Paired with apple slices, banana, celery sticks, or pretzels.
- Oatmeal & Yogurt: Stir into your morning oatmeal or swirl into yogurt for added flavor and healthy fats.
Join the Homemade Peanut Butter Revolution!
Once you experience the rich, authentic flavor and incredible freshness of homemade peanut butter, you’ll wonder why you ever bought it from the store. It’s a simple pleasure that delivers immense satisfaction and superior taste. Give this easy recipe a try, and prepare to be amazed!
Did you love this recipe? Please comment, rate, and share! I always adore seeing your creations. Don’t forget to tag me on Instagram @foxandbriar and use the hashtag #foxandbriar so I can see what you made. You might even be featured in our weekly Reader Feature!
If you make this recipe, don’t forget to tag @foxandbriar and #foxandbriar on Instagram and Facebook! I genuinely love to see what you create and there’s a chance you could be featured in our weekly Reader Feature!