
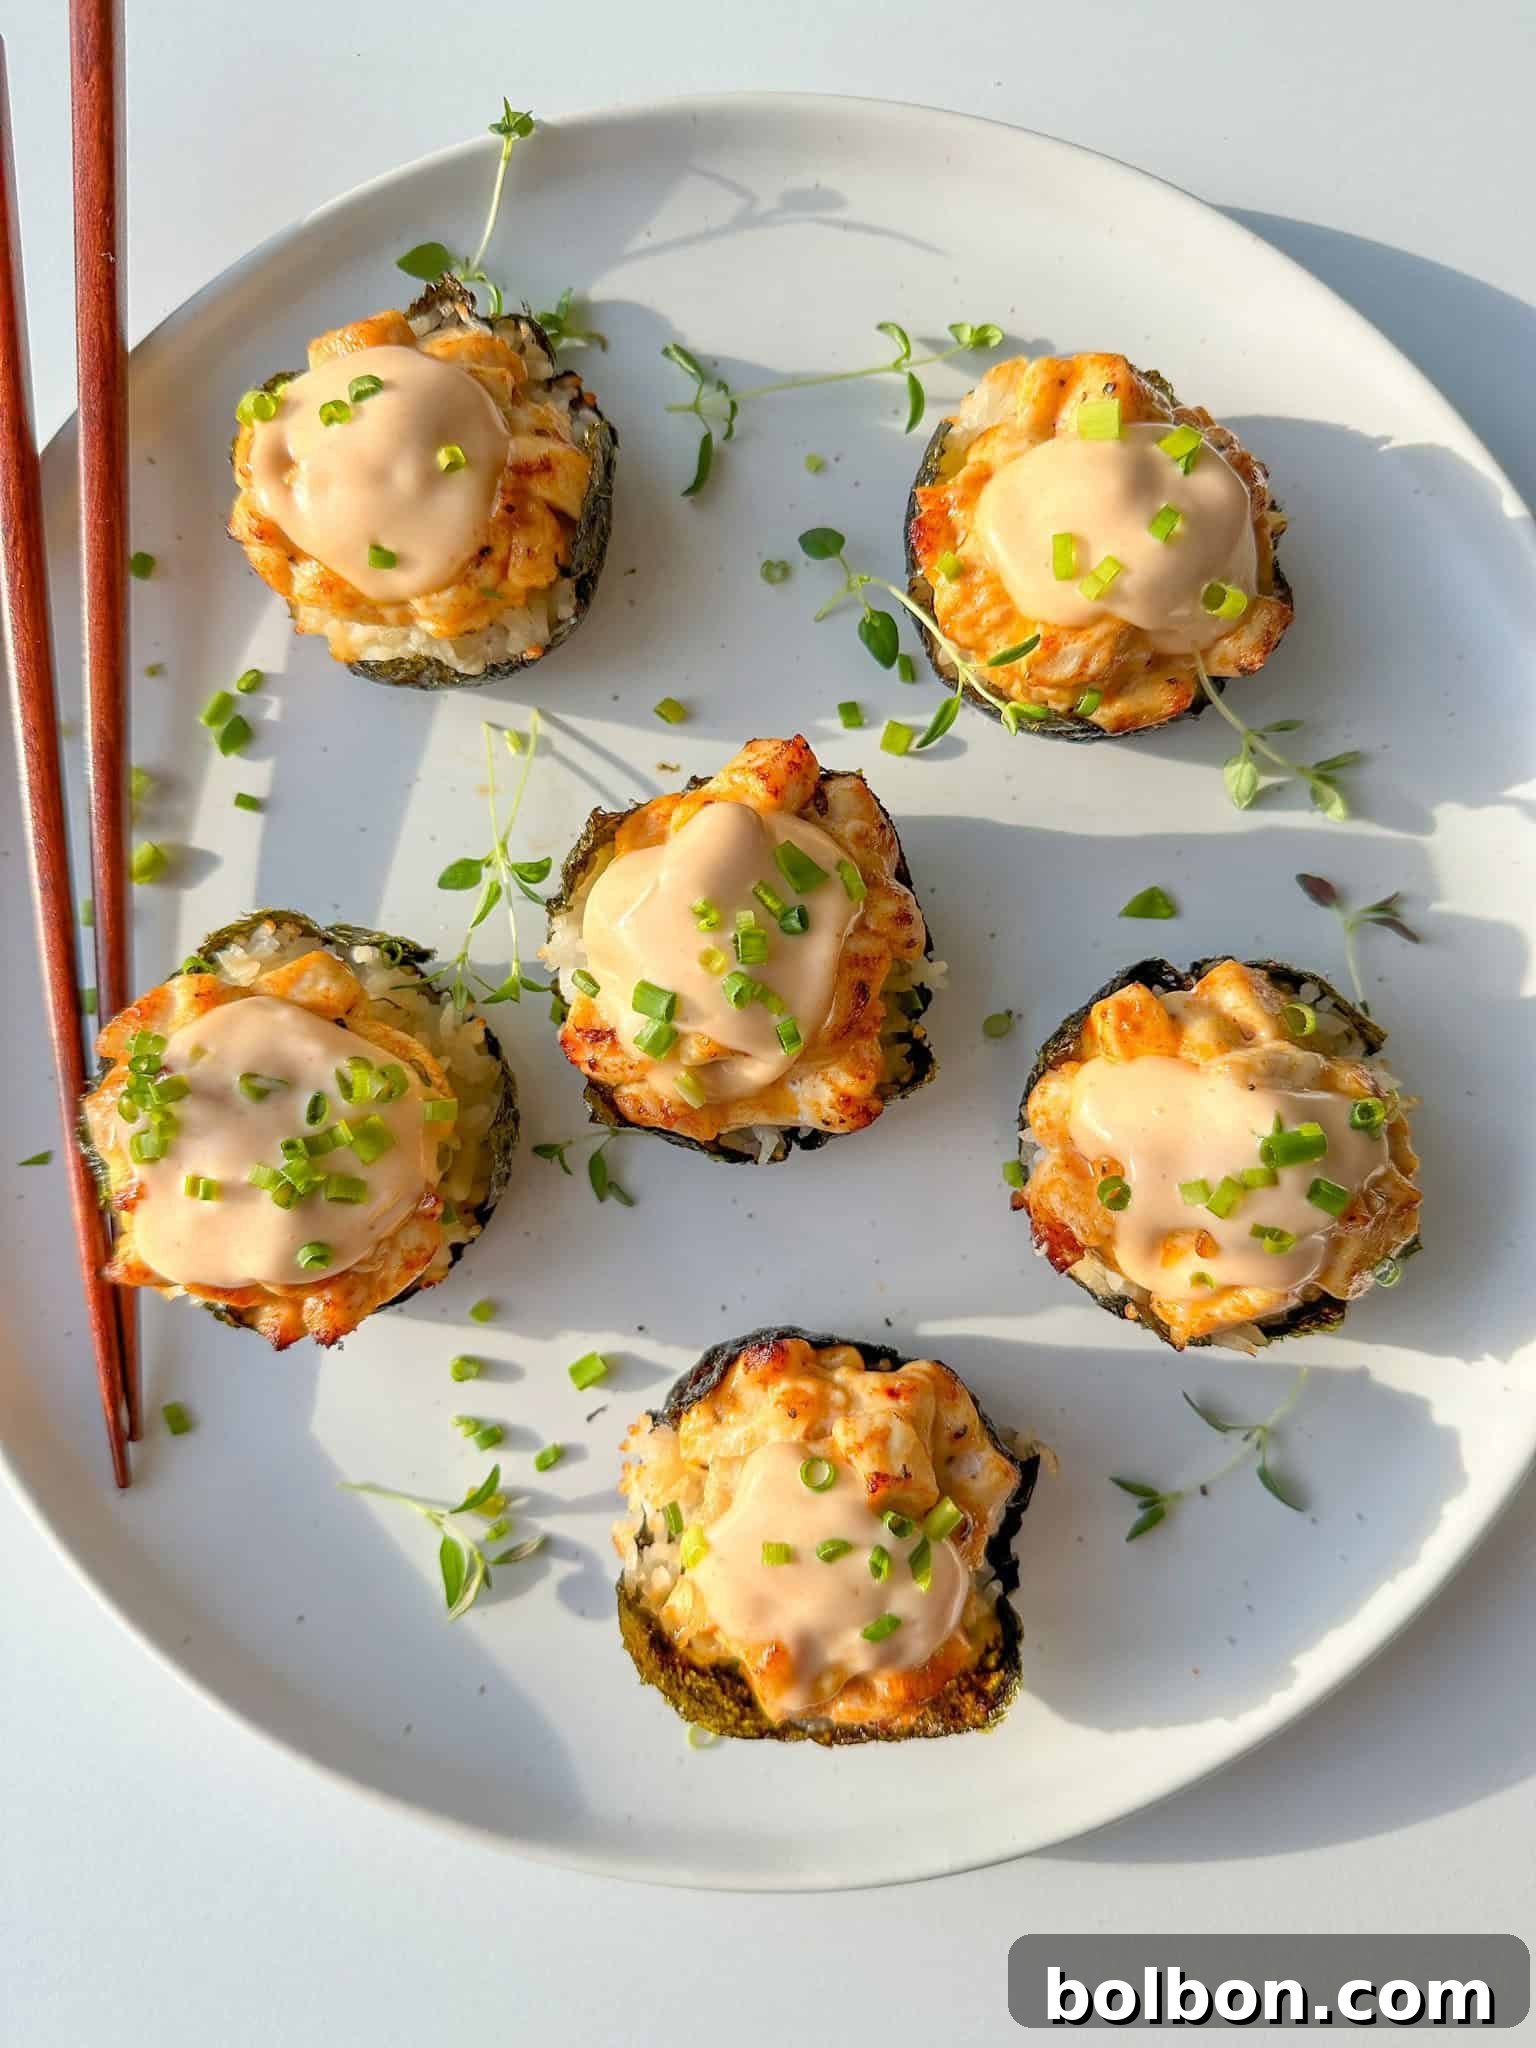
Craving the vibrant flavors and exciting textures of sushi but not a fan of seafood? Look no further! My **Chicken Bake Cups** offer a delightful and easy solution, bringing all the beloved elements of classic sushi into a comforting, oven-baked format. After the incredible viral success of my Salmon Sushi Cups and Shrimp Sushi Cups recipes, it was clear that a chicken version was not just desired, but essential. These individual parcels are a game-changer for weeknight dinners, party appetizers, or simply a fun culinary adventure that everyone can enjoy.
Why You’ll Adore These Chicken Bake Cups
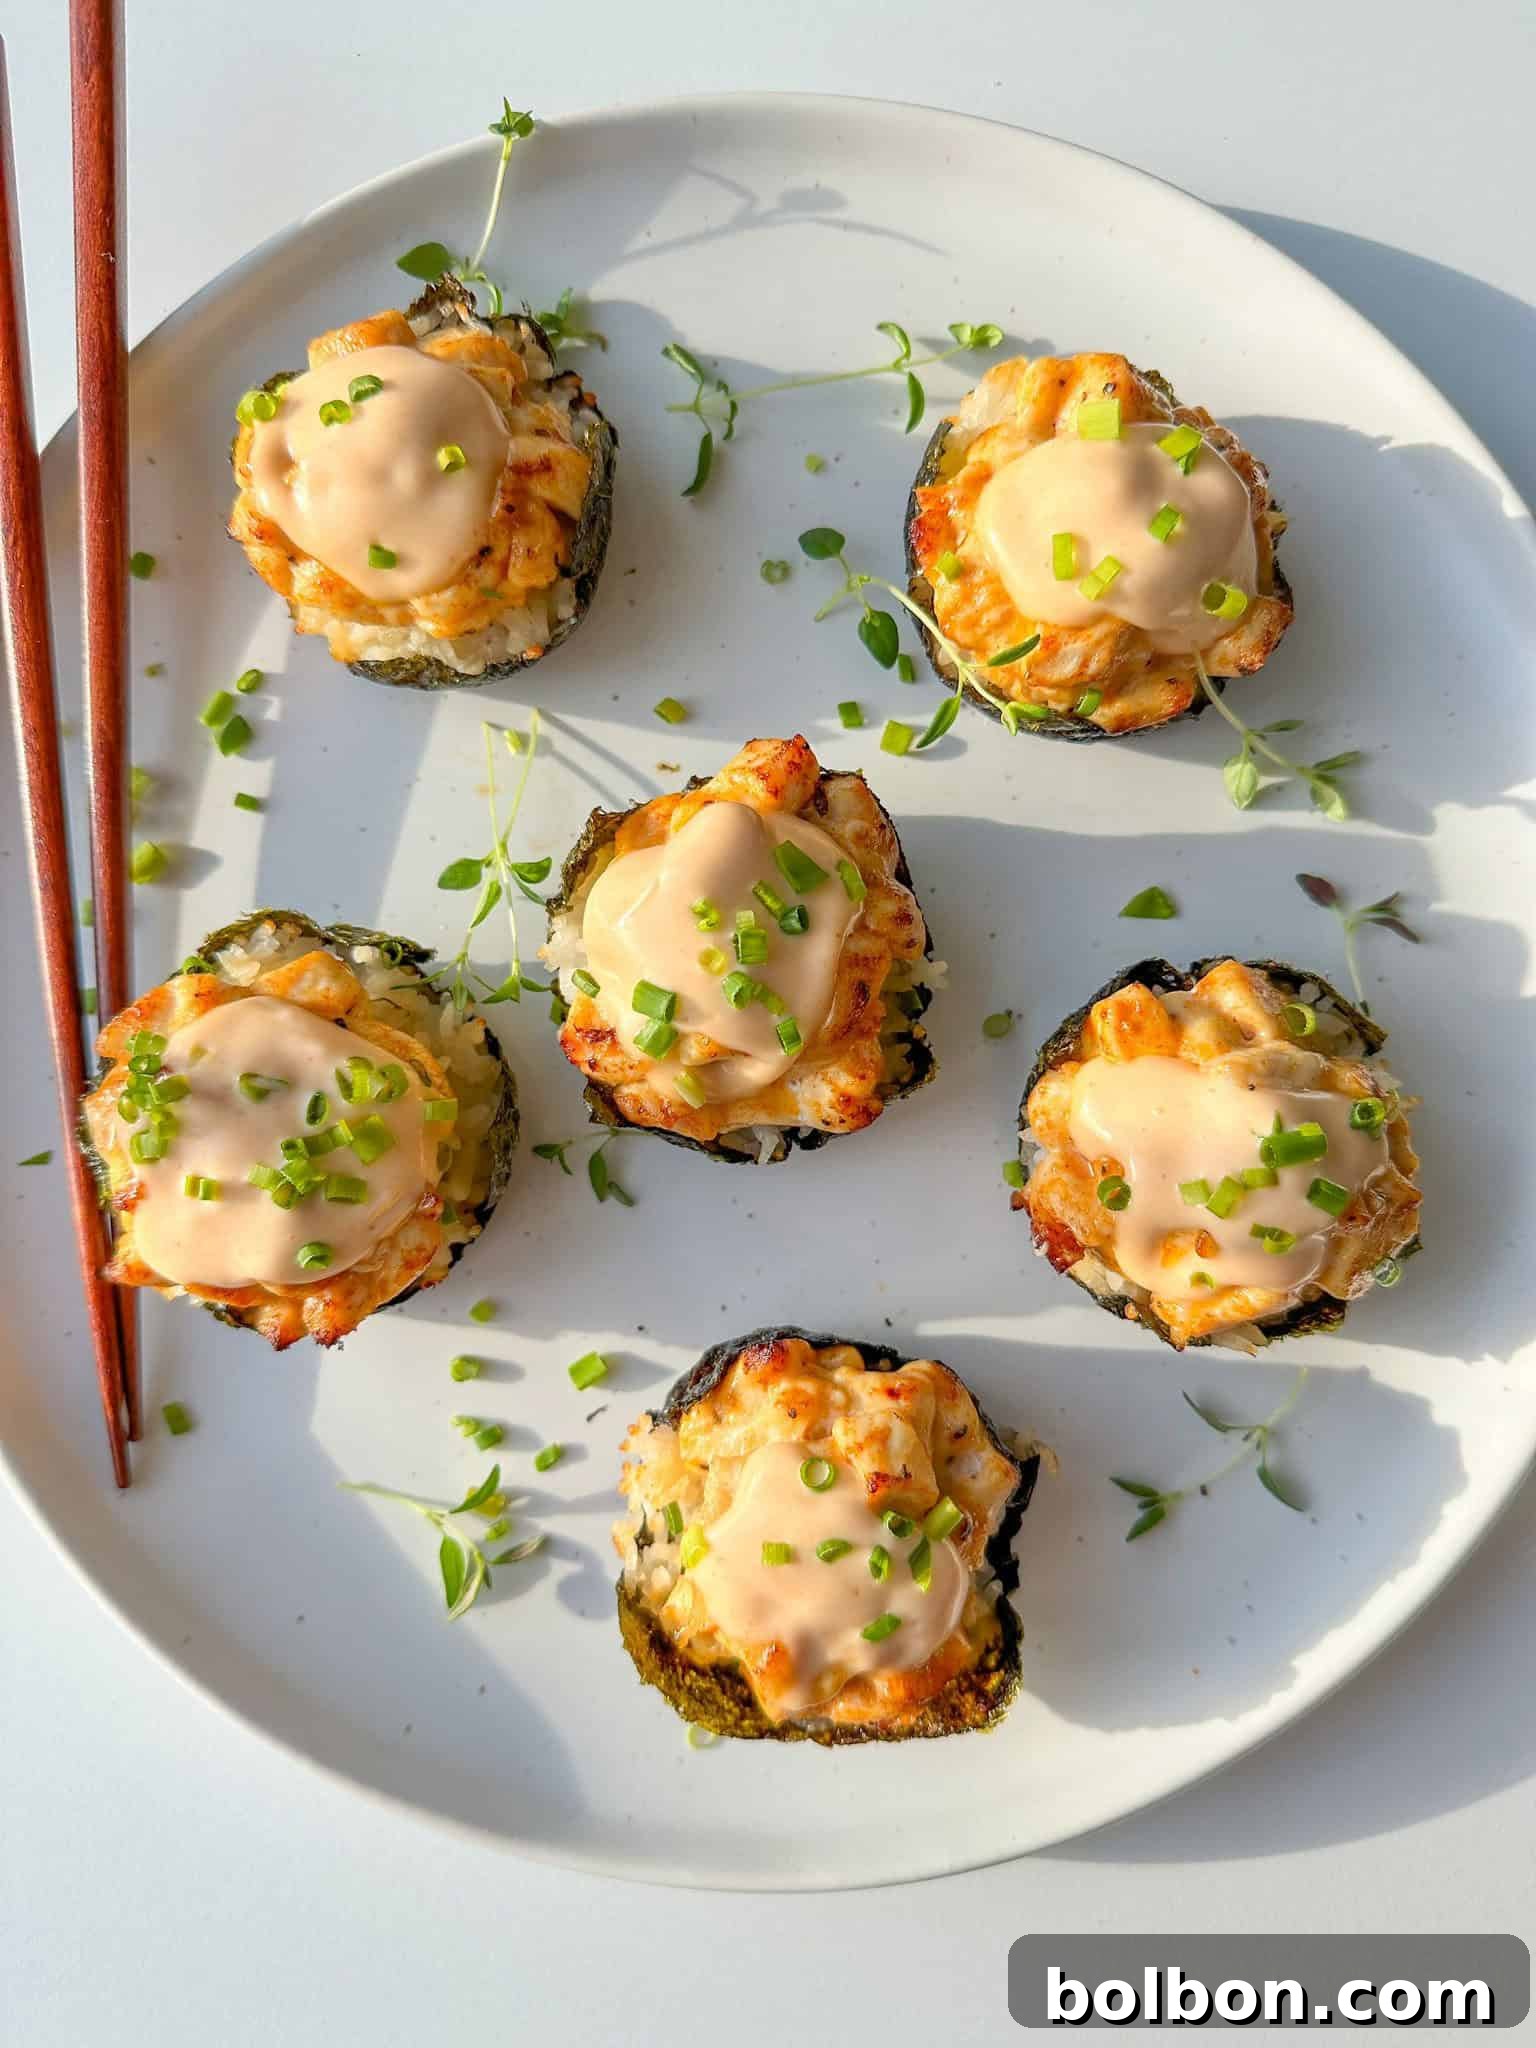
These Chicken Bake Cups encapsulate everything wonderful about sushi in a wonderfully approachable package. Imagine perfectly steamed rice, delicately seasoned with rice vinegar for that signature sushi tang, layered with savory, perfectly cooked chicken, all wrapped in crisp, salty strips of nori (seaweed). A generous dollop of creamy spicy mayo ties all these incredible components together, creating a symphony of flavors and textures in every bite. What makes them truly special is their simplicity: no intricate sushi-rolling techniques are required. All you need is a muffin tin to effortlessly form these delectable bites, making homemade “sushi” accessible to even the most novice home cook.
These cups are not only delicious but also incredibly versatile and convenient. They are perfect for meal prepping ahead of a busy week, providing a wholesome and exciting lunch option. They also shine as a unique appetizer for gatherings, impressing guests with their novelty and irresistible taste. For families, they offer a fun, interactive meal where everyone can customize their toppings. The combination of tender chicken, seasoned rice, and umami-rich nori creates a satisfying and well-rounded meal that is both comforting and exotic.
Crafting Your Chicken Bake Cups: A Step-by-Step Guide
Creating these Chicken Bake Cups is a straightforward process, ensuring a delicious result every time. Follow these detailed steps for perfect, flavorful cups.
- Prepare the Chicken: Begin by cutting your chicken breasts into small, uniform cubes. This ensures even cooking and allows the chicken to absorb the marinade thoroughly. In a mixing bowl, combine the cubed chicken with avocado oil, a generous seasoning of salt, pepper, and paprika. Stir in your spicy mayo until the chicken is well coated. This marinade infuses the chicken with flavor and helps keep it tender during baking.
- Cook the Rice: Rinse your jasmine rice thoroughly under cold water until the water runs clear. This step is crucial for removing excess starch, resulting in fluffier rice. Cook the rice according to package instructions. While a rice cooker makes this process effortless, stovetop cooking works just as well. Don’t forget to add a pinch of salt to the cooking water for enhanced flavor. Once cooked, gently fold in the rice vinegar (if using) while the rice is still warm. The warmth of the rice helps distribute the vinegar evenly and adds that characteristic sushi rice tang. Remember, the goal is a subtle flavor, not an overtly sour taste.
- Preheat Your Oven: Set your oven to 400°F (200°C) to ensure it’s at the ideal temperature when you’re ready to bake.
- Assemble the Nori and Rice Base: Take your pre-cut nori squares (approximately 3.5-inch) and place one tablespoon of warm, cooked rice onto the center of each. Gently press the rice down to form a compact base. Assembling the cups while the rice is still warm is a key tip; the warmth from the rice will slightly soften the nori, making it more pliable and less prone to crisping excessively and falling apart in the oven. This also helps the nori adhere better to the muffin tin.
- Layer in the Muffin Tin: Carefully place each nori and rice square into the cups of a muffin tin. Next, add a spoonful of the marinated chicken mixture on top of the rice in each cup. Don’t overfill, as the chicken needs space to cook evenly.
- Bake to Perfection: Bake the Chicken Bake Cups for approximately 15 minutes. The chicken should be cooked through, with its juices running clear and the flesh appearing white throughout when cut into. For absolute certainty, use a meat thermometer to ensure the internal temperature reaches 165°F (75°C).
- Achieve Golden Crispiness: For that irresistible, slightly browned and crispy texture, turn on your oven’s broiler for 60-90 seconds immediately after baking. Keep a very close eye on them during this stage, as broilers can quickly burn food. The goal is a light golden-brown finish on the chicken.
- Garnish and Serve: Remove the cups from the oven and let them cool slightly in the muffin tin. This makes them easier to handle and prevents the nori from tearing. Top with an extra drizzle of spicy mayo (or your favorite sauce) and a sprinkle of freshly chopped chives for a burst of color and fresh flavor. Serve warm and enjoy your homemade “sushi” creation!
Nonna’s Expert Tip
The type of rice you use can significantly impact the texture. While jasmine rice is my personal preference for its fragrant, fluffy grains, traditional sushi rice or any other short-grain rice will also yield excellent results due to their sticky texture. Always follow the package directions for cooking to ensure the best outcome. Proper rice preparation is the foundation of delicious sushi cups!
Unleash Your Creativity: Chicken Bake Cups Variations & Substitutions
One of the best aspects of these Chicken Bake Cups is their incredible adaptability. Feel free to experiment with these suggestions to perfectly match your taste preferences or dietary needs. Remember to adjust quantities and cooking times as needed when making changes.
- Protein Power-Ups: Instead of cubed chicken breast, consider using tender chicken thighs for a richer flavor and juicier texture. Ground chicken also works beautifully, offering a different mouthfeel. For a truly unique twist, explore other lean proteins like thinly sliced pork or even finely diced beef, ensuring proper cooking and seasoning.
- Vegetarian & Vegan Delights: To create a delicious vegetarian or vegan version, swap the chicken for firm or extra-firm tofu. Press the tofu to remove excess water, then cube it and marinate it with similar seasonings before baking. Ensure all other ingredients, such as mayonnaise, are plant-based to maintain the vegan integrity of the dish. Tempeh or even marinated mushrooms could also be interesting alternatives.
- Sauce Sensations: While spicy mayo offers a fantastic kick, you can easily switch up the flavor profile with different sauces. Try a classic teriyaki sauce for a sweet and savory glaze, sweet chili sauce for a tangy heat, hoisin sauce for an aromatic and slightly smoky touch, or a pure sriracha mayo for an extra fiery punch. Don’t be afraid to mix and match or create your own signature sauce!
- Topping Extravaganza: The garnishes are where you can truly let your imagination run wild. Elevate your cups with slices of creamy avocado, crisp shredded lettuce or cabbage for added crunch, or juicy diced tomatoes for a fresh burst. Sliced green onions provide a mild oniony bite, while toasted sesame seeds add an earthy, nutty flavor and pleasing texture. Other ideas include pickled ginger, a drizzle of eel sauce, or a sprinkle of furikake.
- Spice Level Customization: Adjust the amount of chili garlic sauce or sriracha in your mayo to control the heat. For a milder version, use plain mayonnaise or a touch of sweet Japanese Kewpie mayo. For those who love intense heat, add extra chili flakes or a dash of ghost pepper sauce (use with caution!).
- Cheesy Twist: For a comforting fusion, sprinkle a little shredded mozzarella or Monterey Jack cheese over the chicken during the last few minutes of baking. The melted cheese will add a gooey, savory layer that’s surprisingly delicious with the other components.
Recipes You’ll Also Love
Sushi Bake Recipe
An easy, deconstructed sushi dish baked in a casserole, perfect for sharing and customizable with your favorite ingredients.
Salmon Sushi Cups
These individual baked sushi cups feature tender salmon, seasoned rice, and a creamy topping, mimicking classic sushi flavors in a convenient form.
Shrimp Sushi Cups
A delicious alternative to traditional sushi, these cups combine succulent shrimp, flavorful rice, and a delectable sauce, all baked to perfection.
Perfect Pairings for Your Chicken Bake Cups
To complete your meal, consider serving these delightful Chicken Bake Cups with complementary side dishes that enhance their Asian-inspired flavors. Here are some excellent suggestions:
- Asian Style Green Beans: A vibrant and healthy side that offers a fresh crunch and a savory, garlicky flavor profile, perfectly complementing the rich chicken cups.
- Crisp Asian Slaw: A refreshing mix of shredded cabbage, carrots, bell peppers, and a light sesame-ginger dressing provides a cool, tangy contrast to the warm, savory cups.
- Asian-Inspired Green Salad: A simple yet elegant salad featuring mixed greens, thinly sliced cucumber, creamy avocado, and a zesty ginger-soy vinaigrette adds freshness and a hint of umami.
- Miso Soup: A comforting and light miso soup can be a wonderful starter or accompaniment, offering a delicate, savory broth that cleanses the palate.
- Edamame: Steamed or pan-fried edamame with a sprinkle of sea salt makes for a simple, nutritious, and addictive side dish that’s fun to eat.
- Cucumber Salad with Rice Vinegar: A quick and easy salad made with thinly sliced cucumbers, a touch of rice vinegar, sugar, and sesame seeds provides a sweet and tangy counterpoint.
Your Top Questions Answered About Chicken Bake Cups
I typically use Redmond Real Salt for its natural mineral content and balanced flavor. However, the exact saltiness of your dish can vary depending on the type of salt you use (e.g., table salt is saltier than kosher salt). Always remember that seasoning is to taste, so I encourage you to taste and adjust the salt levels as you cook to achieve your desired flavor.
After baking for about 15 minutes, your chicken should be fully cooked. A reliable way to check is to ensure that the chicken juices run clear when pierced, and a cut piece reveals white meat throughout. For the most accurate measure of doneness, use a meat thermometer to confirm the chicken has reached an internal temperature of 165°F (75°C).
I used chicken cutlets, which are thinly sliced chicken breasts, readily available at most grocery stores. If you have a large whole chicken breast, you can easily slice it into thinner cutlets yourself, then cube them for the recipe. This ensures consistent sizing and quick cooking.
Absolutely! You can certainly use other cuts of chicken if you prefer. Chicken thighs, for instance, are a great option for a juicier result, though they may require a slightly longer cooking time due to their higher fat content. If using ground chicken, you might find it beneficial to pre-cook it slightly before adding it to the cups to prevent excess moisture. Always adjust cooking times accordingly and visually check for doneness to ensure the chicken is cooked through without becoming dry.
I highly recommend using my homemade Spicy Mayo recipe for the freshest and most customizable flavor. However, if you’re short on time or prefer a ready-made option, Kewpie mayo is an excellent choice for its rich, umami flavor. For those who prefer a less spicy profile, plain mayonnaise mixed with a touch of sriracha or even just plain mayo works wonderfully.
The trick to keeping your nori perfectly pliable and intact is to assemble the Chicken Bake Cups while your rice is still warm. The warmth from the rice will gently soften the nori, making it more flexible and less likely to over-crisp and break during baking. This creates a more pleasant texture that holds together beautifully.
My personal favorite is jasmine rice due to its fragrant aroma and slightly sticky texture. However, traditional sushi rice or any short-grain rice will also work exceptionally well as they provide the necessary stickiness to hold the cups together. For convenience, you can even use instant or microwaveable rice in a pinch, just be sure to follow its specific cooking instructions.
Yes, if you don’t have rice vinegar on hand, you can simply leave it out. The dish will still be delicious! Be mindful not to add too much if you do use it, as we want a subtle tang to complement the other flavors, not an overpowering sourness in the rice.
Yes, these cups are great for meal prep! You can prepare the chicken marinade and cook the rice in advance. Assemble the cups just before baking for the best texture, especially to prevent the nori from becoming too soft. If you need to fully assemble ahead, cover loosely and refrigerate, then bake as directed, potentially adding a few extra minutes to the cooking time if baking from cold.
Store any leftover Chicken Bake Cups in an airtight container in the refrigerator for up to 2-3 days. To reheat, place them in a preheated oven at 350°F (175°C) for about 10-15 minutes, or until warmed through. You can also use an air fryer for a few minutes to crisp them up again. Microwaving is an option, but the nori might lose its texture.
Chicken Bake Cups
My Chicken Bake Cups are such a fun and easy meal idea. They have all the incredible components of sushi—steamed rice seasoned with rice vinegar, salty strips of nori (aka seaweed), and spicy mayo—wrapped up into delicious, individual-size parcels. They’re perfect for sushi lovers who prefer chicken over seafood, offering a customizable and family-friendly twist on a viral sensation.
Course: Appetizer, Main Course
Cuisine: American, Asian
Makes: 6 cups
Author: The Modern Nonna
Prep Time: 10 minutes
Cook Time: 15 minutes
Total Time: 25 minutes
Facebook Share
Rate Recipe
Print Recipe
Video Tutorial
Watch how to make these delicious Chicken Bake Cups in this helpful video:
Note: The video content titled “Chicken Bake Cups” covers the preparation process described in the recipe.
Equipment You’ll Need
- Nakiri Knife: Ideal for precise vegetable and chicken cutting.
- Measuring Cups + Spoons: Essential for accurate ingredient proportions.
- Cutting Board: A sturdy surface for safe food preparation.
- Redmond Real Salt: My preferred salt for enhanced flavor.
- Muffin Pan: Crucial for forming the individual bake cups.
- Rice Cooker (Optional): Makes cooking rice effortless and consistent.
- Mixing Bowls: For marinating chicken and mixing rice.
Ingredients
- 3 chicken breasts, skinless and boneless (cut into small, equal-sized cubes for even cooking)
- 1 teaspoon avocado oil (or any neutral oil)
- Salt, to taste (I recommend Redmond Real Salt)
- Pepper, to taste (measure with your heart for optimal flavor)
- Paprika, to taste (adds a lovely color and mild spice)
- 1.5 tablespoons mayo, spicy or plain (adjust to your heat preference)
- ½ cup jasmine rice (or sushi rice, short-grain rice, cooked according to package directions)
- 2 teaspoons rice vinegar, (optional, but adds a traditional sushi tang)
- 2 sheets nori, cut into six 3.5-inch squares (essential for wrapping the cups)
- 1 tablespoon chives, chopped, for garnish (provides freshness and color)
- Additional spicy mayo (for serving, if desired)
Instructions
- Preheat your oven to 400°F (200°C). This ensures the oven is ready for baking as soon as your cups are assembled.
- Cut the chicken into small, uniform cubes. Place them in a bowl with avocado oil, and season generously with salt, pepper, and paprika. Add the spicy mayo and stir until the chicken pieces are thoroughly coated. Allow the chicken to marinate for a few minutes while you prepare the rice, if time permits.
- Rinse the rice under cold running water until the water runs clear. Cook the rice according to the package instructions. If using a rice cooker, add a nice pinch of salt for flavor. Once the rice is cooked and still warm, gently mix in the rice vinegar (if using). The warmth of the rice helps the vinegar integrate evenly.
- Place 1 tablespoon of the warm, cooked rice on top of each nori square. Gently press the rice down to form a compact base on the seaweed. This step is crucial as the warmth from the rice will soften the nori, making it pliable and less likely to break during assembly and baking.
- Carefully place each nori and rice square into the cups of a muffin tin. Then, add 1 tablespoon of the cubed, marinated chicken mixture on top of each rice cup. Distribute the chicken evenly among the cups.
- Bake for about 15 minutes, or until the chicken is cooked through. You can verify this by checking that the chicken juices run clear and a piece of chicken is white throughout when cut into, or by using a meat thermometer to confirm an internal temperature of 165°F (75°C).
- After baking, turn on the broiler setting of your oven. Broil the Chicken Bake Cups for 60 to 90 seconds. Watch them carefully during this time, as the broiler works quickly, to achieve a crispy and beautifully browned finish on the chicken.
- Remove the cups from the oven and let them cool slightly in the muffin tin before handling. This cooling period allows them to set and makes them easier to remove. Finally, top with additional spicy mayo and a sprinkle of fresh chopped chives for a vibrant garnish and an extra layer of flavor. Serve warm and enjoy!
Nutrition Information
Calories: 216 kcal
Carbohydrates: 12g
Protein: 25g
Fat: 6g
Saturated Fat: 1g
Polyunsaturated Fat: 2g
Monounsaturated Fat: 2g
Trans Fat: 0.02g
Cholesterol: 74mg
Sodium: 155mg
Potassium: 441mg
Fiber: 0.2g
Sugar: 0.1g
Vitamin A: 103 IU
Vitamin C: 2mg
Calcium: 11mg
Iron: 1mg
Nutrition information is automatically calculated and should only be used as an approximation.