
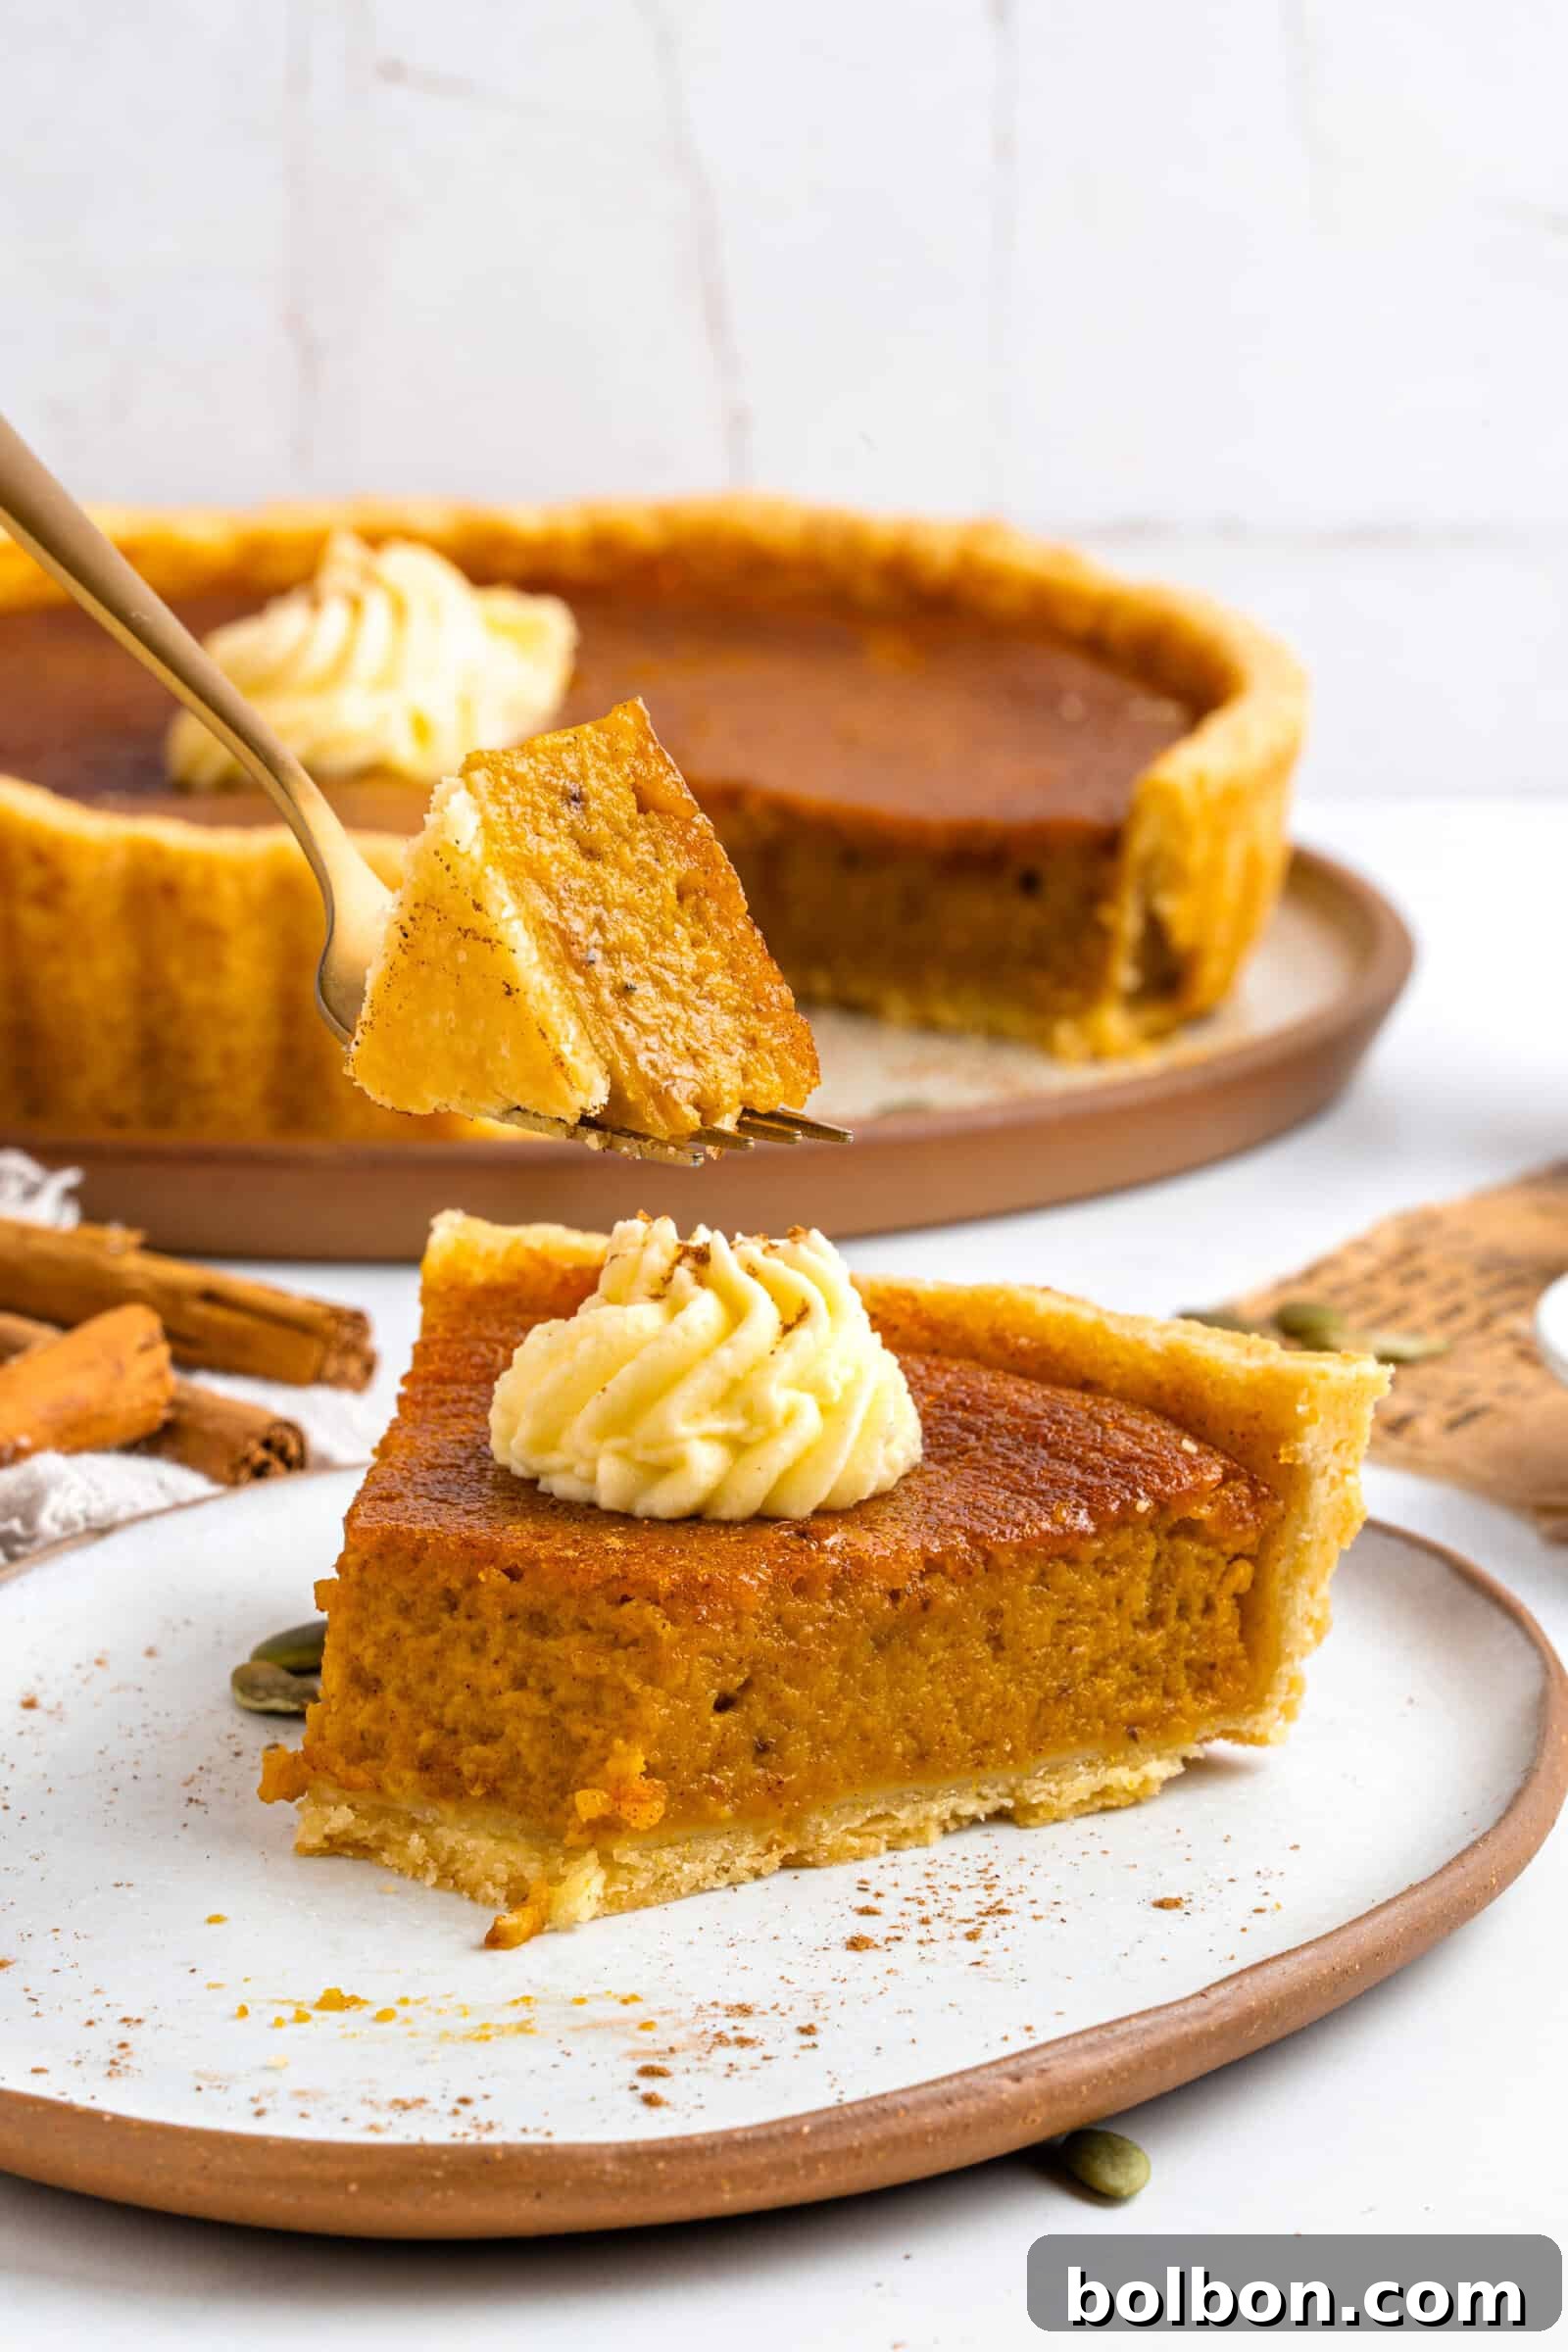
There’s no better way to usher in the autumn season and festive holidays than with a generous slice of this truly classic pumpkin pie 🥧. This iconic dessert, featuring a rich, velvety, and perfectly spiced pumpkin filling nestled within a golden, buttery, and irresistibly flaky crust, embodies the very essence of fall comfort and celebration ☺️. Whether you’re meticulously planning your holiday menu for a grand Thanksgiving feast, seeking a delightful treat for a cozy family gathering, or simply yearning for that nostalgic taste of autumn, this comprehensive recipe is your ultimate guide.
We’ll walk you through every step, from selecting the finest ingredients to achieving that perfect custardy texture, ensuring you create a mouthwatering pumpkin pie that will not only tantalize taste buds but also infuse your home with the warm, inviting, and irresistible aroma of fall 🍂. Prepare to impress your loved ones with a dessert that’s both elegant and deeply comforting, serving it alongside traditional Thanksgiving favorites such as our Easy Thanksgiving Turkey and Roasted Garlic Mashed Potatoes, or savor it as a standalone treat whenever that cozy, autumnal craving strikes 👩🍳. This isn’t just a recipe; it’s an invitation to create cherished memories, one delicious slice at a time.
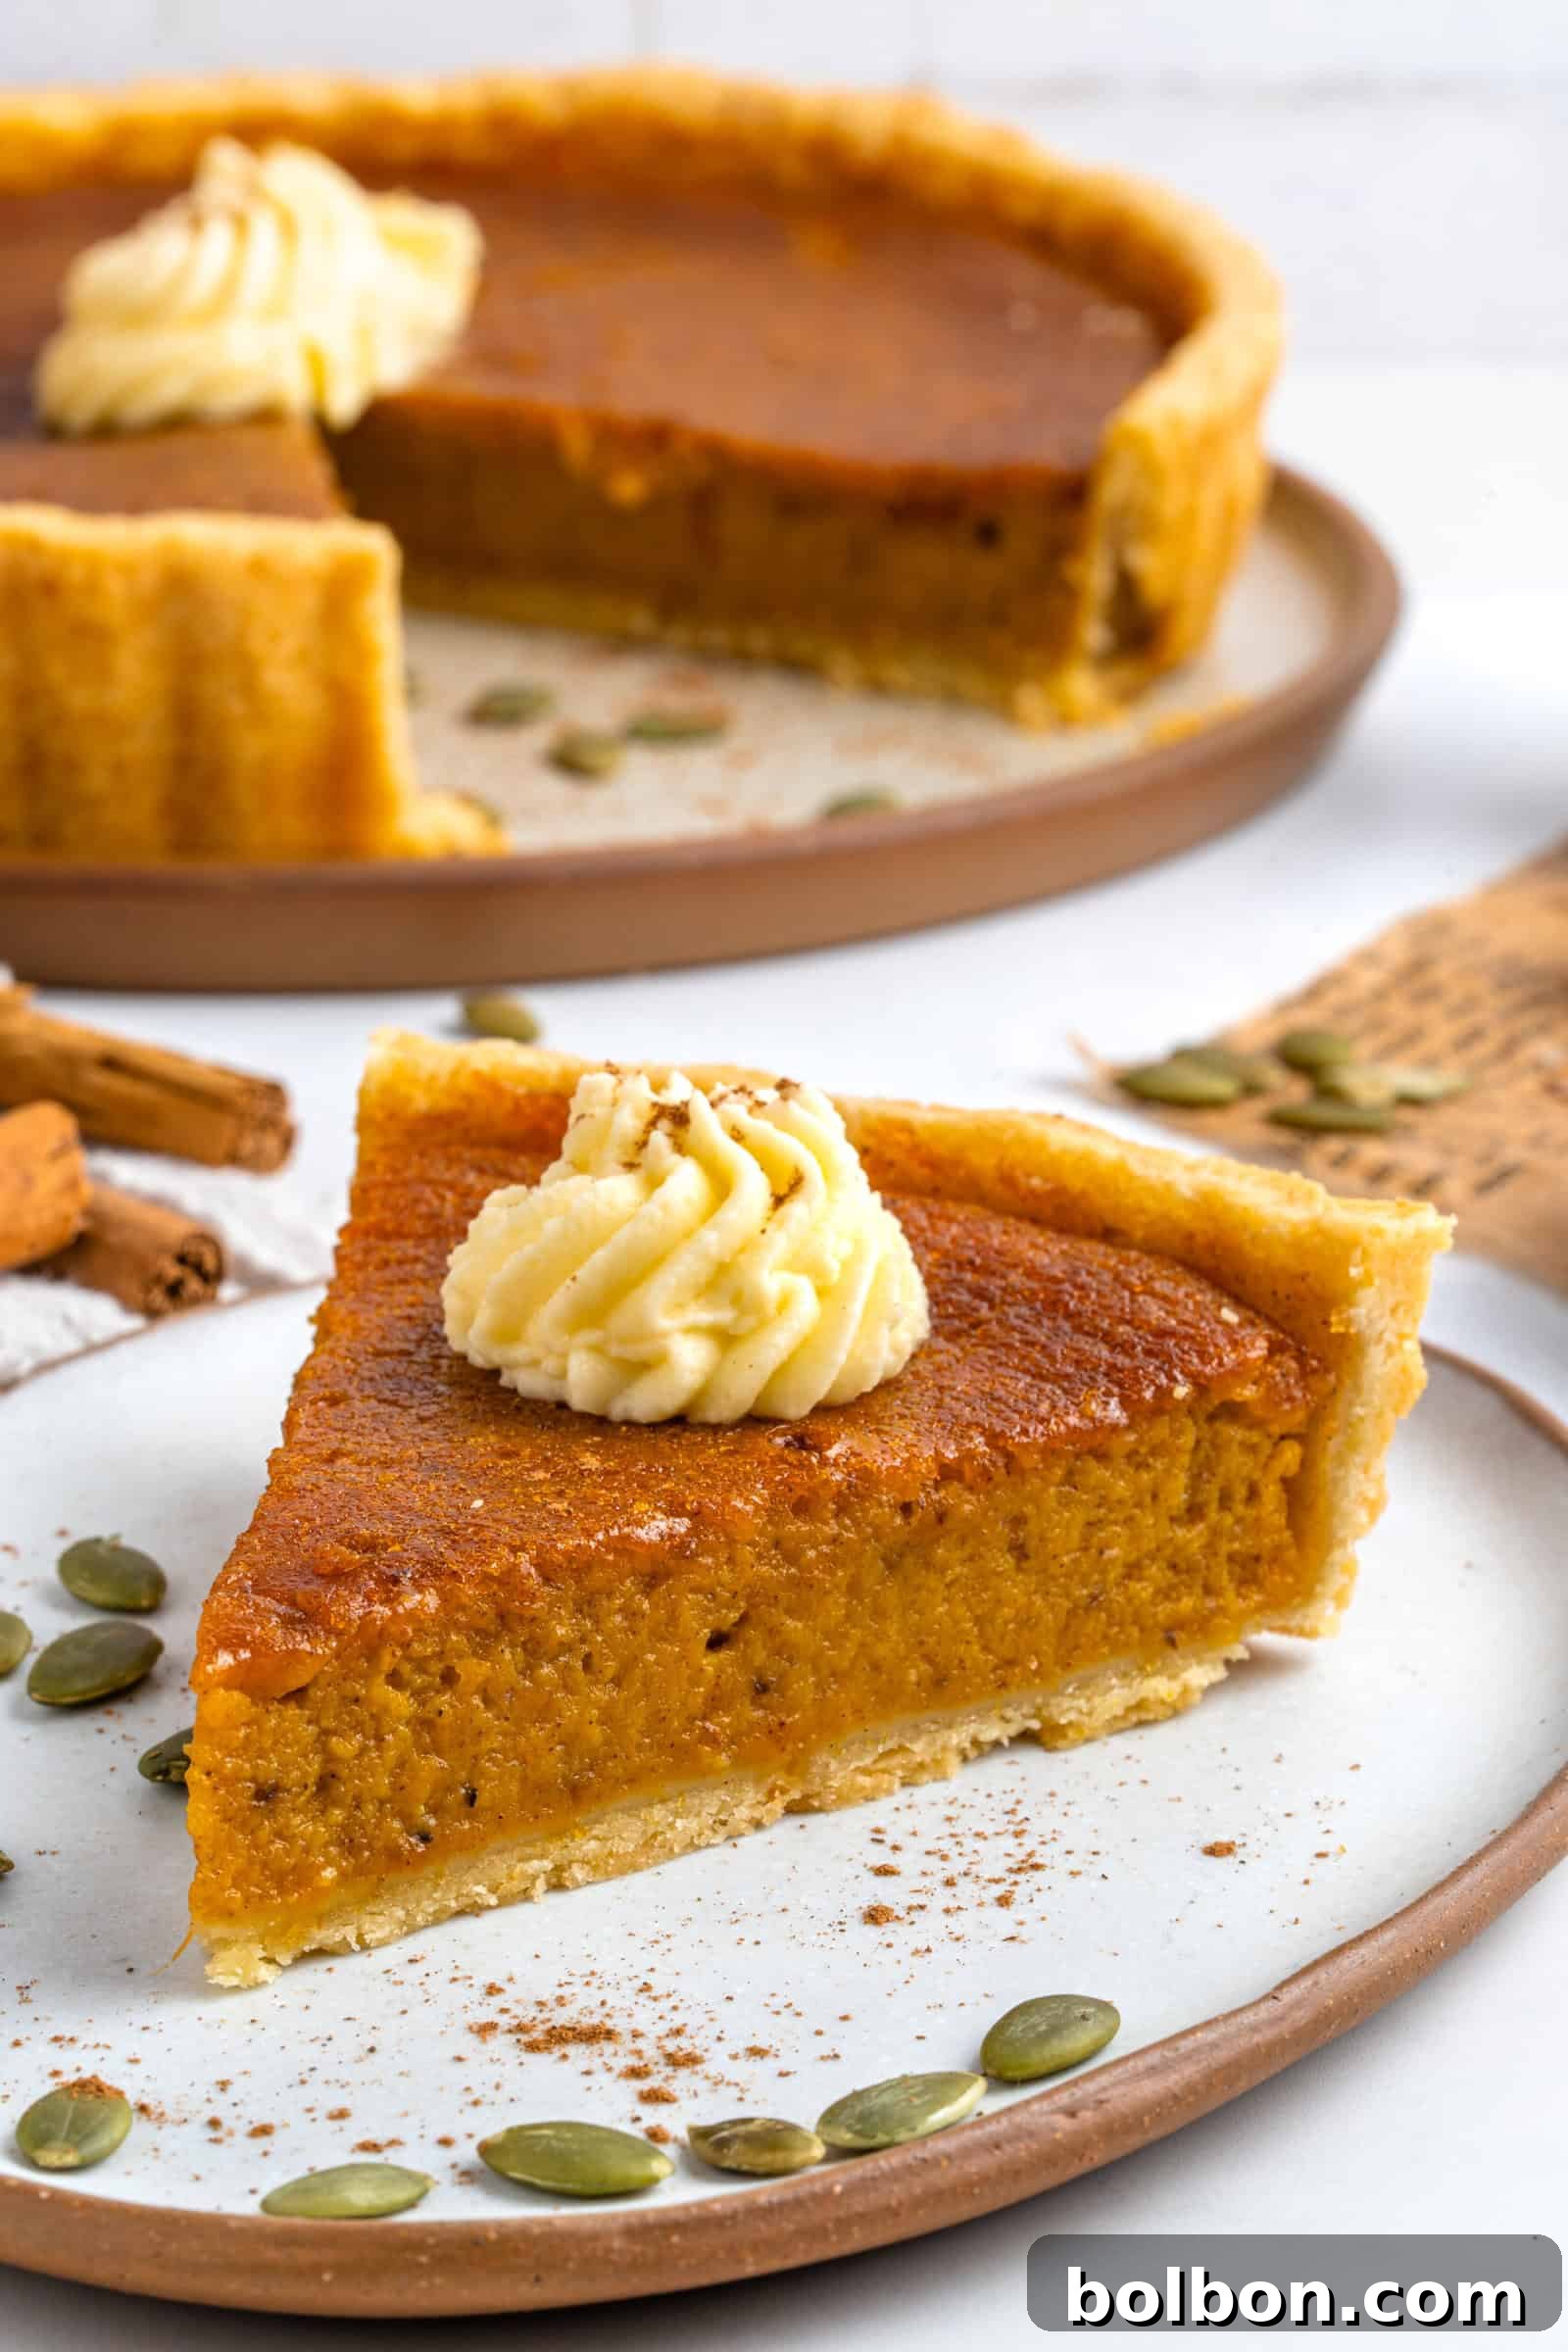
Key Takeaways for Your Perfect Pumpkin Pie
- Our signature Pumpkin Pie recipe delivers a beautifully spiced pumpkin filling encased in a golden, buttery crust, making it an indispensable dessert for fall and holiday gatherings.
- Embrace the convenience of a semi-homemade approach, cleverly combining a quality store-bought pie crust with canned pumpkin puree and a bespoke blend of warming spices for effortless perfection.
- Essential ingredients include creamy pumpkin puree, fresh eggs, rich heavy cream, and a thoughtful combination of sugars, all contributing to a luxuriously rich and comforting dessert experience.
- Crucially, allow your baked pie to cool undisturbed at room temperature for at least 2-4 hours before attempting to slice it. This crucial setting period ensures a firm, beautifully structured slice every time.
- Explore exciting variations, including gluten-free and dairy-free options, and elevate your pie by serving it with a generous dollop of freshly whipped cream, a scoop of premium vanilla ice cream, or a dusting of cinnamon for an exquisite finishing touch.
Table of Contents
- Key Takeaways for Your Perfect Pumpkin Pie
- Why This Pumpkin Pie Recipe Will Become Your Go-To
- Mastering Your Ingredients for an Unforgettable Pie
- Nonna’s Essential Tip for Pie Perfection 🥧
- Knowing When Your Pumpkin Pie is Perfectly Baked
- Creative Variations and Smart Substitutions for Your Pie
- The Best Accompaniments for Your Pumpkin Pie
- Expert Tips for a Flawless Pumpkin Pie
- Storage and Freezing Your Pumpkin Pie
- Explore More Delicious Fall Recipes
- Beyond Pumpkin Pie: Other Holiday Delights
- Frequently Asked Questions About Pumpkin Pie
- The Classic Pumpkin Pie Recipe Card
Why This Pumpkin Pie Recipe Will Become Your Go-To
Prepare to bid farewell to bland, store-bought pumpkin pies forever! Once you experience the rich flavor, silky texture, and undeniable charm of our homemade pumpkin pie, you’ll understand why this recipe is destined to become a beloved staple in your kitchen. What makes it so exceptional? It’s astonishingly foolproof and incredibly easy, designed so that even a novice baker can achieve spectacular results. The secret to this unbelievably simple yet decadent pumpkin pie lies in its clever semi-homemade approach. Shh, don’t worry, your guests will never suspect a thing 🤫!
This recipe ingeniously combines the convenience of a store-bought pie crust – readily available in the frozen section of most grocery stores – with a trusty can of premium pumpkin puree 🎃. But don’t mistake convenience for compromise! We elevate this humble foundation into something truly extraordinary by jazzing it up with a symphony of flavors: rich brown sugar, fragrant pure vanilla extract, and a generous dash of aromatic pumpkin pie spice. The result is a filling that is deeply flavorful, perfectly balanced, and wonderfully smooth. Every bite transports you to a world of autumnal bliss. When your finished pie emerges from the oven, golden and fragrant, complete it with a delicate dollop of luscious freshly whipped cream or a generous scoop of creamy vanilla ice cream 🍨 for that ultimate, special finishing touch that truly takes it over the top. This recipe isn’t just about baking a pie; it’s about creating an experience that tastes like home, comfort, and cherished traditions.
Mastering Your Ingredients for an Unforgettable Pie
Crafting the perfect pumpkin pie starts with understanding and appreciating each ingredient’s role. Here’s a detailed look at what makes our pie filling so incredibly rich and flavorful:
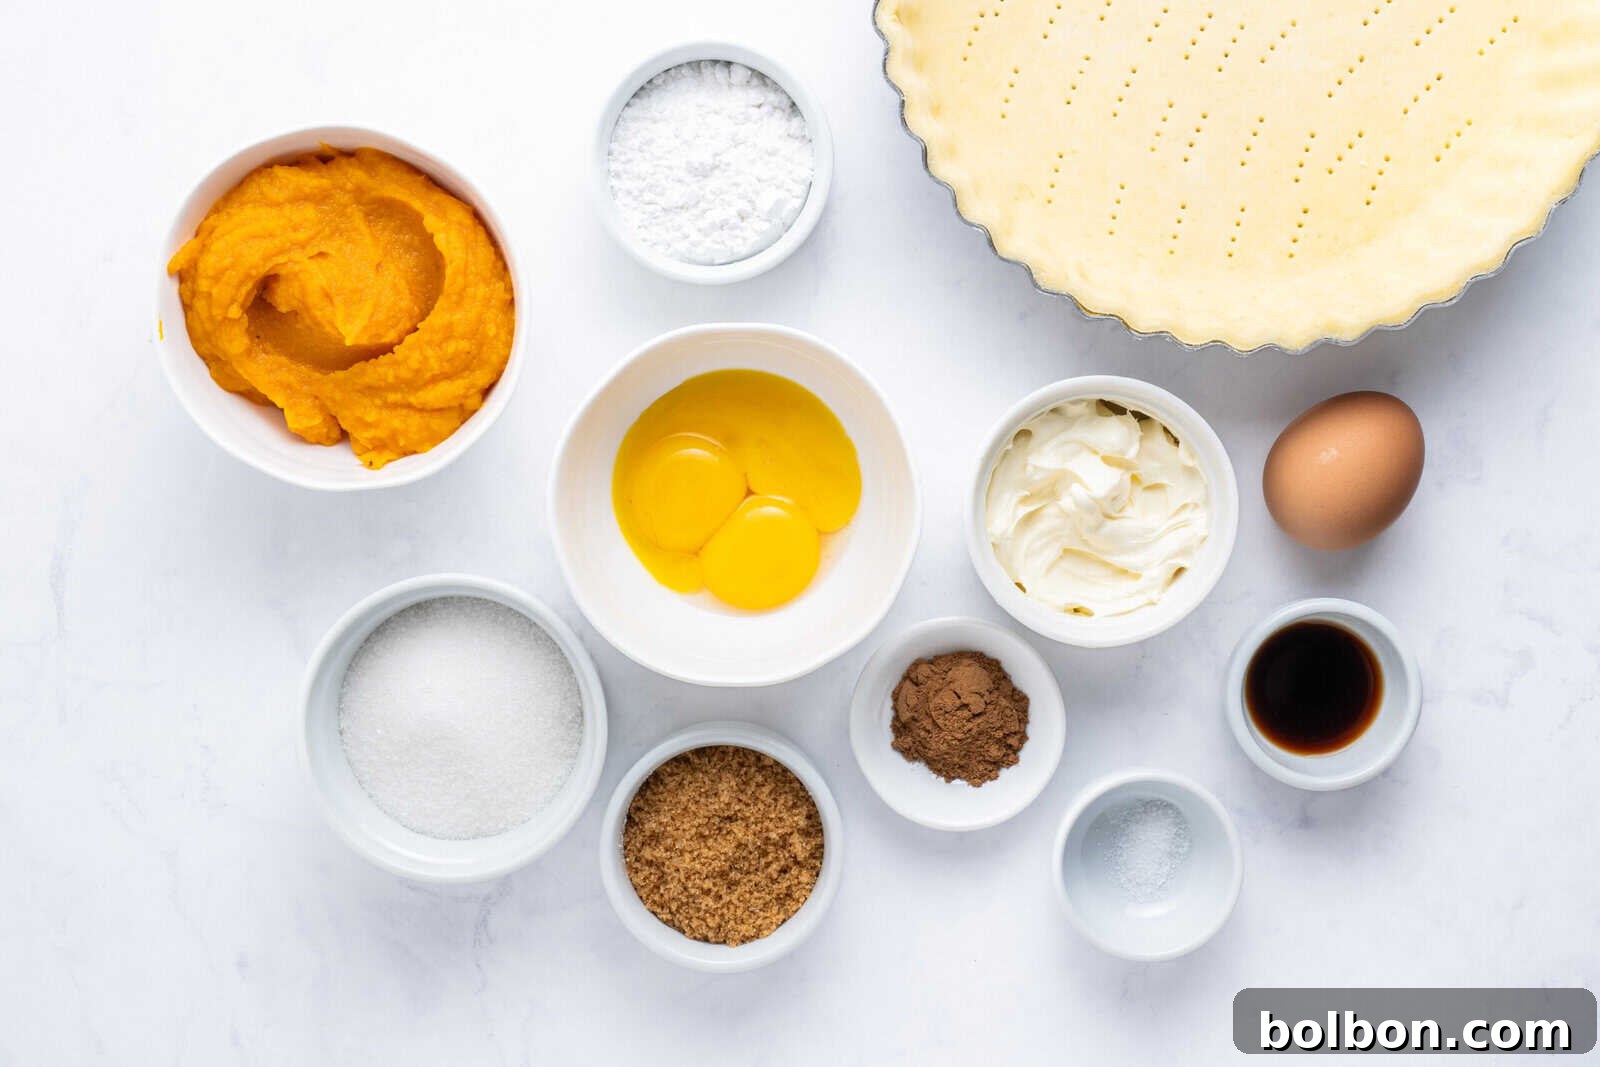
🎃 Pumpkin Puree: The Heart of Your Pie: This is unequivocally the star of our show. It is absolutely crucial to use 100% pure pumpkin puree for your filling – and *not* pumpkin pie mix or pumpkin pie filling. Pumpkin pie mix typically contains added sugars and spices, taking control out of your hands. By opting for pure pumpkin puree, you gain complete command over the sweetness level and the depth of your spice blend, allowing you to tailor the flavor precisely to your preference. Look for brands that offer smooth, consistent puree for the best texture.
🥧 Pie Crust: The Foundation of Flaky Perfection: To simplify your prep and make this recipe truly accessible, we confidently recommend using a high-quality store-bought pie crust. These can be conveniently purchased frozen and significantly cut down on preparation time without sacrificing taste or texture. Before pouring in your filling, remember to gently prick the bottom of the crust all over with a fork. This simple step creates tiny vents that prevent the crust from puffing up and shrinking during baking, ensuring a perfectly flat base for your filling. Best of all, there’s absolutely no need for a messy or time-consuming pre-bake (blind baking) for this recipe!
🤎 Pumpkin Pie Spice: The Essence of Autumn: This aromatic blend is what imbues your pie with that quintessential warm, cozy, and inviting fall flavor. You have the flexibility to either purchase a pre-blended pumpkin pie spice from your grocery store’s spice aisle or, for a truly bespoke touch, craft your own blend. A homemade mix can include ground cinnamon, nutmeg, ginger, allspice, and cloves, allowing you to customize the intensity and proportion of each spice to your liking. The rich, earthy, and sweet notes of these spices are what define a classic pumpkin pie.
🥚 Eggs: The Custard’s Creamy Secret: Our recipe utilizes a combination of one whole egg and three additional egg yolks. This specific ratio is key to achieving a wonderfully rich, smooth, and custardy pie filling that sets beautifully. The egg whites provide structure, while the extra yolks contribute an unparalleled creaminess and deep golden hue to the filling, making every slice luxurious.
🐄 Heavy Cream: For Unrivaled Velvety Texture: Adding another layer of indulgence, heavy cream is instrumental in creating the luxurious custard base of our pumpkin pie. Its high-fat content contributes significantly to the pie’s silky-smooth texture and rich mouthfeel, ensuring the filling is sumptuously creamy and decadent, never dry or crumbly.
🍭 Sugar Duo: A Symphony of Sweetness: We employ two distinct types of sugar in this recipe to build a complex and extra indulgent sweetness profile. Granulated sugar provides the primary sweetness, offering a clean and bright taste. Coconut sugar (or traditional brown sugar) complements this by adding a deeper, more nuanced sweetness with subtle caramel and molasses undertones. This combination prevents the pie from being one-dimensionally sweet and instead offers a rich, comforting depth of flavor.
🤍 Vanilla Extract: The Warmth of Home: Pure vanilla extract is a non-negotiable ingredient, imparting that heartwarming aroma and depth of flavor that we all know and love in classic desserts. Its sweet, floral, and slightly woody notes enhance all the other ingredients, binding them together in a harmonious blend.
🧂 Salt: The Flavor Enhancer: A humble pinch of salt plays a crucial, yet often underestimated, role. It doesn’t make the pie salty; rather, it expertly balances all the sweet and spicy flavors, preventing them from becoming cloying and instead allowing each note to shine brightly. It truly elevates the overall taste profile.
☁️ Whipping Cream & Powdered Sugar: The Cloud-Like Topping: For the ultimate finishing touch, fresh whipping cream (chilled) is whisked at high speed until it transforms into light, airy, and fluffy whipped cream. Powdered sugar is then folded in to add a subtle, delicate sweetness that perfectly complements the rich pie without overpowering it. This ethereal topping provides a beautiful contrast in texture and temperature to the warm, spiced pie.
Nonna’s Essential Tip for Pie Perfection 🥧
This step is crucial for achieving a beautifully set and easy-to-slice pumpkin pie: After baking, allow your pie to cool completely at room temperature for a minimum of 2-4 hours before attempting to cut into it. This patient waiting period ensures the filling has ample time to fully set and firm up, preventing any runny slices and guaranteeing a picture-perfect presentation.
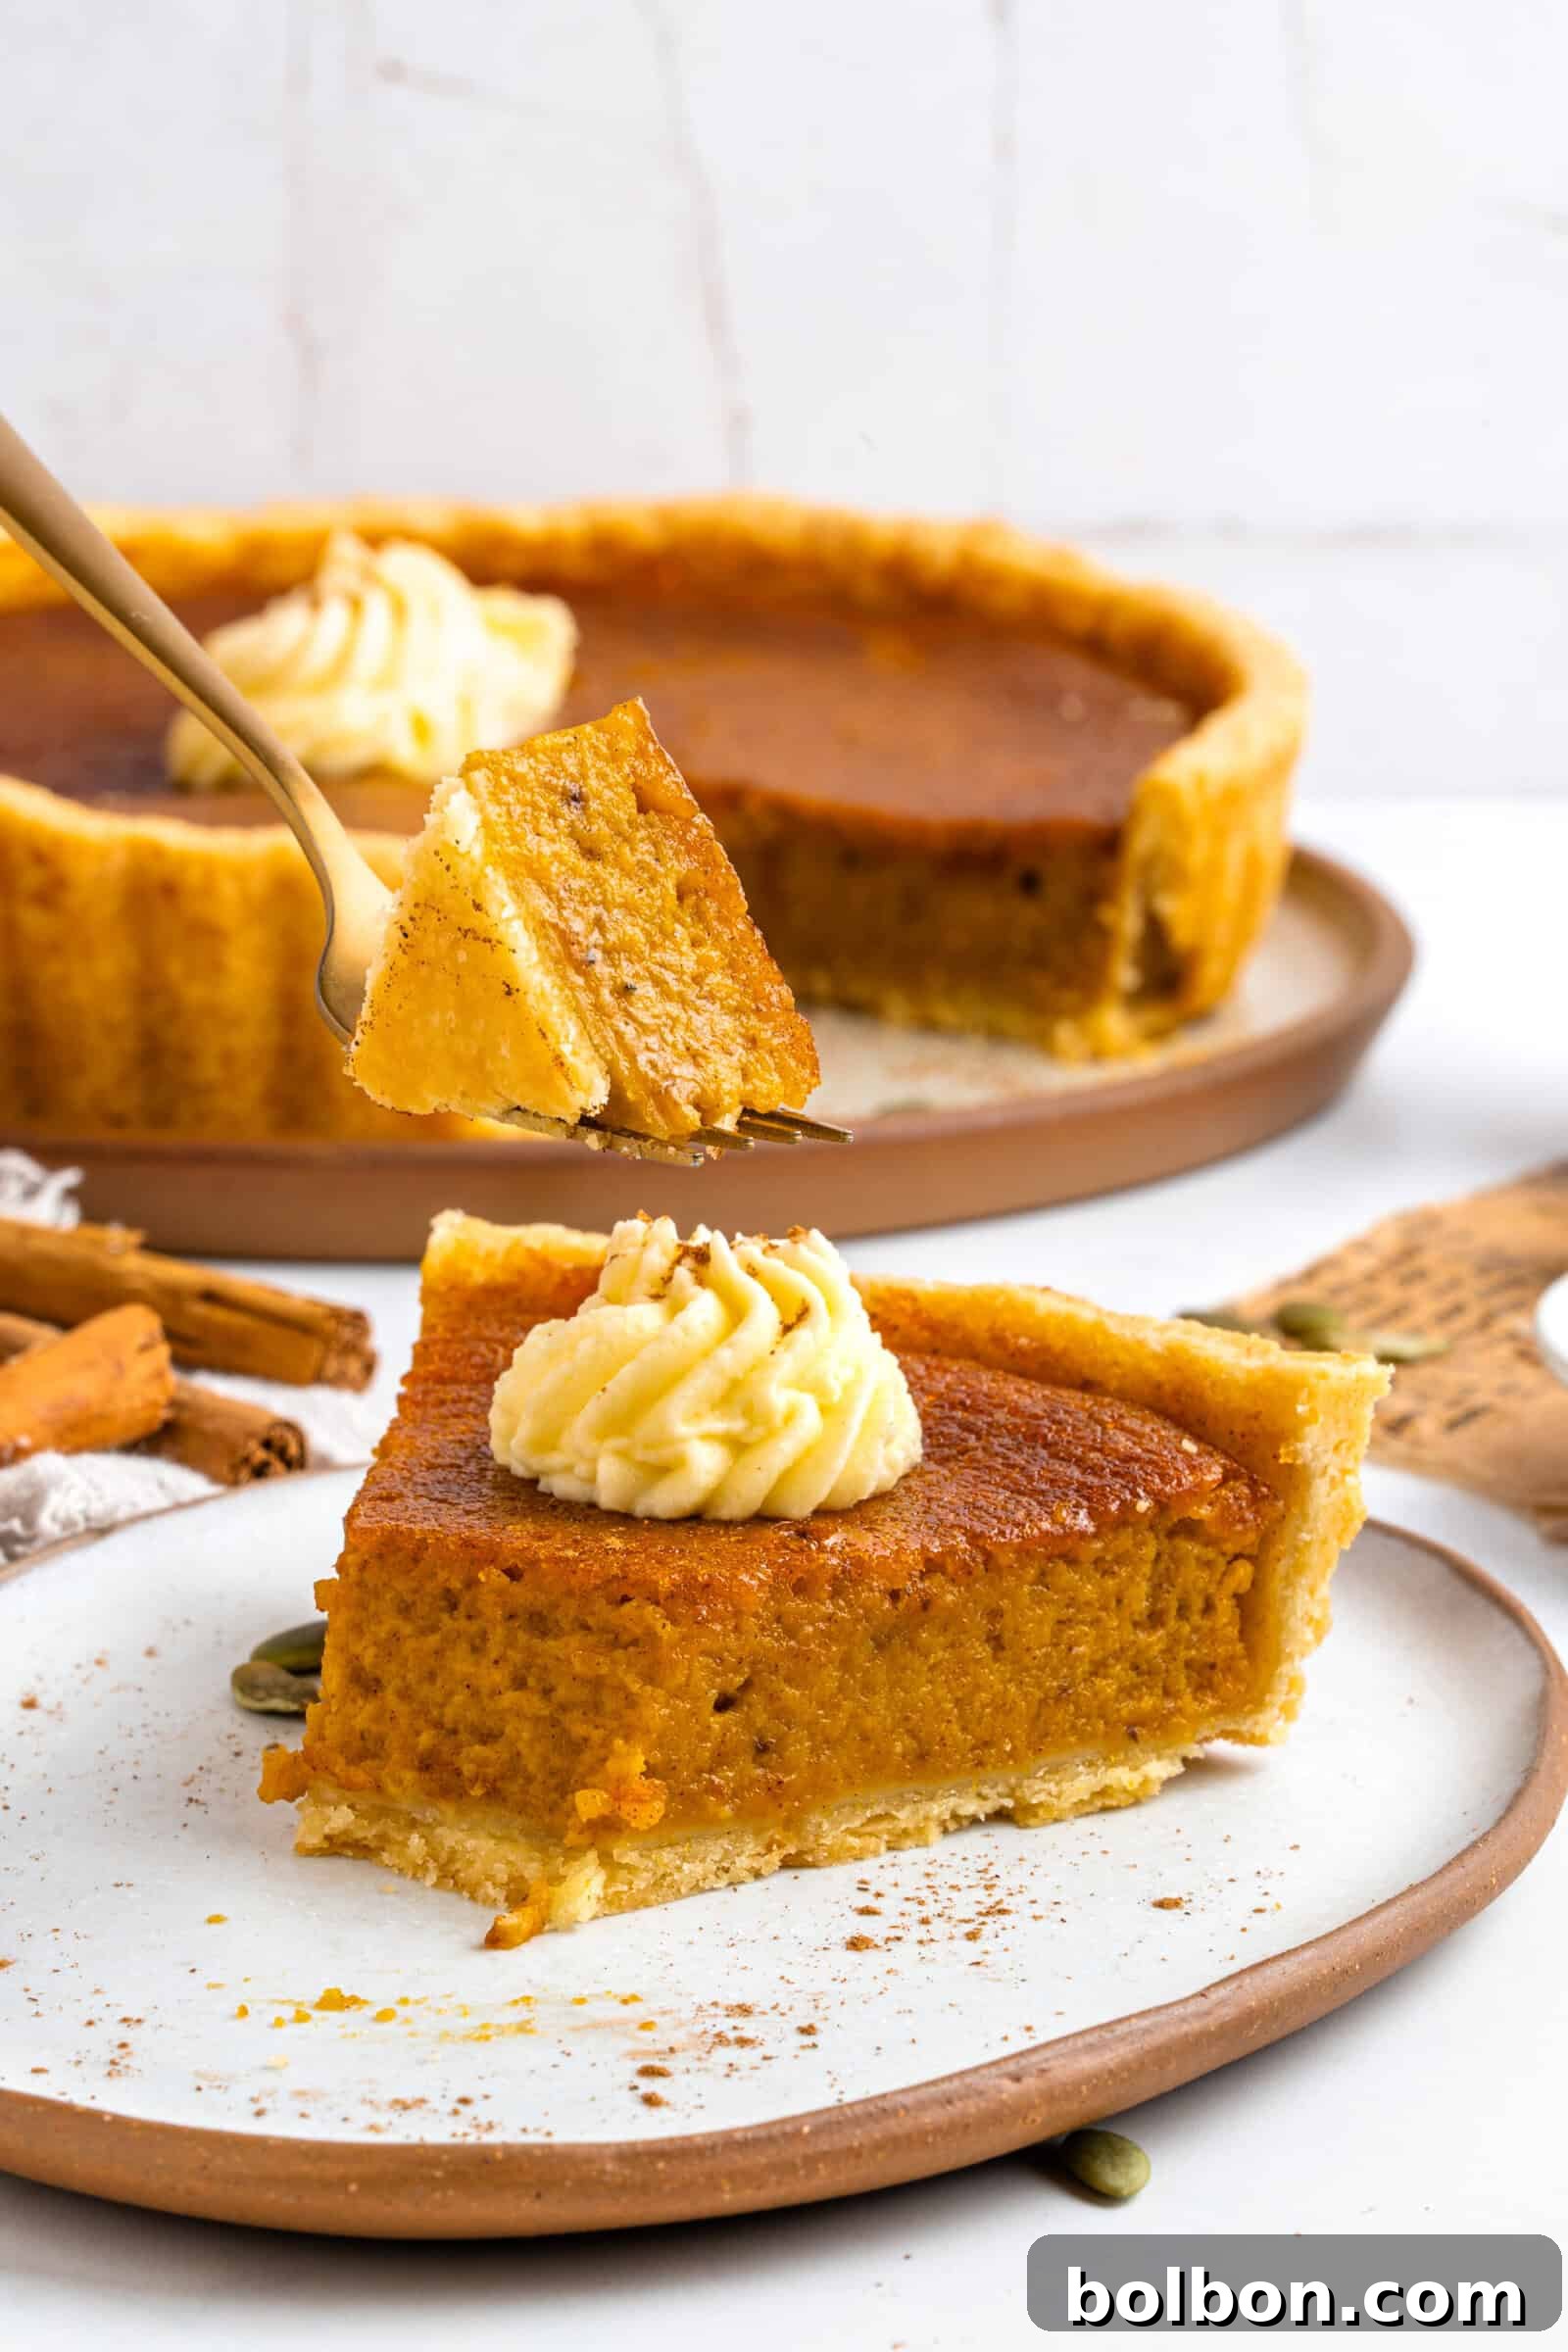
Knowing When Your Pumpkin Pie is Perfectly Baked
Achieving that perfectly set, yet still creamy, pumpkin pie filling is an art. Here are several reliable methods to ensure your pie is baked to perfection:
- The Gentle Jiggle Test: This is a classic indicator. Carefully and gently wiggle the pie pan. The outer edges of the filling should appear fully set and firm, showing no movement. However, the very center of the pie (about 2-3 inches in diameter) should still have a slight, delicate jiggle, much like a perfectly set Jell-O. This indicates that the pie is cooked through but not overbaked, and the residual heat will continue to set the center as it cools.
- Toothpick or Knife Check: For a more precise assessment, insert a clean toothpick or the tip of a thin, pointy knife into the pie filling. Aim to insert it about 2 inches away from the center of the pie. If the toothpick or knife comes out mostly clean, with just a few moist crumbs attached, your pie is done. If it comes out wet with raw filling, continue baking and check again in 5-10 minute intervals. Remember, the very center may still look slightly moist, but it will firm up during the cooling process.
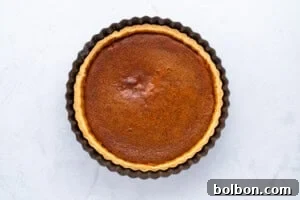
- Visual Color Cues: Pay attention to the pie’s appearance. A perfectly baked pumpkin pie filling will develop a rich, vibrant amber-orange color. You might also notice that the filling around the edges of the pie has slightly puffed up and may show tiny cracks, which is a normal sign of doneness.
- Crust Assessment: Don’t forget to check the crust! The pie crust should be a beautiful golden brown color, indicating it’s fully baked and deliciously crispy. You may also observe it pulling ever so slightly away from the sides of the pie pan. If your crust edges are browning too quickly before the filling is fully cooked, simply tent a thin strip of aluminum foil around the perimeter of the pie to prevent scorching.
- Temperature Check (The Pro Move): For the most accurate reading, use an instant-read thermometer. Insert it into the center of the pie, avoiding the crust. The internal temperature should register around 175°F (79°C). This temperature ensures the eggs are fully cooked and the custard is set, while maintaining a wonderfully smooth texture.
- The Critical Cool-Down: This final step is paramount. Once out of the oven, allow the pie to cool undisturbed at room temperature for at least 2–3 hours, or ideally 4 hours. Resist the urge to cut into it too soon! As the pie cools, its internal structure continues to firm up beautifully, ensuring clean, perfect slices. You can even bake your pie a day ahead of time, allowing it to cool completely before chilling, which often enhances the flavors.
Expert Tips for a Flawless Pumpkin Pie
Beyond the basic recipe, a few expert tips can elevate your pumpkin pie from great to absolutely extraordinary:
- Preventing a Soggy Bottom: While our recipe doesn’t require blind baking, for an extra crisp crust, especially if you’re concerned about a soggy bottom, you can lightly blind bake your store-bought crust for 10-15 minutes before adding the filling. Use pie weights or parchment paper filled with dried beans to prevent puffing.
- Avoiding Cracks in the Filling: Cracks usually occur when a pie is overbaked or cools too quickly. To prevent cracks, ensure you don’t overbake (use the jiggle or temperature test!). Also, avoid moving the pie too much immediately after removing it from the oven, and let it cool gradually at room temperature on a wire rack, away from drafts.
- For Deeper Flavor: Consider infusing your heavy cream with a cinnamon stick or a few whole cloves for 30 minutes before heating and mixing into the filling. Strain before use for a subtle, aromatic boost.
- Chill Before Serving (Optional but Recommended): While cooling at room temperature is essential for setting, chilling the pie for a few hours in the refrigerator after it has cooled completely can further firm up the filling and enhance the flavors, especially if serving the next day.
- Garnish for Impact: Beyond whipped cream, consider a dusting of cinnamon, a sprinkle of toasted pecans, a drizzle of caramel sauce, or even a few candied cranberries for a festive touch.
Creative Variations and Smart Substitutions for Your Pie
While our classic pumpkin pie recipe is perfect as is, it also offers incredible versatility for personalization. Experiment with these variations to make the pie uniquely yours:
- Crust Choices for Every Preference:
- Traditional Shortbread Crust: Pumpkin pie is most commonly baked in a rich, buttery shortbread-style pie crust. For ultimate convenience, you can easily purchase these pre-made and frozen from the grocery store. Alternatively, for those who enjoy baking from scratch, a simple boxed mix can yield excellent results with minimal effort.
- Alternative Pre-Made Crusts: For a delightful twist, consider using a pre-made graham cracker crust or a nutty walnut crust. These options are usually found in the baking aisle and offer a different flavor and texture profile. The best part? If you choose these, there’s no need to defrost or prick the crust before filling – simply pour and bake!
- Gluten-Free Options: Don’t let dietary restrictions keep you from enjoying this treat. Purchase a gluten-free pie crust from the frozen section, or even make your own if you’re adventurous. For a truly unique and naturally gluten-free approach, consider leaving out the crust entirely for a delicious, spoonable crust-less pumpkin pie, which has a texture akin to a rich pumpkin pudding.
- Customizing Your Pumpkin Pie Spice Blend: While pre-blended pumpkin pie spice is convenient, crafting your own allows for perfect customization. You can easily make your own pumpkin pie spice by blending individual pre-ground spices like cinnamon, nutmeg, ginger, allspice, and cloves. For the freshest, most potent flavor, you could even grind whole spices using a high-power food processor or a clean coffee bean grinder – the aroma is incredible!
- Exploring Sweetener Options:
- Brown Sugar Deep Dive: If you desire a deeper, more pronounced caramel flavor in your filling, consider using brown sugar exclusively instead of a combination with granulated sugar. Its moist texture and molasses notes will add a wonderful richness.
- Natural Sweetener Twists: For a unique twist and different flavor profiles, experiment with alternative sweeteners such as pure maple syrup 🍁 or local honey. These natural sweeteners will impart their own distinct aromas and complexities to the pie, creating a subtly different but equally delicious dessert.
- Dairy-Free Delight: For those seeking a dairy-free version of this classic dessert, readily replace the heavy cream with full-fat coconut cream (chilled, scoop out the thick cream from the top of the can) or a high-quality dairy-free milk alternative such as almond milk or oat milk. While results may vary slightly, these alternatives can still yield a wonderfully creamy and satisfying pie.
- Adjusting the Spice Level: Tailor the spice profile to your personal preference. Feel free to add more cinnamon for a warmer flavor, or increase the amounts of ground ginger, allspice, or cloves for different aromatic profiles. For an unexpected and exciting spicy kick, consider incorporating a tiny pinch of cayenne pepper🌶️ into your filling – it won’t make it hot, but it will subtly enhance the other spices.
- Elevating Your Whipped Cream Topping: Take your whipped cream to the next level by infusing it with additional flavors. Mix in a teaspoon of pure vanilla extract for extra aroma, a dash of ground cinnamon for seasonal warmth, or even a splash of your favorite flavored liqueur, such as Bailey’s Irish Cream or Grand Marnier, for an adult-friendly indulgence.
- Miniature Pumpkin Pies: Instead of baking a single large pie, charming individual-sized mini pies can be created using tartlet tins or muffin tins. These are perfect for portion control, easy serving, and delightful presentations. Just remember that you will need to significantly adjust the baking time downwards, as smaller pies cook much faster. Keep a close eye on them!
The Best Accompaniments for Your Pumpkin Pie
A slice of warm, spiced pumpkin pie is a joy on its own, but pairing it with the right accompaniments can elevate the experience to pure culinary bliss:
- Classic Creamy Toppings: You can never go wrong with a generous dollop of lightly sweetened whipped cream, made fresh for an airy texture. Alternatively, a scoop of premium vanilla ice cream 🍨, melting slightly over the warm pie, provides a delightful contrast in temperature and adds an extra layer of creamy sweetness.
- Healthier Alternatives: If you prefer something a bit lighter than traditional cream or ice cream, consider serving your pumpkin pie with a spoonful of plain or vanilla whole-fat Greek yogurt. A light dusting of pumpkin pie spice blend on top of the yogurt will beautifully tie the flavors together.
- The Ultimate Warm Beverage Pairing: For the truly indulgent, a slice of this pie makes a supremely delicious and decadent pairing alongside our irresistible ☕️ Pumpkin Spice Latte. The complementary flavors of pumpkin and spices in both the pie and the latte create a harmonious autumn symphony.
- Coffee or Tea: A hot cup of freshly brewed coffee or a comforting mug of black tea can also be a wonderful, simpler pairing, allowing the rich flavors of the pie to remain the star.
Storage and Freezing Your Pumpkin Pie
Ensuring your delicious pumpkin pie remains fresh and flavorful is key, whether for enjoying leftovers or preparing ahead. Here’s how to properly store and even freeze your creation:
- Refrigerator Storage: Due to its dairy and egg content, pumpkin pie must always be stored in the refrigerator. Once completely cooled to room temperature, cover the pie loosely with plastic wrap or aluminum foil to prevent it from drying out or absorbing other odors from the fridge. Stored correctly, your pumpkin pie will remain fresh and delicious for 3 to 4 days.
- Freezing for Later Enjoyment: Yes, freezing pumpkin pie is a fantastic way to prepare ahead or preserve leftovers! However, to best maintain its flavor and texture, some careful steps are needed.
- Cool Completely: Ensure the pie is entirely cool, preferably chilled in the refrigerator for a few hours, before freezing.
- Initial Wrap: Wrap the entire pie tightly in several layers of plastic wrap, making sure to seal it well.
- Second Layer of Protection: Add a layer of heavy-duty aluminum foil over the plastic wrap. This dual protection is crucial for preventing freezer burn and maintaining quality.
- Freezer Bag (Optional but Recommended): For added security, place the double-wrapped pie into a large freezer-safe bag or an airtight container.
- Thawing Instructions: To enjoy your frozen pie, transfer it to the refrigerator and allow it to defrost slowly for 8-12 hours, or overnight.
- Serving After Thawing: Once thawed, you can bring the pie to room temperature for serving, or for a warm slice, gently reheat it in a low oven (around 300°F / 150°C) for 15-20 minutes, or until just warmed through. This helps to re-crisp the crust slightly.
- Best Practice: For optimal flavor and texture, freshly baked and refrigerated pie is always best. Freezing is a great option for extending shelf life, but expect a slight change in texture upon thawing.
Explore More Delicious Fall Recipes
Decadent Pumpkin Bread
Total Time: 55 mins
Perfect Pumpkin Spice Latte
Total Time: 10 mins
Pumpkin Bread with Cream Cheese Filling
Total Time: 55 mins
Energizing Pumpkin Overnight Oats
Total Time: 5 mins
Beyond Pumpkin Pie: Other Holiday Delights to Complete Your Feast
While pumpkin pie often takes center stage, a truly memorable holiday meal is composed of a symphony of flavors. Here are more delectable recipes to complement your festive spread and ensure your holiday table is nothing short of spectacular:
- Rich and Flavorful Gravy: The essential accompaniment for any holiday roast.
- Perfectly Juicy Thanksgiving Turkey: Our foolproof method for a moist and tender turkey.
- Creamy Baked Mac and Cheese: A comforting, crowd-pleasing side dish that’s always a hit.
- Classic Herb Stuffing: The ultimate savory bread stuffing, bursting with aromatic herbs.
- Delicious Sweet Potato Donuts: A delightful sweet treat or unique side.
- Homemade Cranberry Sauce: Fresh and vibrant, a perfect balance to rich meats.
- Crispy Brussels Sprouts with Bacon: A savory and irresistible vegetable side.
- Perfectly Roasted Sweet Potatoes: Simple, sweet, and wonderfully caramelized.
- Velvety Roasted Garlic Mashed Potatoes: Infused with rich garlic flavor for an elevated classic.
- Caramelized Roasted Delicata Squash: A naturally sweet and tender side dish.
- Hearty Turkey Noodle Soup: Perfect for using up holiday leftovers.
- Creamy Butternut Squash Pasta: A comforting and seasonal main course option.
- Warm Spiced Baked Apples: A simple, wholesome, and aromatic dessert.
- Perfectly Sautéed Mushrooms: A versatile and earthy addition to any plate.
- Crisp Asian-Style Green Beans: A fresh and flavorful take on a classic vegetable.
- Whole Roasted Sweet Potato: A rustic and naturally sweet side, easy to prepare.
Frequently Asked Questions About Pumpkin Pie
Absolutely! To adapt this recipe for a gluten-free diet, your primary adjustment will be the pie crust. You can easily purchase a pre-made gluten-free pie crust, typically found in the frozen dessert section of most well-stocked grocery stores, or opt for a boxed gluten-free pie crust mix to make your own from scratch. For a wonderfully unique and naturally gluten-free option, you could even omit the crust entirely, baking the filling in a buttered pie dish for a delightful crust-less pumpkin pie that resembles a rich, spiced pumpkin pudding. It’s equally delicious!
While coconut sugar offers a unique, slightly nutty flavor and a lower glycemic index, it is by no means mandatory for this recipe. You have complete flexibility to use any variety of sugar you prefer. A popular and excellent substitute is light brown sugar, which will contribute a similar deep, molasses-like flavor profile, enhancing the pie’s richness. Feel free to use all granulated sugar if that’s what you have on hand, though you might lose some of the subtle caramel notes.
Yes, you can certainly adapt this classic pumpkin pie recipe to be dairy-free! The key substitution involves the heavy cream. For a rich, creamy texture, we recommend replacing the heavy cream with full-fat coconut cream (chilled, and scoop only the thick cream from the top of the can). Alternatively, a high-quality dairy-free milk alternative such as almond milk or oat milk can also be used, though note that the texture might be slightly less rich than with heavy cream. We always encourage experimentation to find your perfect dairy-free balance!
Absolutely, and we highly encourage it for the freshest flavor! Making your own pumpkin pie spice is incredibly simple and allows for customization of the flavor profile. You can combine a mix of individual pre-ground spices you likely already have in your pantry, such as cinnamon, nutmeg, ginger, ground allspice, and ground cloves. For an even more aromatic and potent blend, you can grind whole versions of these spices using a high-power food processor or a clean coffee bean grinder just before mixing. The difference in aroma and taste is truly remarkable!
To maintain optimal freshness and prevent spoilage, all leftover pumpkin pie should be stored in the refrigerator. Once the pie has cooled completely to room temperature, cover it securely with plastic wrap or aluminum foil to protect it from air exposure and absorption of other food odors. When stored properly in the refrigerator, your delicious pumpkin pie will remain fresh and enjoyable for 3 to 4 days.
Yes, freezing pumpkin pie is a fantastic way to prepare ahead or preserve leftovers! However, to best maintain its flavor and texture, some careful steps are needed. First, ensure the pie is completely cooled, preferably chilled in the refrigerator. Then, wrap your pie tightly in multiple layers of plastic wrap, followed by a layer of heavy-duty aluminum foil. This double-layer protection is vital to prevent freezer burn. For extra security, place the wrapped pie in a freezer-safe bag. To thaw, simply transfer the pie to the refrigerator and allow it to defrost for 8-12 hours. You can then bring it to room temperature or warm it slightly in the oven before serving for the best texture.
Absolutely, you can use fresh pumpkin for your pie, and it can yield a wonderfully nuanced flavor! However, it does involve a few extra steps compared to the convenience of canned puree. You’ll need to select a pie pumpkin (sugar pumpkin), roast it until tender, then thoroughly puree the roasted flesh. Crucially, you’ll also need to strain the fresh pumpkin puree to remove excess moisture. This straining step is vital for achieving a dense, creamy pie filling texture similar to what canned puree provides, preventing a watery or grainy pie.
Ingredient weights can indeed vary significantly due to several factors. For instance, while 1 cup of all-purpose flour might weigh approximately 160g in our kitchen, depending on how it’s measured (scooped and leveled vs. spooned into the cup), the brand of flour, or even humidity, it could weigh anywhere from 120g to 180g in yours. Similarly, brands and styles of measuring cups and spoons (whether designed for wet or dry ingredients) can also impact the final volume and weight. For the most consistent and accurate results, especially in baking, we always recommend adhering to the weight measurements (if provided) directly within the recipe, as these have been tested and proven to work best for the recipe’s intended outcome. When in doubt, weighing ingredients is generally more accurate than volumetric measurements.
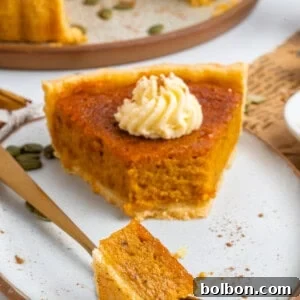
The Classic Pumpkin Pie
⭐
⭐
⭐
⭐
Facebook Share
See FAQs
Print Recipe
Video Tutorial
Equipment Needed
Ingredients (Yields 8 slices)
For the Pumpkin Pie Filling:
- 1 large egg
- 3 egg yolks
- ½ cup granulated sugar
- ¼ cup brown sugar (or coconut sugar for a nutty flavor)
- 1 teaspoon pure vanilla extract (recommended brand)
- 2 teaspoons pumpkin pie spice (homemade or store-bought blend)
- A pinch of salt (enhances flavors)
- 1.5 cups pumpkin purée (ensure it’s pure, canned, not pie mix)
- ¾ cup heavy cream (35% MF, for a rich custard)
- 1 pie crust (store-bought, 9-inch, unbaked)
For the Whipped Cream Topping:
- 1 cup whipping cream (chilled, for best results)
- 3 tablespoons powdered sugar (adds subtle sweetness)
US Customary –
Metric
Note: Metric conversions are approximations and may vary. For best results, use the original US customary measurements.
Step-by-Step Instructions
-
Step 1: Prepare Crust & Preheat Oven. Carefully transfer your unbaked pie shell to a sturdy baking sheet. Allow it to defrost at room temperature for about 15 minutes. During this time, preheat your oven to 425°F (220°C).
-
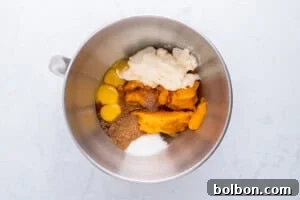
Step 2: Mix the Filling. In a spacious mixing bowl, combine the whole egg, egg yolks, granulated sugar, brown sugar, pumpkin purée, heavy cream, vanilla extract, pumpkin pie spice, and a pinch of salt. Whisk all ingredients thoroughly until the mixture is completely smooth and well-combined. Ensure there are no lumps and the sugars have dissolved.

-
Step 3: Fill and Initial Bake. Once your pie shell has defrosted, use a fork to gently prick the bottom all over. This prevents the crust from bubbling up. Carefully pour the prepared pumpkin filling into the pie shell, filling it almost to the rim. Place the baking sheet with the pie into your preheated oven and bake for an initial 15 minutes at 425°F (220°C).
-
Step 4: Reduce Heat & Continue Baking. After the initial 15 minutes, reduce the oven temperature to 375°F (190°C). Continue to bake for an additional 35 to 45 minutes, or until the pie is mostly set. To check for doneness, gently insert a toothpick or a thin, pointy knife about 2 inches from the center; it should come out mostly clean. (In our tests, the total baking time was approximately 1 hour.)
-
Important Note: Crust Protection. If you notice the edges of your pie crust browning too quickly during the longer bake, simply cover the perimeter of the pie with a thin strip of aluminum foil. This will protect the crust from burning while allowing the filling to finish cooking perfectly.
-
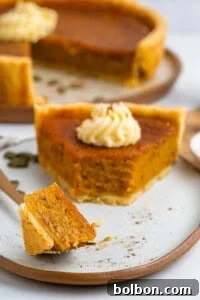
Step 5: Cool & Serve. This step is paramount! Once removed from the oven, let the pie rest and cool completely at room temperature for at least 1 hour, or ideally 2-4 hours, before slicing. This allows the custard to fully set, ensuring clean, beautiful slices. Serve your perfectly set pie with a dollop of freshly made whipping cream. Store any leftover pie securely covered in the refrigerator for up to 4 days. Enjoy every comforting bite!

Whipped Cream Topping Instructions:
-
Step 1: Whip the Cream. In a clean, chilled bowl, combine the very cold whipping cream and powdered sugar. Using a hand mixer (or a stand mixer with a whisk attachment), whisk on high speed for 1 to 2 minutes, or until stiff peaks form. Be careful not to over-whisk, as it can turn granular. Serve immediately on your cooled pumpkin pie for the freshest taste and enjoyment!
Recipe Notes & Expert Tips
- Crucial Cooling Time: For impeccable results, it is absolutely vital to allow your freshly baked pie to cool completely at room temperature for 2-4 hours. This extended cooling period allows the delicate custard filling to set fully, ensuring firm, beautifully structured slices that won’t run when cut. Patience is key for perfection!
- Pure Pumpkin is Best: Always ensure you are using 100% pure pumpkin puree – specifically avoid pre-made pumpkin pie mix or pumpkin pie filling, which contain added sugars and spices that you won’t be able to control.
- Selecting Your Pie Crust: Pumpkin pie traditionally shines in a buttery shortbread-style crust. You have several convenient options: purchase a high-quality pre-made frozen crust, or easily prepare one from a boxed mix. For a different flavor profile, consider a pre-made graham cracker or walnut crust, often found in the baking aisle. These alternative crusts usually do not require defrosting or pricking before filling.
- Crafting Your Own Spice Blend: Elevate your pie by making your own pumpkin pie spice. Blend pre-ground cinnamon, nutmeg, ginger, allspice, and cloves to your preferred ratio. For the most intense aroma and flavor, consider grinding whole spices in a high-power food processor or a dedicated clean coffee grinder just before use.
- Sweetener Customization: To adjust the sweetness and flavor depth, experiment with your sugars. Substituting brown sugar entirely for granulated sugar will yield a deeper, more pronounced caramel note. For unique natural flavors, try incorporating maple syrup or honey, which will impart their distinct characteristics to the pie.
- Dairy-Free Adaptation: To create a delicious dairy-free pumpkin pie, simply swap the heavy cream for full-fat coconut cream (ensure it’s well-chilled and use only the thick cream from the top of the can) or a dairy-free milk alternative like almond or oat milk.
- Whipped Cream Enhancements: Make your whipped cream extra special! Stir in a teaspoon of vanilla extract, a pinch of ground cinnamon, or a splash of a complementary flavored liqueur, such as Bailey’s Irish Cream, for an indulgent finish.
- Baking Mini Pies: For charming individual servings, use tartlet or muffin tins to create mini pumpkin pies. Remember that baking times will be significantly shorter for smaller pies, so keep a close eye on them to prevent overbaking.
Nutrition Information
Calories: 408kcal,
Carbohydrates: 38g,
Protein: 5g,
Fat: 27g,
Saturated Fat: 15g,
Polyunsaturated Fat: 2g,
Monounsaturated Fat: 8g,
Trans Fat: 0.003g,
Cholesterol: 152mg,
Sodium: 117mg,
Potassium: 193mg,
Fiber: 2g,
Sugar: 25g,
Vitamin A: 8043IU,
Vitamin C: 2mg,
Calcium: 71mg,
Iron: 2mg
Nutrition information is automatically calculated and should be used as an approximation only.
Additional Recipe Info