
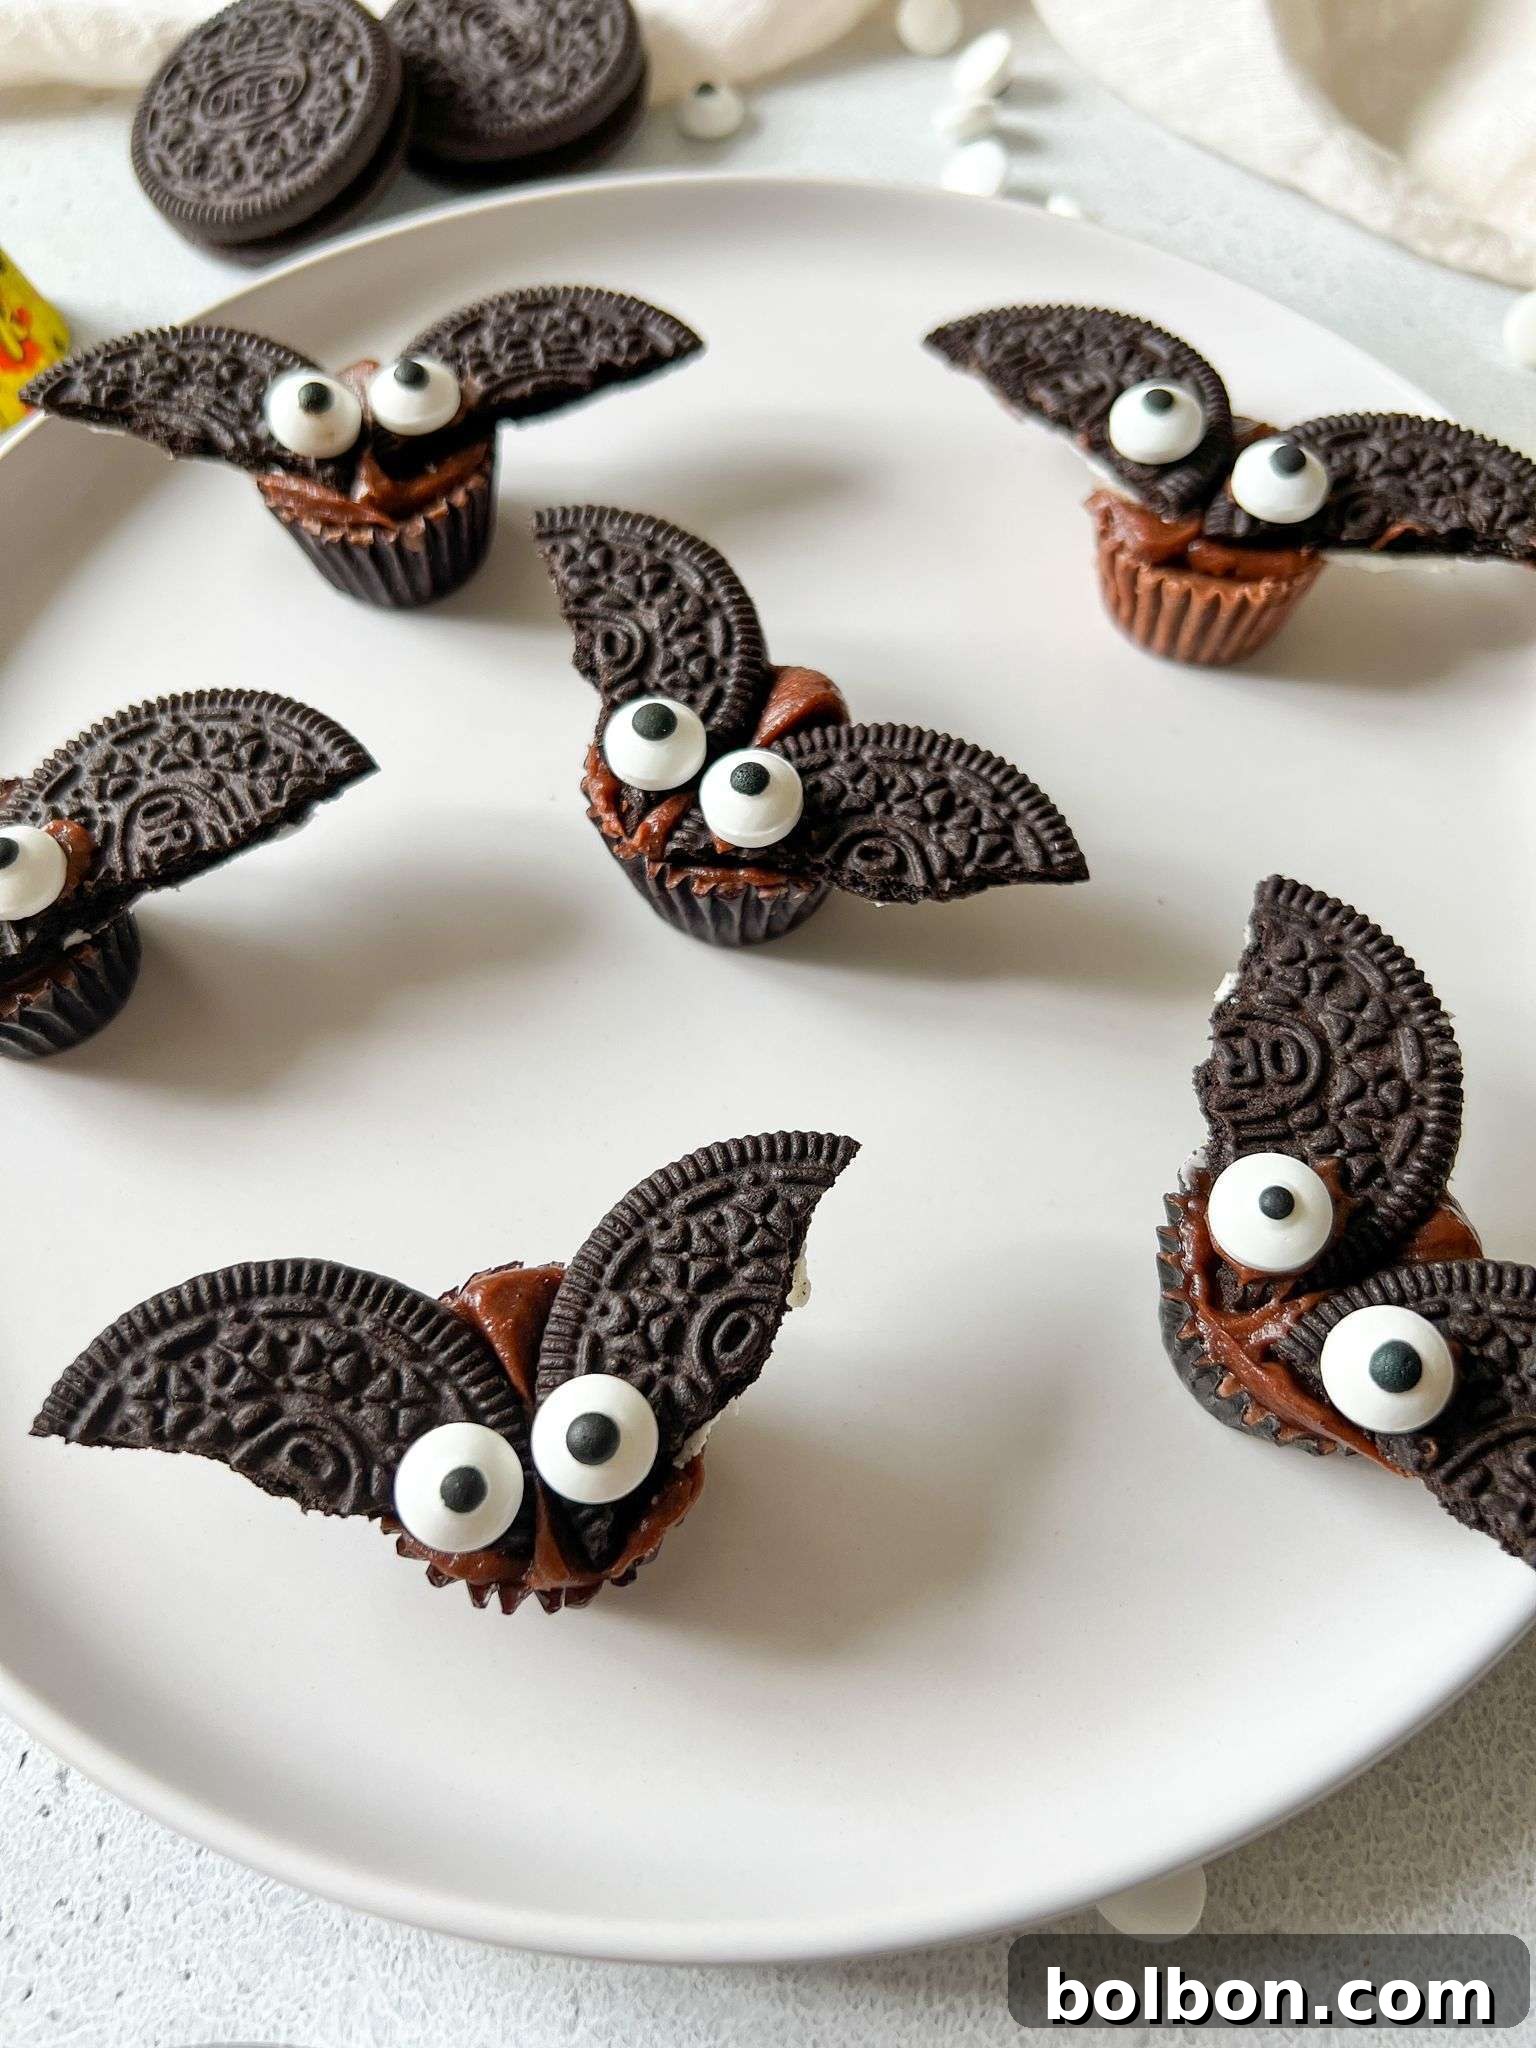
Halloween 🎃 is a time for spooky delights, eerie decorations, and, of course, delicious treats that capture the spirit of the season. As the air grows crisp and autumn leaves begin to fall, there’s no better way to celebrate than by crafting some adorable and utterly irresistible chocolate bats 🦇! These charming confections are not just a feast for the eyes but also a perfect addition to any Halloween party, ghoulish gathering, or simply a cozy night in with themed sweets.
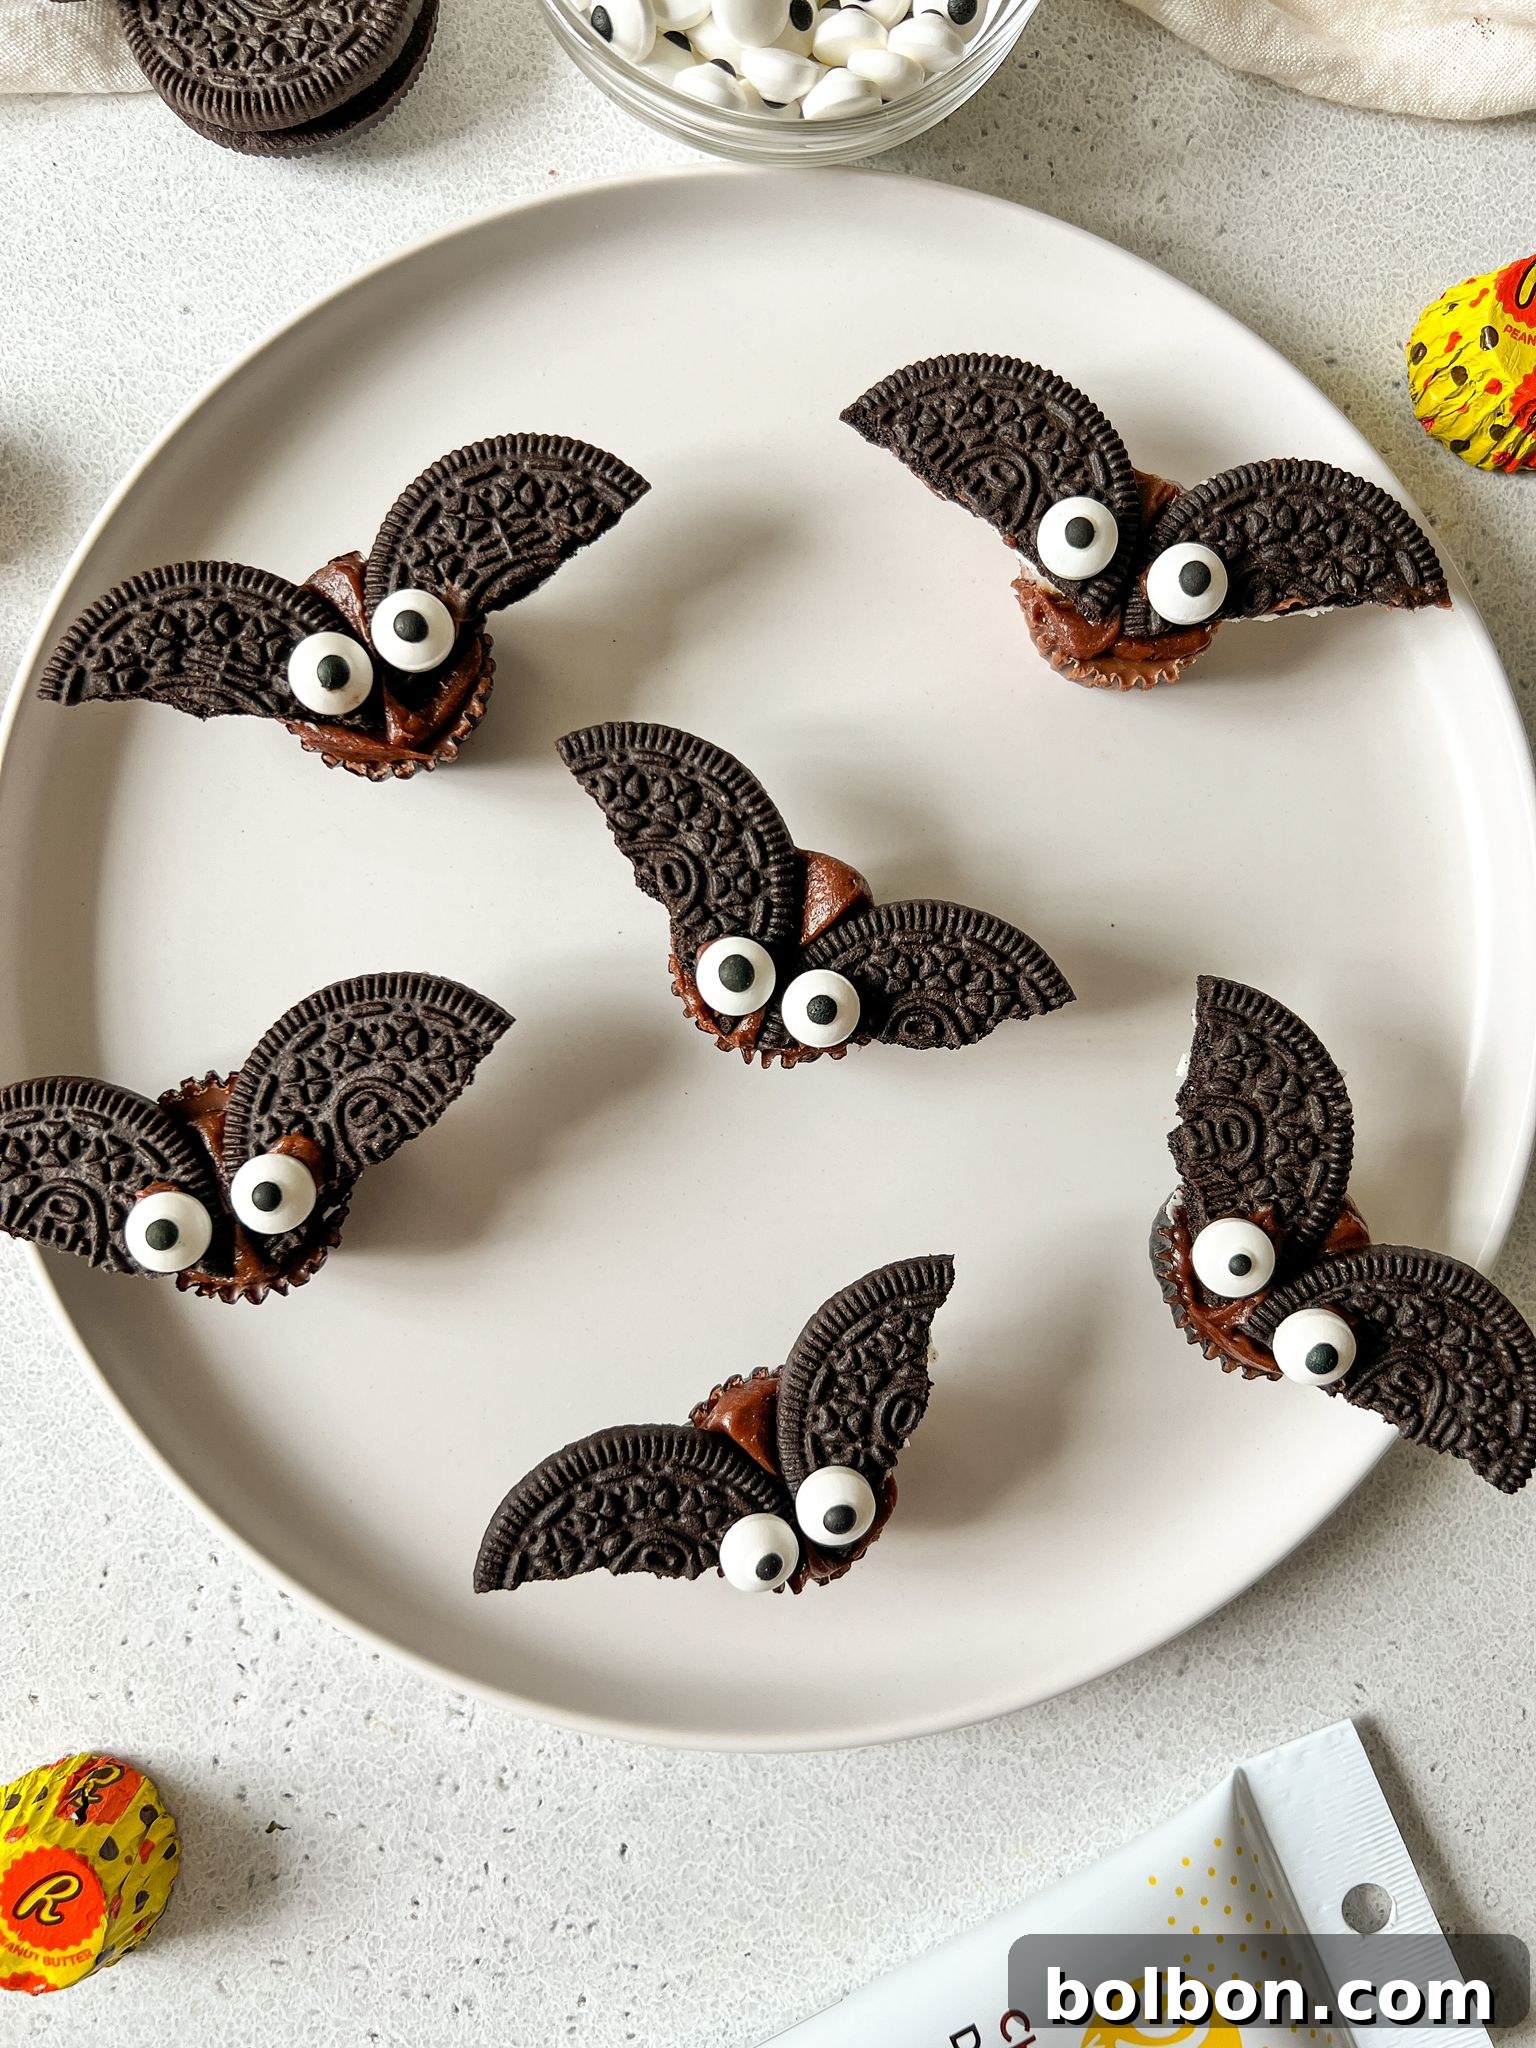
Imagine tiny, dark chocolate bodies adorned with iconic cookie wings and playful candy eyes – these no-bake chocolate bats are designed to bring smiles and a touch of spooky whimsy to everyone. Whether you’re a seasoned baker or a kitchen novice, this recipe requires minimal ingredients and effort, allowing you to easily assemble your own delightful army of these winged creatures. They’re a fantastic project for families, a quick treat for unexpected guests, and a guaranteed crowd-pleaser that embodies the fun and magic of Halloween. Get ready to transform simple pantry staples into enchanting edible art that will be the talk of your Halloween festivities!
Why You’ll Adore These Spooky Sweet Chocolate Bats
These Halloween Chocolate Bats aren’t just a treat; they’re an experience! Here’s why they’re destined to become your go-to festive snack:
- Effortlessly Quick and Simple: Forget complicated baking or long hours in the kitchen. This recipe is designed for maximum impact with minimal fuss. In just a few easy steps, without needing an oven, you can create charming, Instagram-worthy treats ready for enjoyment. It’s perfect for busy schedules or spontaneous Halloween fun!
- Irresistibly Adorable Charm: Who can resist a cute bat? These chocolate confections are incredibly eye-catching and boast an undeniable charm. They serve as both a delightful treat for the taste buds and a fantastic, edible decoration that will elevate the spooky ambiance of any Halloween party or gathering. Their whimsical appearance makes them an instant favorite.
- Engaging for All Ages: This is a truly kid-friendly activity that promises fun for the whole family. Little hands can get involved in unwrapping, breaking cookies, and carefully placing the candy eyes, fostering creativity and fine motor skills. It’s a wonderful opportunity to spend quality time together, making memories while crafting delicious edible creatures.
- Endlessly Customizable: While our classic recipe calls for specific ingredients, the beauty of these chocolate bats lies in their versatility. There are countless variations and substitutions you can explore to cater to different dietary preferences, allergies, or simply to unleash your inner mad scientist of sweets. Think different cookie flavors, candy centers, or icing colors!
- Budget-Friendly Fun: Made with readily available and affordable ingredients like mini peanut butter cups, Oreos, and chocolate icing, these bats won’t break the bank. You can whip up a significant batch of these festive treats without excessive cost, making them ideal for large parties or school events.
- Perfect for Gifting: Package a few of these adorable chocolate bats in clear cellophane bags with a festive ribbon, and you’ve got a charming homemade gift or party favor. They make thoughtful tokens for neighbors, teachers, or trick-or-treaters who stop by for a special treat.
- No-Bake Brilliance: The best part? No oven is required! This is a completely no-bake dessert, which means less cleanup, less heat in the kitchen, and a quicker path to enjoying your delicious creations. It’s perfect for summer Halloween parties or when you simply want to avoid turning on the oven.
Gathering Your Bat-Making Essentials
To embark on your chocolate bat adventure, you’ll need just a few simple ingredients and tools:
Equipment:
- A clean workspace or baking sheet lined with parchment paper for easy cleanup.
- A small plate or bowl for your chocolate icing.
- A small offset spatula or butter knife (optional, for spreading icing).
Ingredients:
- Mini Reese’s Cups: These iconic peanut butter cups form the sturdy and delicious body of your bats. Ensure they are unwrapped and ready.
- Oreo Cookies: The classic chocolate sandwich cookies are perfect for creating the distinctive bat wings.
- Chocolate Icing: A ready-made chocolate icing (like Wilton Brown Chocolate icing) works perfectly as both adhesive and a base for the eyes. Alternatively, a small amount of melted chocolate or even a nut/seed butter can be used.
- Candy Eyes: Small edible candy eyes bring your bats to life, giving them a whimsical and slightly spooky gaze.
Crafting Your Chocolate Bats: A Simple Step-by-Step Guide
Transforming these simple ingredients into enchanting chocolate bats is an enjoyable process. Follow these straightforward steps to create your spooky sweet treats:
Step 1: Prepare the Bat Bodies. Begin by carefully unwrapping all your mini Reese’s Peanut Butter Cups. These delightful chocolate and peanut butter treats will serve as the sturdy and delicious bodies of your chocolate bats. Place them on your prepared surface, such as a baking sheet lined with parchment paper, allowing enough space between each cup.
Step 2: Apply the Adhesive. Next, take your chocolate icing (or melted chocolate) and place a small, neat dot on top of each Reese’s cup. This dot acts as the crucial adhesive that will secure the bat’s wings in place. Aim for a small but sufficient amount to ensure good sticking power.
Step 3: Create the Iconic Wings. Gently twist and break each Oreo cookie in half. The goal is to separate the two chocolate cookie wafers, ideally leaving one half with less cream filling. This un-iced half will be easier to work with. Carefully break the chosen cookie half into two smaller, roughly equal semicircles. These will become the distinctive wings of your bats. Don’t worry if an Oreo breaks imperfectly; consider it a chef’s treat – a reward for your hard work!
Step 4: Attach the Wings. Using the chocolate icing dot you placed earlier as glue, attach the two Oreo cookie halves to the sides of each Reese’s cup. Position them slightly angled upwards and outwards, mimicking the outstretched wings of a bat in flight. Press gently to ensure they adhere well, but avoid pressing too hard to prevent the Reese’s cup from deforming.
Step 5: Prepare for the Eyes. Now, it’s time to give your bats their personalities. With the chocolate icing, carefully add two small dots on the front, upper portion of each Reese’s cup, just above the “wings.” These dots will serve as the base for the candy eyes, making sure they stick securely and stay in place.
Step 6: Apply the Candy Eyes. Finally, and with a delicate touch, gently place the white candy eyes on top of the chocolate icing dots. Position them to give your bats a fun, expressive look. The contrast of the white eyes against the dark chocolate will make your bats truly pop and come alive. Once the eyes are in place, your adorable chocolate bats are complete and ready to awe your Halloween guests!
Nonna’s Spooky Tips & Expert Advice
Pro Tips for Perfect Chocolate Bats
For the best results and a truly memorable Halloween treat, consider these helpful hints:
- Icing Choice Matters: While I personally love using Wilton Brown Chocolate Icing for its perfect consistency and rich color, you have options! A small amount of any creamy nut or seed butter (like peanut butter or sunflower seed butter) can also work wonders as an adhesive for the eyes if you’re looking for an alternative to icing. Melted chocolate, slightly cooled to a thicker consistency, is another excellent choice for both wings and eyes.
- Handle Candy Eyes with Care: The candy eyes, while undeniably adorable and edible, can be quite firm. It’s always advisable to exercise caution when consuming the chocolate bats, especially for young children or anyone with dental sensitivities. For added safety, you might consider removing the candy eyes before eating, or even replacing them with softer alternatives like mini chocolate chips, edible sprinkles, or simply piping small icing dots for eyes.
- Chilling for Stability: For best results, especially if you’re making these ahead of time or for a party, pop your finished chocolate bats into the refrigerator for 15-30 minutes. This will help the chocolate icing set firmly, ensuring the wings and eyes stay perfectly in place during handling and transport.
- Storage Solutions: Keep your chocolate bats fresh by storing them in an airtight container at room temperature for up to 3-4 days. If your kitchen is particularly warm, or if you prefer a firmer texture, you can store them in the refrigerator. Just be sure to bring them to room temperature for a few minutes before serving for optimal flavor.
- Creative Presentation: Arrange your finished bats on a platter with some artificial cobwebs, plastic spiders, or even some dry ice (used safely, of course) for an extra spooky effect. They also look fantastic nestled among other Halloween treats!
- Batch Prep: These bats are so easy, they’re perfect for making in large batches. Double or triple the recipe as needed for bigger parties or to share with friends and family.
Creative Twists & Dietary Adaptations
Let’s add a unique twist to your Halloween celebration! These chocolate bats are incredibly versatile, allowing for fun substitutions and variations to suit every taste and dietary need.
- Cookie Alternatives for Wings: While Oreos provide that classic chocolate bat look, feel free to experiment with other round cookies of your choice! Wafer cookies, shortbread, or even chocolate digestive biscuits can offer different textures and flavors. For a gluten-free option, simply opt for your favorite brand of gluten-free chocolate sandwich cookies or round chocolate wafers to make allergy-friendly bats that everyone can enjoy.
- Nut Allergy-Friendly Bodies: If you or your guests have nut allergies, don’t worry – you can still make these fantastic treats! Substitute the mini Reese’s cups with nut-free chocolate cups, mini chocolate cupcakes (turned upside down to resemble a cup shape), or even solid chocolate candy melts molded into small cup shapes. Sunbutter cups are another excellent option for a similar flavor profile without the nuts.
- Edible Eye Creativity: As mentioned, while candy eyes are adorable, their hardness can be a concern. Consider alternatives for the eyes:
- Mini Chocolate Chips: Placed pointy-side down, these make cute, soft eyes.
- Piped Icing Dots: Use a contrasting color of icing (like white or green) and a small round piping tip to create edible eyes directly on the bats.
- Sprinkles: Two small white or silver round sprinkles can also work effectively.
- Flavorful Icing: Infuse your chocolate icing with a few drops of extract for an extra dimension of taste! Vanilla, mint, or even a hint of orange extract can transform the flavor profile of your bats, offering a pleasant surprise with every bite.
- Different Chocolate Centers: Instead of Reese’s, try using other mini chocolate candies as the bat body. Rolo candies, miniature M&M’s, or even small chocolate truffles could work, offering different textures and flavor combinations.
- Colorful Bats: While classic black and brown are traditional, you could use white chocolate cups and white chocolate icing for “ghost bats,” or add food coloring to white icing for vibrant, fun-colored bats!
Beyond the Bats: More Spooktacular Halloween Recipes
If you’re loving these chocolate bats and want to expand your Halloween culinary repertoire, check out these other fantastic and festive recipes:
- Mummy Hot Dogs: A savory and fun classic, perfect for a quick party appetizer.
- Frankenstein Kiwis: A healthy and adorable green snack that’s easy to make.
- Witch Finger Cookies: Creepy, buttery cookies that are both delicious and delightfully spooky.
- Halloween Cheese Board: An elegant and eerie spread, perfect for adult gatherings.
- Pretzel Broomsticks: Sweet and salty treats that look just like a witch’s ride.
- Halloween Cocktails: Festive beverages to add a grown-up touch to your spooky soiree.
Common Questions About Halloween Chocolate Bats
Absolutely! You are welcome to use any round cookies instead of Oreos. Get creative and choose your favorite cookie flavor, whether it’s chocolate wafers, shortbread, or even gluten-free options. The key is a cookie that can be easily broken in half to form the wings.
If you or your guests have nut allergies, you can easily adapt these chocolate bats! Simply substitute the mini Reese’s cups with nut-free chocolate cups, such as sunbutter cups, or use mini chocolate cupcakes that resemble the shape of a small cup. This ensures that everyone can safely enjoy these festive Halloween treats without any concerns.
Yes, the candy eyes used in the recipe are indeed edible. However, it’s important to note that they can be quite hard. It’s advisable to be careful when consuming the chocolate bats, especially if you have sensitive teeth or are serving them to young children. You might consider removing the candy eyes before eating, or using softer edible alternatives like mini chocolate chips or piped icing for the eyes, to ensure a comfortable eating experience.
Certainly! Infusing your chocolate icing with flavors is a fantastic idea to give your chocolate bats an extra dimension of taste. A few drops of vanilla extract, mint extract for a refreshing twist, or orange extract for a zesty kick can elevate the flavor profile beautifully. Just be sure to add a small amount and taste as you go.
To keep your chocolate bats fresh and delicious, store them in an airtight container at room temperature. They will typically stay fresh for up to 3-4 days. If your home is particularly warm, or if you prefer them firmer, you can refrigerate them. Just let them sit at room temperature for a few minutes before serving to soften slightly.
Absolutely! These chocolate bats are perfect for making in advance. You can assemble them a day or two before your event and store them in an airtight container. This makes party preparation much easier, allowing you to focus on other aspects of your Halloween celebration when the big day arrives.
Halloween Chocolate Bats
Facebook Share
Rate Recipe
Print Recipe
Video
Equipment
Ingredients
- 8 mini Reese’s cups
- 8 Oreo cookies
- candy eyes
- chocolate icing , or any melted chocolate
Instructions
-
Unwrap the mini Reese’s cups, add a dot of chocolate icing (or melted chocolate) on top, and gently twist each Oreo cookie until the halves separate.
-
Take the Oreo half with less icing and carefully break it into two equal pieces. Attach these two pieces to the sides of the Reese’s cup, using the chocolate icing as an adhesive, to form the bat wings. If any Oreos break in the process, consider it a chef’s treat!
-
Apply two small dots of icing on the front of the Reese’s cup for the eyes, then gently place the white candy eyes on top of the icing dots. Enjoy your adorable chocolate bats!
Nutrition
,
Carbohydrates: 99g
,
Protein: 11g
,
Fat: 35g
,
Saturated Fat: 11g
,
Polyunsaturated Fat: 7g
,
Monounsaturated Fat: 16g
,
Trans Fat: 0.1g
,
Cholesterol: 3mg
,
Sodium: 572mg
,
Potassium: 417mg
,
Fiber: 5g
,
Sugar: 66g
,
Vitamin A: 33IU
,
Vitamin C: 0.2mg
,
Calcium: 64mg
,
Iron: 12mg
Nutrition information is automatically calculated, so should only be used as an approximation.