
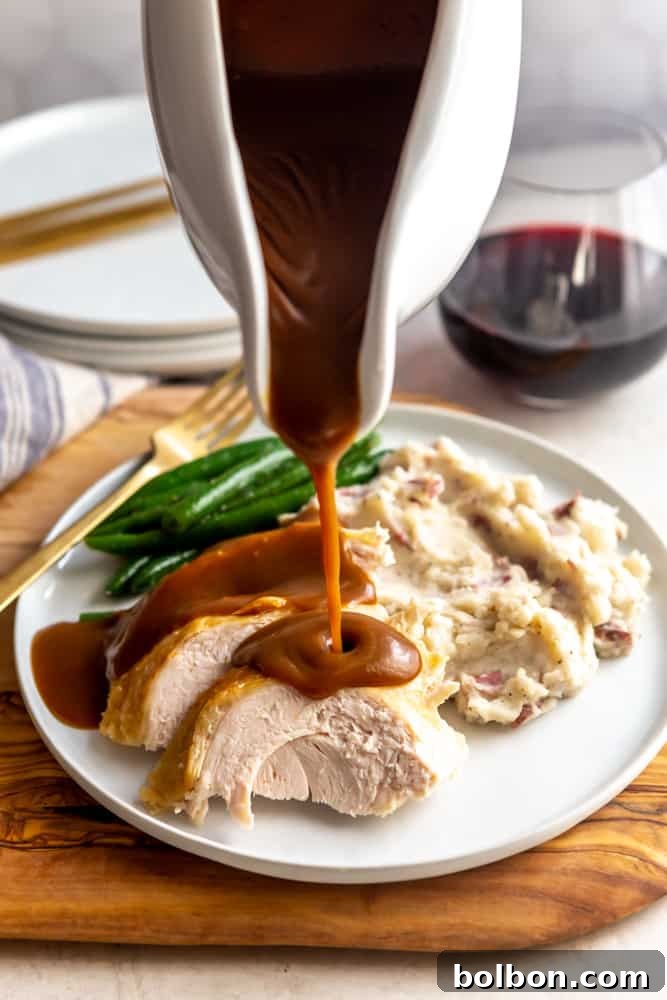
Thanksgiving. The word alone conjures images of delicious food, cherished family moments, and, for many, a touch of kitchen chaos. Amidst the flurry of roasting the turkey, mashing potatoes, and perfecting the cranberry sauce, one crucial element often adds last-minute stress: the gravy. But what if you could banish that stress and ensure a rich, flavorful gravy without the eleventh-hour scramble? Enter Make-Ahead Turkey Gravy – your secret weapon for a truly low-stress and delicious Thanksgiving celebration.
Why Make Your Gravy Ahead of Time? Embrace a Stress-Free Thanksgiving
For many home cooks, making gravy on Thanksgiving Day is one of the most dreaded tasks. The turkey has just come out of the oven, everyone is hungry, and you’re juggling multiple dishes, all vying for precious stovetop space and your attention. You’ve been cooking for hours, and the thought of creating a perfect, lump-free gravy from the limited, often-insufficient drippings can be overwhelming.
This is precisely why a make-ahead turkey gravy recipe is nothing short of revolutionary. Imagine doing all the heavy lifting weeks in advance. The day of the feast, your masterpiece simply needs a quick reheat, freeing you to focus on carving the turkey, spending time with loved ones, or simply enjoying a moment of calm before the meal. This intelligent approach not only liberates you from last-minute pressure but also often results in a deeper, more developed flavor profile for your gravy.
By preparing your gravy ahead, you eliminate the frantic rush to deglaze a hot roasting pan and whisk a roux while your guests eagerly await dinner. It allows for meticulous flavor building, ensuring every drop is rich, savory, and perfectly seasoned. This foresight means less stress, more enjoyment, and a truly unforgettable Thanksgiving meal.
Crafting Delicious Turkey Gravy Without Drippings
Many traditional gravy recipes heavily rely on pan drippings from a roasted whole turkey. But what if you’re grilling, smoking, or even deep-frying your turkey? Or perhaps your roasting pan simply didn’t yield enough drippings for a generous batch of gravy? This make-ahead method is a game-changer, allowing you to create a rich, flavorful turkey gravy entirely independent of the main bird’s roasting process.
The secret lies in generating your own “drippings” and an incredibly robust turkey stock using readily available turkey parts. Turkey wings and thighs are ideal for this purpose, as they offer a fantastic ratio of bone, skin, and meat, all essential for developing deep, savory flavors and natural fat. The bones contribute gelatin, which adds body and silkiness, while the skin renders fat, crucial for creating a flavorful roux.
For the best results, always opt for bone-in, skin-on turkey pieces. These elements are key to building a foundation of flavor that rivals, or even surpasses, gravy made from limited pan drippings. By roasting these parts with aromatic vegetables, you’re essentially creating a concentrated flavor base that will infuse your stock with an unparalleled richness. This technique ensures that whether your main turkey is smoked, fried, or even a turkey breast, you’ll still have an abundant supply of the most delicious, homemade turkey gravy.
The Art of Making Homemade Turkey Gravy: A Step-by-Step Guide
This Make-Ahead Turkey Gravy recipe doesn’t cut corners; it builds flavor from the ground up, starting with a robust homemade turkey stock. Not only will you end up with an incredible gravy, but you’ll also likely have some extra turkey stock and tender meat, perfect for freezing or transforming into a comforting turkey soup later on.
- Roast Turkey Parts with Aromatics: The foundation of your flavorful gravy begins with roasting bone-in, skin-on turkey wings or thighs alongside a medley of classic aromatics like onions, carrots, and celery. Toss these with olive oil, salt, and pepper to encourage deep browning and caramelization. This crucial step mimics the flavor development you’d get from roasting a whole turkey, creating those coveted browned bits and savory drippings that are essential for a rich stock. Roast until the turkey parts are deeply golden and thoroughly cooked, yielding maximum flavor and fat.
- Craft a Rich Turkey Stock: Once your turkey parts and vegetables are beautifully roasted, transfer them to a large stock pot. Next, it’s time to deglaze your roasting pan. Place the pan over two stovetop burners on medium heat and pour in some dry white wine (or extra chicken broth if you prefer to omit alcohol). Scrape up all the flavorful browned bits (the “fond”) from the bottom of the pan with a wooden spoon. This concentrated flavor is gold! Pour this liquid into your stock pot, then add chicken or turkey broth, water, and fresh herbs like thyme and a bay leaf. Bring the mixture to a boil, then reduce the heat and simmer gently for several hours. This slow simmering process extracts all the delicious flavors from the bones, meat, and vegetables. Check periodically, adding more water if the liquid level drops too much.
- Strain and Separate the Fat: When your stock has achieved a rich aroma and color, carefully strain it through a fine-mesh sieve, discarding all the solids. At this point, you’ll want to separate the rendered turkey fat from the stock. The easiest way to do this is to chill the stock overnight in the refrigerator; the fat will solidify on top, making it simple to skim off. If you’re short on time, you can use a fat separator or carefully ladle the fat from the surface while the stock is warm. This turkey fat is vital for making the roux, which will thicken your gravy and add incredible depth of flavor.
- Make and Freeze Your Turkey Gravy: With your perfectly rendered turkey fat and rich stock ready, it’s time to create the gravy. In a saucepan, melt the turkey fat (if you don’t have enough turkey fat, you can supplement with butter). Whisk in all-purpose flour to create a roux, cooking it for a couple of minutes until it’s a light golden color and smells nutty. Slowly, gradually whisk in your hot turkey stock, a little at a time, ensuring no lumps form. Continue whisking constantly until all the stock is incorporated and the gravy thickens to your desired consistency. If it becomes too thick, simply whisk in a bit more hot stock. Season generously with kosher salt and freshly ground black pepper to taste. Once cooled slightly, your magnificent make-ahead turkey gravy can be transferred to freezer-safe containers, ready to be enjoyed weeks or even months later.
Freezing and Reheating Your Make-Ahead Turkey Gravy for Perfection
One of the greatest advantages of this recipe is its freezer-friendly nature. Proper storage and reheating ensure your gravy tastes just as fresh and delicious as the day it was made, providing unparalleled convenience on a busy holiday.
- Freezing for Long-Term Storage: After preparing your gravy, allow it to cool slightly but don’t let it sit at room temperature for too long. Once it has reached a safe temperature, transfer it to high-quality freezer-safe containers or heavy-duty freezer bags. Leave a little headspace for expansion if using rigid containers. Label with the date and contents. Your make-ahead turkey gravy can be frozen for up to 4 months, making it perfect for preparing well in advance of Thanksgiving or other special meals.
- Safe Thawing Practices: To thaw your frozen gravy, simply transfer it from the freezer to the refrigerator one to two days before you plan to serve it. This slow thawing method helps maintain the gravy’s smooth texture and prevents any separation. Avoid thawing at room temperature for food safety reasons.
- Reheating for Optimal Consistency: When you’re ready to serve, reheat the thawed gravy in a saucepan over low to medium-low heat. Whisk it frequently and gently as it warms to ensure even heating and to smooth out any slight separation that might have occurred during freezing. If the gravy appears too thick after reheating, gradually whisk in additional warm chicken or turkey broth until it reaches your desired silky consistency. Taste and adjust seasoning as needed before serving piping hot over your roasted turkey, mashed potatoes, or stuffing.
Essential Equipment for Homemade Gravy Success
Affiliate links provided for your convenience:
- High-Quality Roasting Pan: Essential for browning turkey parts and developing flavorful fond.
- Sturdy Whisk: Crucial for making a lump-free roux and smoothly incorporating stock.
- Large Stock Pot: For simmering your turkey stock to perfection.
- Fine Mesh Sieve: For straining your stock, ensuring a clear, smooth base.
- Fat Separator: A handy tool for easily removing fat from your stock.
- Large Food Storage Containers: For chilling stock and storing large batches of gravy.
- Freezer-Safe Containers: Ideal for long-term storage of your make-ahead gravy.
- Elegant Gravy Boat: For serving your masterpiece in style.
More Thanksgiving Feast Inspirations
Complete your holiday table with these complementary recipes:
- Herb Butter Roasted Turkey: A classic and flavorful centerpiece.
- Creamy Roasted Garlic Mashed Potatoes: The perfect vehicle for generous amounts of gravy.
- Fresh Green Bean Casserole with Crispy Shallots: A beloved side dish reimagined.
- Savory Mushroom and Leek Stuffing: A delicious and aromatic accompaniment.
- Homemade Cranberry Sauce: The perfect sweet and tart counterpoint.
Make Ahead Turkey Gravy
Ingredients
For the Turkey Stock
- 4 lbs Bone-in Turkey Thighs or Wings
- 2 medium onions, cut into 1-inch chunks
- 3 medium carrots, cut into 1-inch pieces
- 3 celery stalks, cut into 1-inch pieces
- 4 cloves garlic, peeled
- 2 tablespoons olive oil
- 8 cups chicken or turkey broth
- ½ cup dry white wine
- 3 cups water
- 5 sprigs fresh thyme
- 1 bay leaf
For the Gravy
- 1/2 cup turkey fat (from stock, or butter if needed)
- 1/2 cup all-purpose flour
- 4 cups turkey stock (from above), plus more if needed
- 1 teaspoon kosher salt
- Freshly ground black pepper, to taste
Instructions
- Preheat oven to 400 degrees F (200 degrees C). In a large roasting pan, combine the chopped onion, carrots, and celery with olive oil. Season generously with salt and pepper.
- Place the bone-in turkey parts on top of the seasoned vegetables. Brush the turkey with a little more olive oil and season with salt and pepper. Roast for approximately 90 minutes, or until the turkey is thoroughly cooked, deeply browned, and has rendered a good amount of fat and drippings.
- Carefully transfer the roasted turkey parts and vegetables from the roasting pan to a large stock pot. At this stage, you may remove some of the cooked turkey meat from the bones to reserve for another use (like soup or sandwiches), but ensure plenty of meat and bones remain for the stock.
- Place the roasting pan over two burners on medium heat on your stovetop. Add the dry white wine and deglaze the pan by stirring and scraping up all the flavorful browned bits (fond) from the bottom of the pan with a wooden spoon. If you need more liquid to fully deglaze, a splash of chicken stock works well. Once the bottom of the pan is clean and all the flavorful bits are dissolved, pour this rich liquid into the stock pot with the turkey parts and vegetables.
- To the stock pot, add the chicken or turkey broth, water, fresh thyme sprigs, and the bay leaf. Bring the mixture to a rolling boil, then immediately reduce the heat to a low simmer. Allow the stock to simmer gently for several hours (at least 2-3 hours, but longer is better for deeper flavor). Check the liquid level frequently and add more water if needed to keep the ingredients submerged.
- When the stock has achieved a rich flavor and color, remove it from the heat. Carefully strain the stock through a fine mesh sieve into a clean bowl or container, pressing on the solids to extract all liquid. Discard the cooked solids.
- At this point, you can refrigerate your stock if time permits. Chilling the stock overnight will allow the fat to rise to the top and solidify, making it very easy to skim off and use for your roux. If you don’t have time to chill it, use a fat separator or carefully skim the rendered fat from the surface of the warm stock using a ladle.
- When you are ready to make the gravy, ensure the turkey stock is hot. If you refrigerated it, reheat it gently in a saucepan before proceeding.
- In a clean sauce pan, add 1/2 cup of the reserved turkey fat. If you don’t have enough turkey fat, you can make up the difference with unsalted butter. Sprinkle in the 1/2 cup of all-purpose flour and stir constantly with a whisk for about two minutes, cooking the raw flour taste out and creating a light roux.
- Slowly begin whisking in 1/2 cup of the hot turkey stock, whisking continuously to prevent any lumps from forming. Continue adding the stock in small increments, whisking after each addition, until all 4 cups are incorporated. Bring the gravy to a gentle simmer, whisking constantly, until it thickens to your desired consistency. If the gravy becomes too thick, you can add more hot stock, a tablespoon at a time, until it’s perfect. Taste and adjust seasoning with additional kosher salt and freshly ground black pepper as necessary.
- Your make-ahead turkey gravy is now complete! It can be served immediately, or stored and refrigerated or frozen for future use.
- To Store Gravy: Allow the gravy to cool slightly. Transfer it to an airtight, freezer-safe container, leaving a small amount of headspace. It can be stored in the refrigerator for up to 4 days, or in the freezer for up to 4 months.
- To Reheat Gravy: If frozen, thaw the gravy in the refrigerator for one to two days. Reheat the gravy in a saucepan over medium-low heat, whisking frequently until it is hot and smooth. If needed, you can add a little more hot chicken or turkey stock to thin the gravy to your desired serving consistency.
Nutrition
Nutrition information is automatically calculated and should only be used as an approximation.
Additional Info
Did you enjoy this recipe?
Please leave a comment below and share your experience! And don’t forget to tag me on Instagram @foxandbriar and use the hashtag #foxandbriar so I can see your wonderful creations!
Disclosure: This post contains affiliate links, which means that if you purchase the items I recommend through the links I provide, I get a small commission at no extra cost to you. For more info, please see my disclosure policy. Thanks for supporting Fox and Briar!