
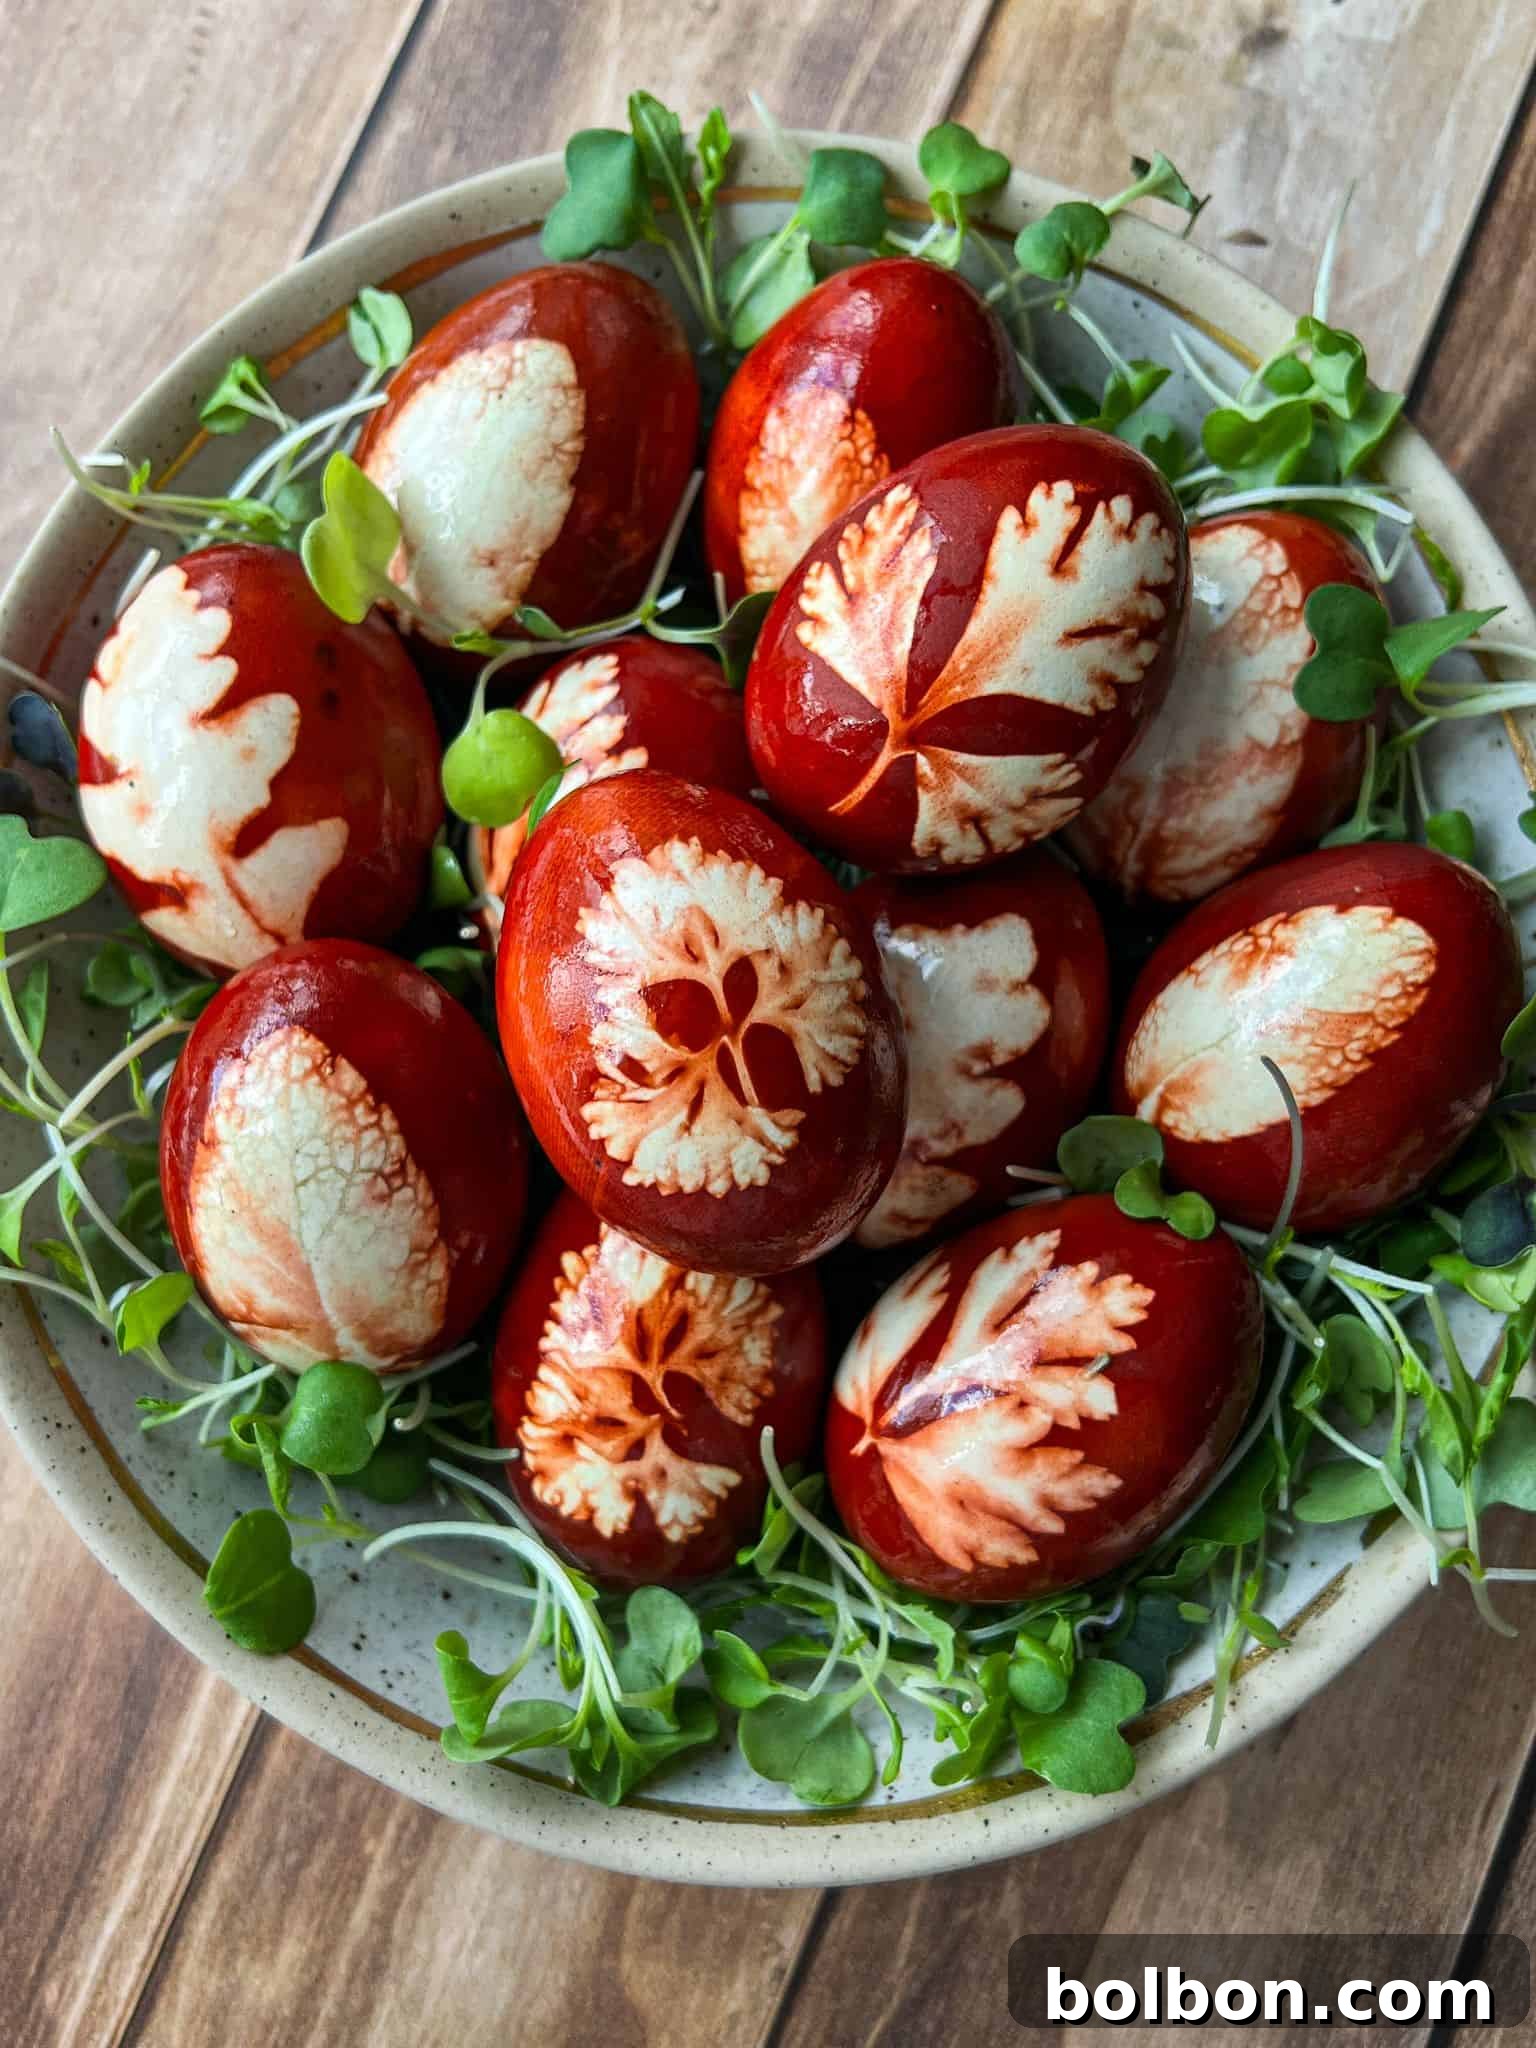
Traditional Slavic Naturally Dyed Easter Eggs: The Ancient Secret of Onion Skins and Pantyhose
Prepare to embark on a captivating journey into a cherished Easter tradition, straight from the heart of Slavic cultures. Forget those store-bought dye kits filled with artificial colors; we’re revisiting an age-old method for creating stunning, naturally dyed Easter eggs – and yes, the secret weapon is surprisingly simple: pantyhose!
While often seen as a staple for a classic, elegant look, pantyhose reveal an unexpected talent when it comes to crafting beautiful, rustic Easter eggs. This ingenious technique, passed down through generations, leverages the humble onion skin to impart rich, earthy hues, while the sheer fabric creates intricate botanical patterns. It’s an eco-friendly, chemical-free approach that produces breathtaking results, full of authentic charm and history.
For many, including myself, this isn’t just a craft; it’s a beloved childhood memory, a connection to our heritage in the Balkans and beyond. The anticipation of peeling back the pantyhose to reveal a perfectly patterned egg is a memory etched in the hearts of countless families. This method is a testament to the resourcefulness and artistry embedded in traditional practices, transforming everyday items into magical tools for festive celebrations.
All you need are a few basic ingredients: eggs, an assortment of small leaves or herbs, old nylon pantyhose, a generous amount of onion peels, and a splash of vinegar. The process is elegantly simple: wrap each egg with a chosen leaf, secure it tightly within a piece of pantyhose, and then boil them in a pot brimming with onion skins and water. The result? Gorgeous, naturally dyed Easter eggs with unique, rustic patterns, achieved with zero mess, no harsh chemicals, and 100% genuine cultural charm.
Let’s honor this beautiful tradition together, creating Easter eggs that carry stories and history, just as our ancestors did.
Why Embrace Naturally Dyed Easter Eggs?
Regardless of your background, there’s an undeniable allure to this old-school method of dyeing Easter eggs. It’s a charming blend of practicality, sustainability, and artistic expression that resonates deeply. Why choose natural dyes over synthetic alternatives? The reasons are plentiful and compelling:
- Simplicity and Accessibility: This method utilizes materials you likely already have at home or can easily find in your garden or local grocery store. There’s no need to purchase specialized, often expensive, dye kits that are used once a year and then forgotten. Think onion peels, leaves from your yard, or even leftover herbs – truly a zero-waste approach.
- Generational Wisdom: This technique is time-tested and “grandma-approved” 👵💯. It’s a culinary and artistic heritage passed down through generations, from grandmothers to mothers and now to you. There’s a comforting authenticity in knowing you’re participating in a tradition that has endured for centuries, connecting you to a rich cultural past.
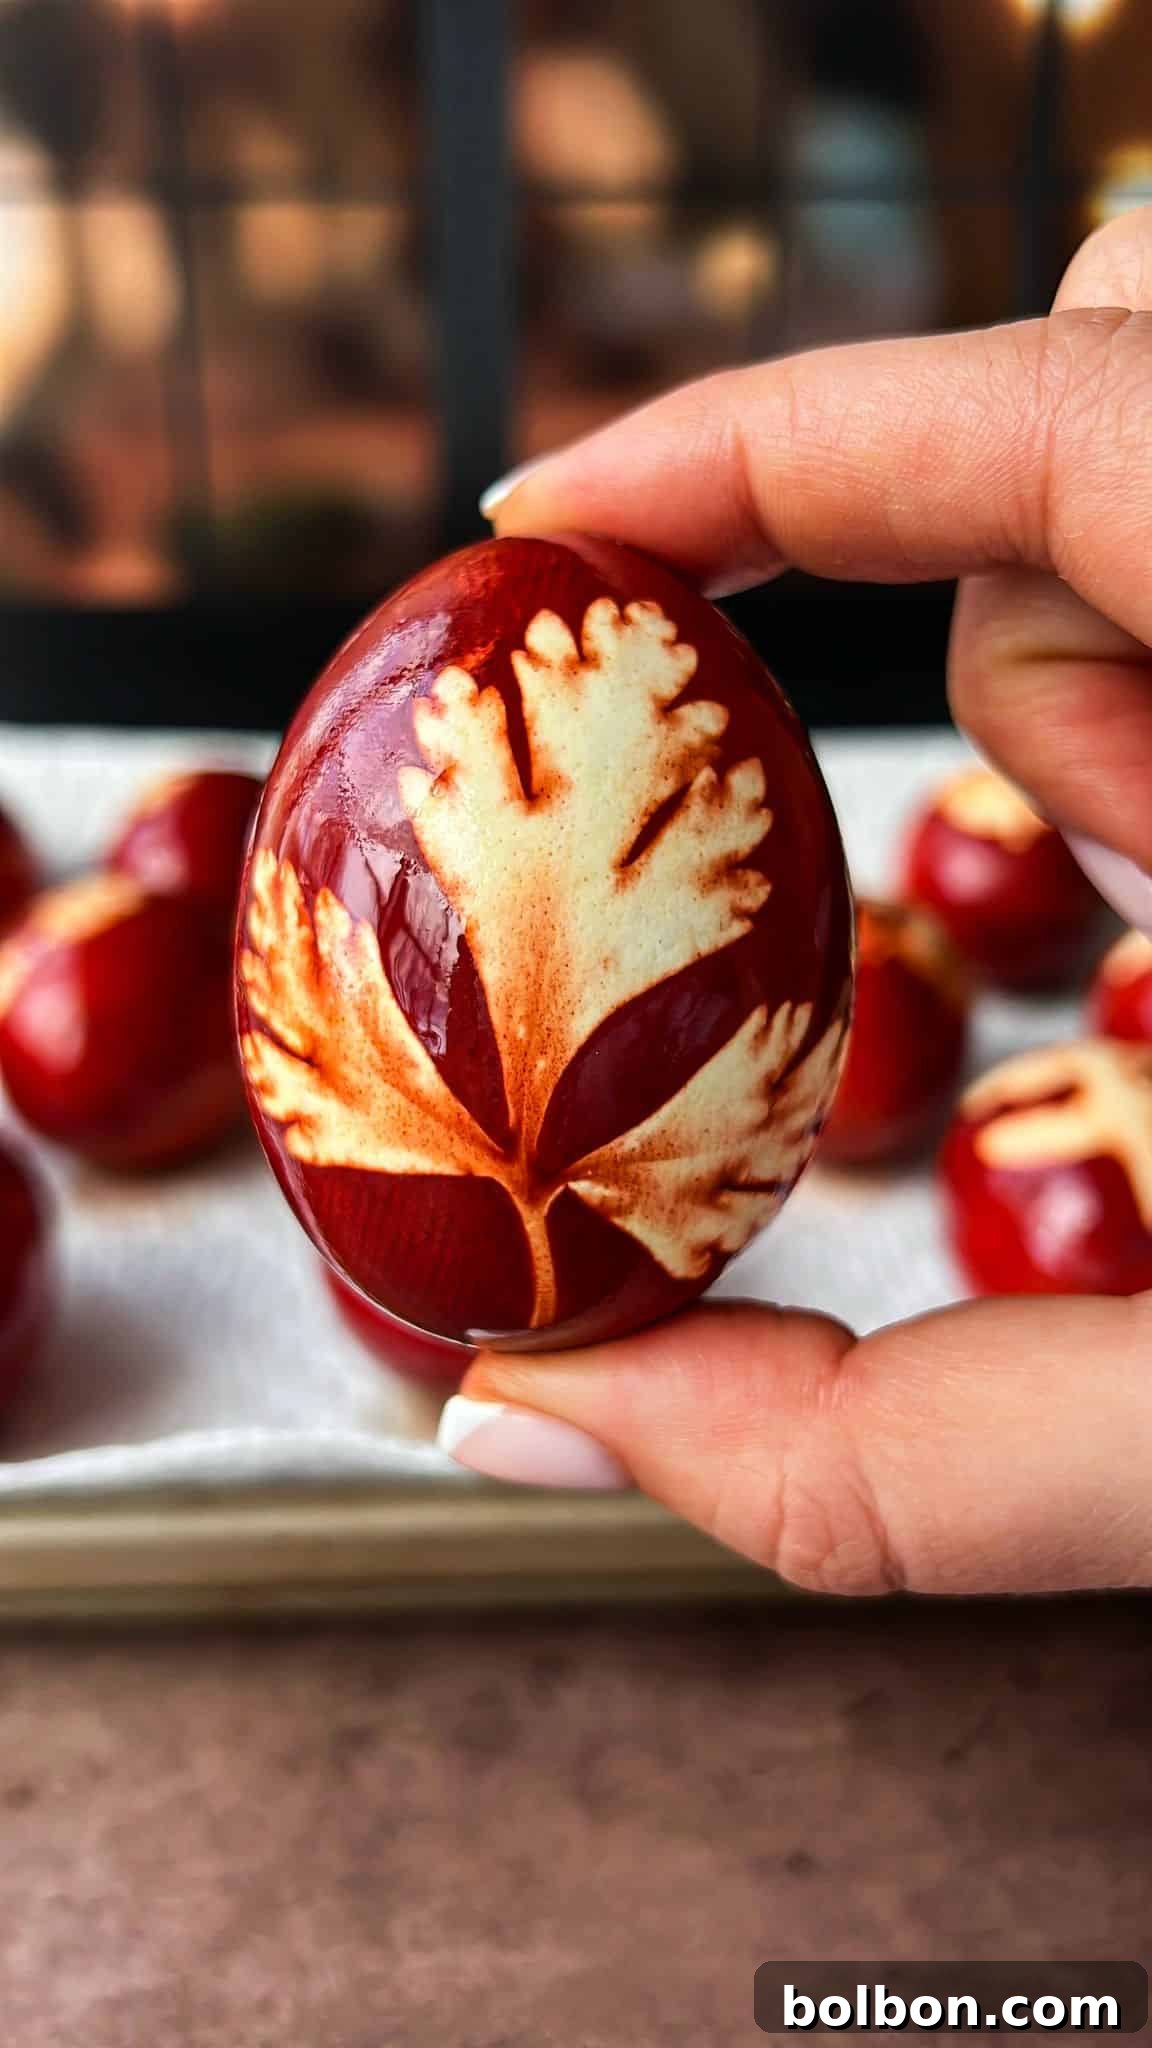
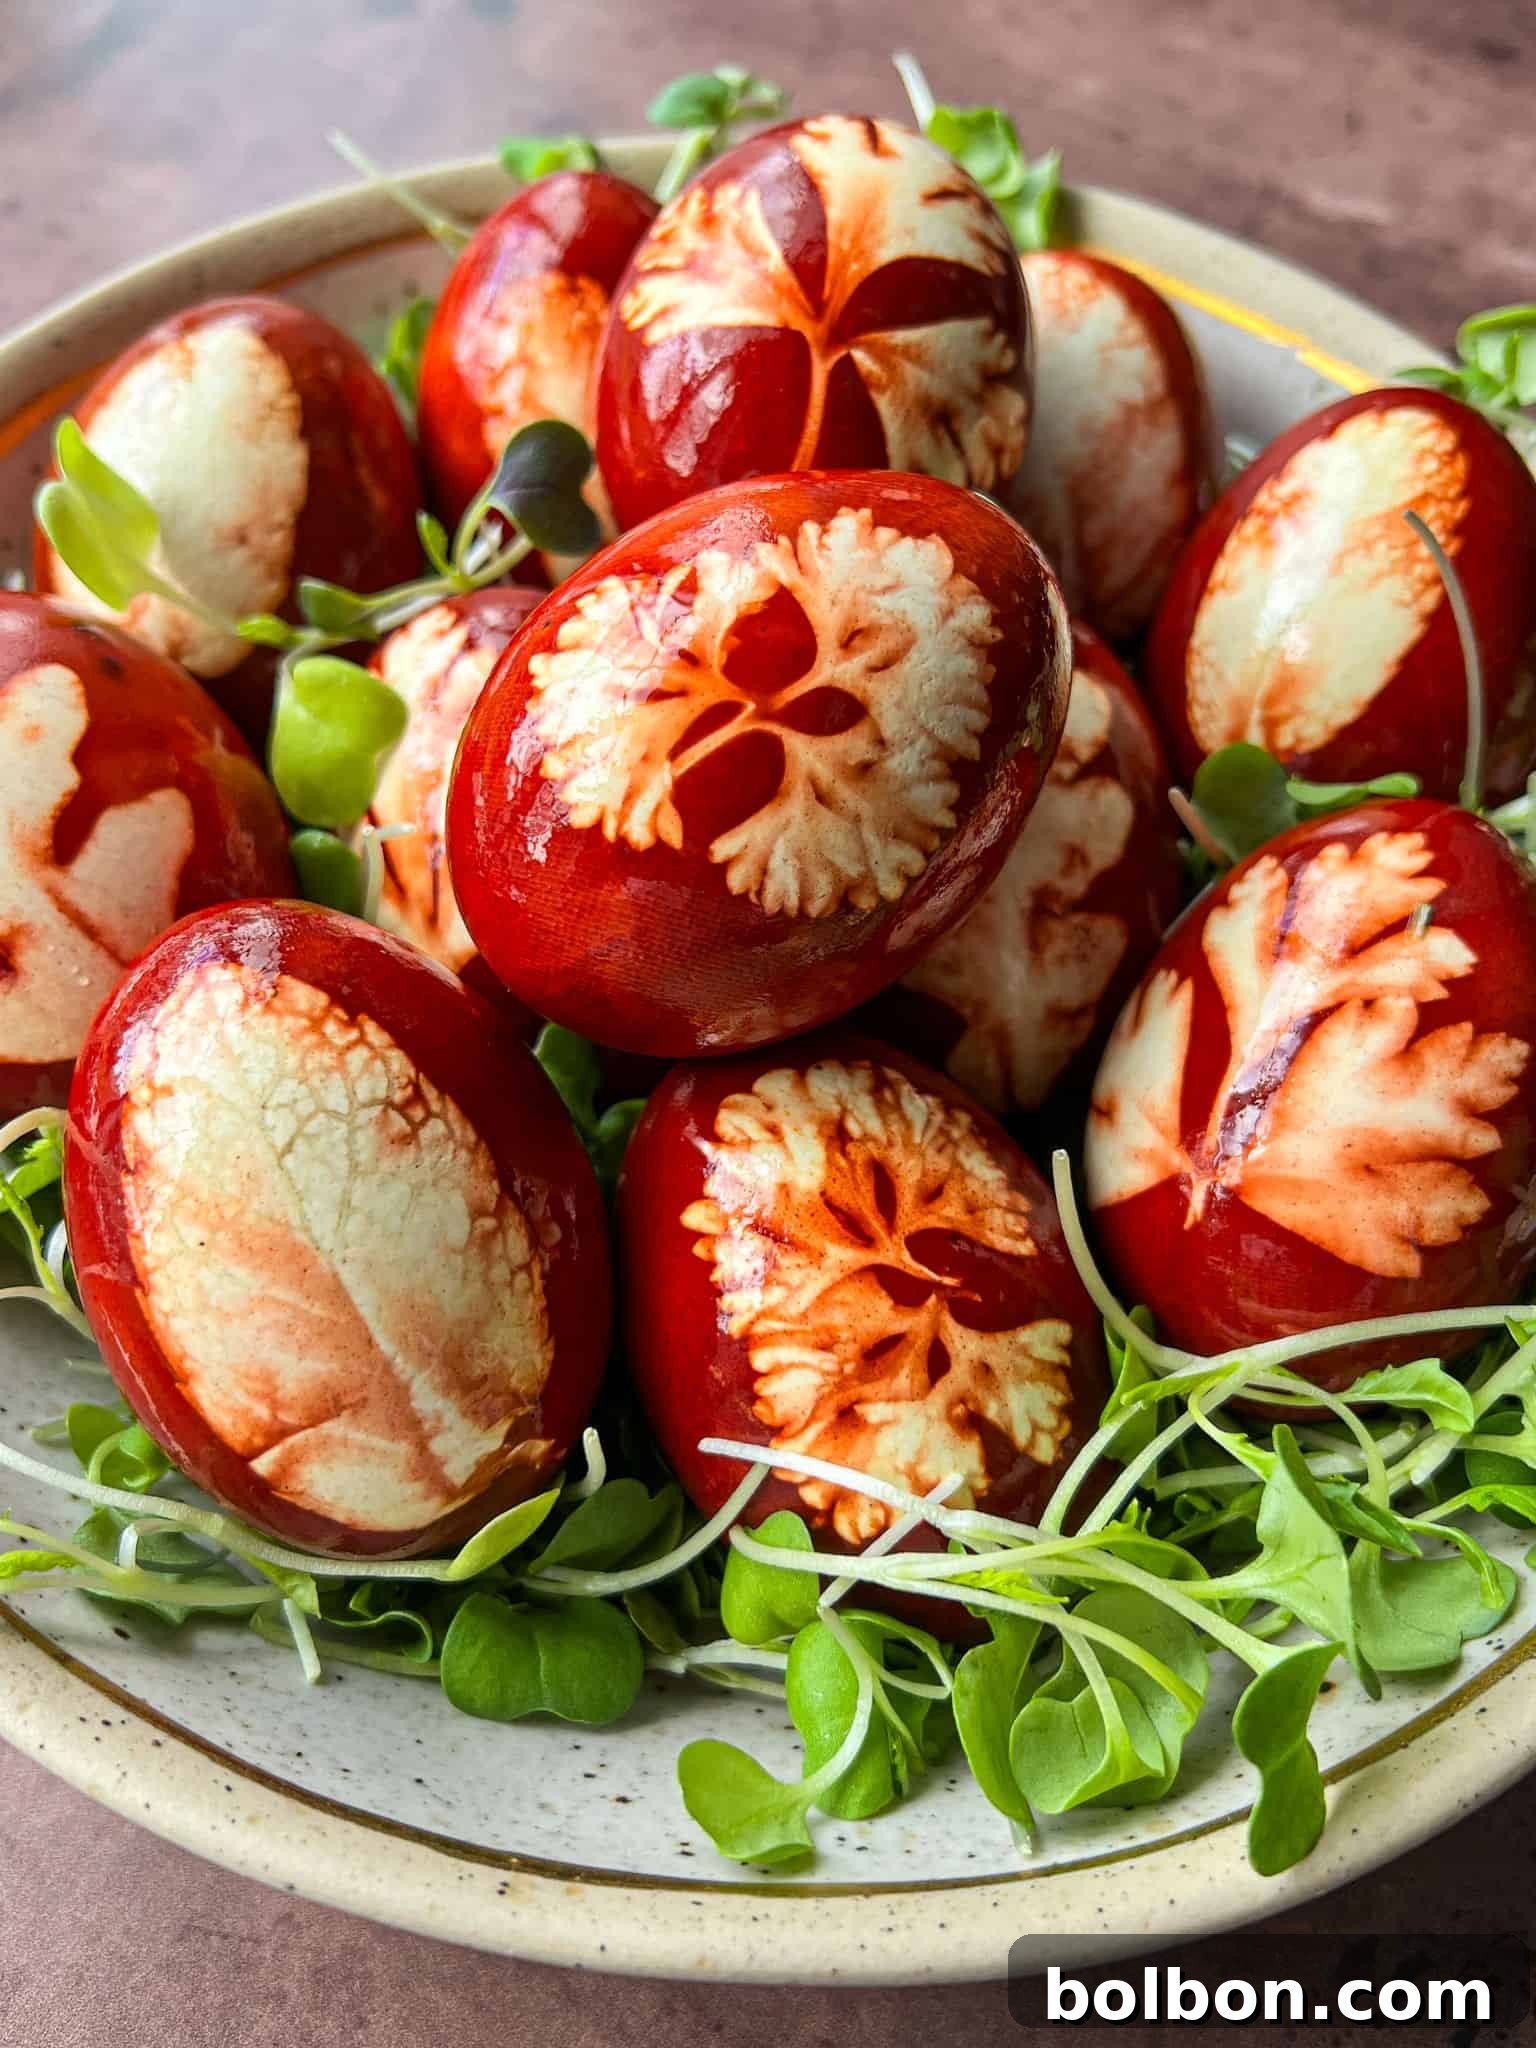
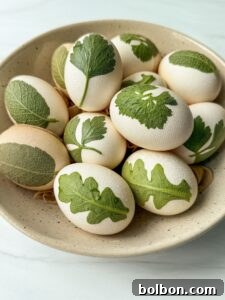
- Stunning Aesthetic: The results are consistently gorgeous. Naturally dyed eggs boast a unique rustic elegance that commercial dyes simply can’t replicate. The earthy tones and intricate leaf patterns create a chic, artisanal look that would feel right at home in any high-end spring decor collection. Each egg becomes a small work of art, subtly unique and full of character.
- Non-Toxic and Safe: A significant advantage is the absence of harsh, synthetic dyes. When you’re using natural ingredients like onion skins, you eliminate concerns about toxins seeping into your eggs, making them perfectly safe for consumption. This is especially reassuring for families with children or those mindful of what goes into their food.
- Creative Freedom: The process encourages creativity. You have complete freedom to experiment with different leaf shapes, flower petals, and herb varieties to create a myriad of patterns. From delicate fern fronds to bold parsley leaves, each choice adds a personal touch, allowing you to design truly unique Easter eggs every time.
- Eco-Friendly Approach: In an era where sustainability is paramount, this method shines. By using natural materials and avoiding synthetic dyes, you reduce your environmental footprint, embracing a more conscious and eco-friendly way to celebrate Easter. It’s a small step that makes a difference.
Embrace the warmth, tradition, and natural beauty of homemade Easter eggs this year. It’s more than just dyeing eggs; it’s about creating memories, honoring heritage, and crafting something truly special with your own hands.
Crafting Your Natural Masterpieces: A Step-by-Step Guide
Creating these beautiful, naturally dyed Easter eggs is a rewarding process. Follow these detailed steps to achieve stunning results, turning simple ingredients into works of art.
Materials You’ll Need:
- 12 raw eggs (white eggs yield more vibrant colors, but brown eggs work for muted tones)
- An abundance of dry onion peels (from approximately 15-20 onions for a deep color)
- A selection of small, interesting leaves, flowers, or herbs (e.g., parsley, mint, basil, fern fronds, clover)
- One pair of old nylon pantyhose (any nude or light color works best)
- 8 cups of water
- ¼ cup white vinegar
- A large pot
- Scissors
- Paper towels
- A touch of vegetable or coconut oil (for shine)
Preparation Steps:
- Prepare the Pantyhose: First, take your pair of nylon pantyhose (stockings). Using scissors, cut them into individual segments, each approximately 5-6 inches in length and 4 inches wide. You’ll need one piece per egg. The foot of the pantyhose is often a good starting point for consistent pieces.
- Soak Your Foliage: Gather your chosen leaves, flowers, or herbs. Rinse them gently and then immerse them in a bowl of warm water for a few minutes. This warm bath will help soften the delicate foliage and make it more pliable, ensuring it adheres better to the egg surface during the wrapping process.
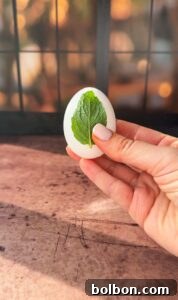
- Wrap the Eggs with Care: Take one raw egg. Carefully center a softened leaf or flower onto the clean side of the egg, ensuring the patterned side of the leaf faces outwards. Gently place the egg, with the leaf pressed against it, inside one of your pre-cut pantyhose pieces.
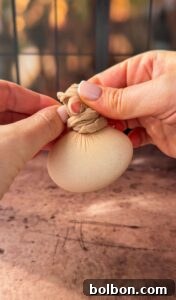
- Secure the Package: Tightly wrap the egg within the stocking. Twist the excess stocking material at the base of the egg once or twice to create a snug fit, then tie it securely, much like you would tie the neck of a balloon. The goal is to keep the leaf firmly pressed against the eggshell. Repeat this step for each egg, creating a collection of beautifully wrapped parcels. If you’re unsure, refer to the accompanying step-by-step photos or video for visual guidance.
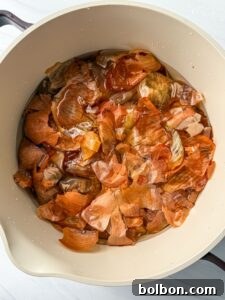
- Layer the Pot: In your large pot, spread half of your collected onion peels evenly across the bottom. Carefully arrange the wrapped eggs on top of the onion peels, ensuring the side with the leaf pattern faces downwards. This helps the dye penetrate the leaf-covered area more effectively.
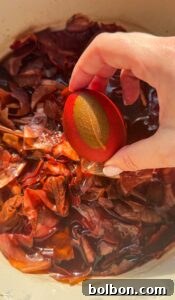
- Add Liquids and Remaining Peels: Pour in half of the 8 cups of water, followed by the ¼ cup of white vinegar. The vinegar acts as a mordant, helping to fix the dye to the eggshells. Then, add the remaining onion peels on top, completely covering the eggs. Finally, pour in the rest of the water, ensuring all the eggs are submerged.
- Gentle Simmering: Place the pot on the stove and bring the water to a gentle simmer. It’s crucial not to let the water boil vigorously, as this can cause the eggshells to crack. Maintain a low, gentle simmer for approximately 15-20 minutes.
- The Long Soak: After 15-20 minutes, remove the pot from the heat. Allow the eggs to sit and soak in the dye bath for a minimum of 8 hours, or ideally, overnight (around 20 hours) for the deepest, most vibrant colors. Once the water has cooled to room temperature, you can transfer the pot to the refrigerator to continue soaking.
- Unveiling Your Creations: Once the soaking time is complete, carefully remove each egg from the pot. Use scissors to cut the string or knot of the pantyhose, then gently peel away the stocking and the leaf. Place your newly dyed eggs on a paper towel to dry completely.
- Add a Touch of Shine: For a beautiful, polished finish, once the eggs are dry, lightly rub each one with a small amount of vegetable or coconut oil. This will enhance their natural luster and make their colors pop. Enjoy your magnificent, naturally dyed Easter eggs!
Nonna’s Expert Tip 🐣
The key to achieving truly rich and deep colors lies in two factors: the quantity of onion peels and the duration of the soak. For an intense, vibrant hue, use a generous amount of onion peels and allow the eggs to sit in the dye bath for at least 8 hours, or even better, overnight. I personally prefer to let mine soak in the fridge for about 20 hours to maximize color saturation.
The Lively Tradition of the Balkan Egg Cracking Game
In many Slavic and Balkan countries, Easter isn’t complete without the beloved, boisterous, and sometimes fiercely competitive “egg tapping” or “egg fighting” game, often known as tockane or chokanje. This tradition is more than just a game; it’s a symbolic battle where the victor is believed to be blessed with good luck and health for the entire year ahead. But be warned: things can get quite intense!
The game kicks off when everyone selects their champion hard-boiled egg – often chosen with a keen eye for its perceived strength, a skill some might call “Slavic egg intuition.” Two players then face each other, each holding their egg firmly with the pointy end facing upwards. One player holds their egg steady, while the other taps it with their own, aiming to crack their opponent’s egg without damaging their own. Strict rules apply: only pointy-end-to-pointy-end hits are allowed, ensuring a fair, albeit spirited, competition.
An egg that cracks is immediately out of the game. Its owner passes it to the winner, who then proceeds to challenge the next contender. This continues until only one egg remains uncracked – the ultimate champion! The atmosphere is electric with excitement, laughter, and playful taunts. You’ll find cousins strategizing, grandparents offering sage advice, and everyone trying to protect their chosen egg from defeat. It’s a truly memorable and engaging way to celebrate Easter, fostering friendly competition and creating lasting family memories.
Creative Variations and Substitutions for Your Natural Egg Dyes
The beauty of natural egg dyeing lies in its versatility and endless possibilities for customization. Don’t hesitate to experiment with different ingredients and techniques to create a truly unique batch of Easter eggs:
- Egg Color Canvas: While this recipe works with both white and brown eggs, remember that white eggs provide the perfect canvas for producing the most vibrant and bold colors. If you opt for brown or heirloom eggs, be aware that the resulting hues will be softer, more muted, and wonderfully earthy.
- Expand Your Color Palette: The world of natural dyes extends far beyond onion skins! Experiment with a variety of other natural foods to unlock a spectrum of beautiful colors:
- For stunning blues and purples, try red cabbage.
- Achieve lovely pinks and reds with beets.
- For a brilliant golden yellow 🌟, turmeric powder is your go-to.
- Spinach or matcha powder can yield beautiful shades of green.
Simply adjust the amount of your chosen ingredient and the soaking time to control the intensity of the color.
- Diverse Foliage Patterns: Don’t limit yourself to just one type of leaf! Explore different leaves, delicate flowers 🌺, and various herbs from your garden or local market. Ferns, cilantro, dill, small daisies, or even intricate lace patterns from doilies can create diverse and captivating designs on your eggs.
- Personalized Touches: For an extra special touch, before you begin the dyeing process, use a clear wax crayon 🖍️ to draw patterns or write your child’s name directly onto the raw eggshell. The wax will resist the dye, revealing a personalized message or design once the egg is finished. It’s a delightful surprise for children and adults alike!
Let your creativity shine and transform your Easter eggs into a personalized display of natural art.
Explore More Festive Recipes
Enhance your Easter celebration with these other delicious and traditional recipes:
Easter Bunny Bread
35 mins
Sweet Easter Bread
2 hrs 45 mins
Deviled Egg Chicks
25 mins
Roasted Leg of Lamb (Foolproof)
4 hrs 45 mins
Cadbury Chocolate Chip Cookies
22 mins
Simple Green Salad
15 mins
Perfect Pairings for Your Easter Eggs
Once your beautiful, naturally dyed Easter eggs are complete, they can be enjoyed in many ways, both as a festive decoration and a delicious treat. Here are some ideas for how to best serve and incorporate them into your holiday spread:
- The Centerpiece of Easter Dinner: Serve your naturally dyed eggs alongside a magnificent Roasted Leg of Lamb (European Style) 🍗. The rustic elegance of the eggs beautifully complements a traditional holiday feast.
- Transform Leftovers into Delights: Any leftover hard-boiled eggs can be cleverly transformed into these adorable Deviled Egg Chicks. They’re a fun and appealing way to repurpose your holiday eggs.
- Sweet Companions: Pair your eggs with a batch of Cadbury Chocolate Chip Cookies 🍪 for a perfect balance of savory and sweet on your Easter table.
- Elevate Your Charcuterie Board: Charcuterie boards aren’t just for Christmas! Accessorize your spring-themed Easter board with these beautifully dyed eggs. Their natural colors and patterns will add a touch of sophistication and charm to your appetizer spread.
- Simple Snacking: Of course, a perfectly hard-boiled, naturally dyed egg is a delightful and healthy snack on its own, especially after participating in the exciting egg-cracking game!
Frequently Asked Questions About Natural Egg Dyeing
Absolutely! In fact, they are a healthier alternative to using artificial dye kits, which often contain synthetic colorings. This traditional method uses only natural food-based ingredients, such as onion peels and vinegar, to create vibrant colors that are perfectly safe for consumption. You can enjoy these beautiful eggs with complete peace of mind.
For best results, opt for small, flat, and intricately shaped leaves or flowers. Excellent choices include delicate fern fronds, clover leaves, parsley, cilantro, dill, or mint sprigs. Small flowers like pansies, violets, or even tiny daisies can also create beautiful impressions. The key is that they can lie flat against the egg surface and are small enough to fit within the pantyhose wrap without bulging.
The world of natural dyes is rich with possibilities! Here are some common foods and the colors they can produce:
- Red cabbage: Creates beautiful shades of blue and purple.
- Beets: Yields lovely pinks and reds.
- Turmeric: Produces a brilliant yellow or golden hue.
- Spinach or Matcha powder: Can create various shades of green.
- Coffee or Black Tea: For a more muted, sepia-toned brown.
Experiment with different combinations and soaking times to achieve your desired shade.
The soaking time is crucial for color intensity. For truly vibrant and deep colors, I recommend letting the eggs soak for a minimum of 8 hours, and ideally, overnight (around 12-20 hours). If you prefer a lighter, more pastel hue, you can reduce the soaking time to just a few hours. Always ensure the water has cooled before refrigerating the pot for longer soaks.
Patience is key! Once the eggs have finished soaking and are ready to be unveiled, use a pair of sharp scissors to carefully cut the knot or tie of the pantyhose. Then, gently peel away the stocking material and the leaf. Avoid rubbing or sliding the fabric, as this could smudge the delicate pattern. Allow the eggs to dry completely on a paper towel before handling them further.
Natural dyes typically result in a beautiful matte finish. To add a lovely shine, simply take a small amount of vegetable oil (like olive, sunflower, or coconut oil) on a paper towel or cotton ball and gently rub it over each dry egg. This simple step will bring out their natural luster and make the colors appear even more vivid.
Just like any hard-boiled egg, naturally dyed eggs should be stored in the refrigerator. When properly stored, they will typically last for up to one week. Always ensure they are cooled quickly after the dyeing process and kept refrigerated until ready to be enjoyed or displayed.
Naturally Dyed Easter Eggs
Facebook Share
Rate Recipe
Print Recipe
Video
Equipment
Ingredients
- 12 eggs
- 12 leaves (any of choice) , parsley, mint, basil, etc.
- 1 pair nude panty hose
- onion peels, enough to fill up the pot
- 8 cups water
- ¼ cup white vinegar
- touch of oil, for the end to make them shiny
Instructions
-
Take a pair of nylon panty hose (stockings) and cut them into pieces starting from the foot of the panty hose.

-
For me, each piece turns out to be 5-6 inches in length and 4 inches in width.
-
Next, start on the foliage. You can use any small leaves of choice from outside or the grocery store. I like to make it fun by including herbs (or flowers) that are different. You can use: parsley, basil, mint, flowers, cilantro, or anything else you like.
-
Pick off each leaf and soak them in warm water. The warm water will soften it up and help stick to the egg.
-
Next, take an egg and place the leaf right in the middle on the clean side of the egg, which is the side that’s not stamped.
-
Take a square of the stocking and place the egg gently on the inside between the two sides.
-
Tightly wrap the egg in the stocking making sure to twist at the base and tie it the same way you would tie a balloon.
-
If you’re unsure, have someone assist you or look at the step-by-step photos in the prep section of this post.
-
Repeat this step for each egg.
-
Next, fill a pot with 1/2 of the onion peels and place the wrapped eggs in the pot with the herb side down.
-
Add half of the water, the vinegar, followed by the rest of the onion peels and the other half of the water.
-
Let this come up to a simmer and leave it for 15-20 minutes. Don’t let it boil vigorously as the eggs can crack.
-
After 15-20 minutes, take it off the heat and let it sit for a minimum of 8 hours (or overnight). When the water has cooled, you can store them in the fridge.
-
Note: the more onion peels you use and the longer you let it sit, the deeper the color will be.
-
When the eight hours is up, cut the string, remove the herb, and set on paper towel to dry.
-
Once the eggs are dry, cover each one in some oil which will make them nice and shiny!



Notes
- Traditions: In Bulgarian Easter tradition, an egg-cracking game called “egg tapping” or “egg fighting” is a key part of our celebration. The object of the game? Try to crack your opponent’s egg without breaking your own. The winner is believed to have good luck for the year!
- Onions: You can use yellow or red onions for this recipe. Some cultures even use other produce such as red cabbage so feel free to experiment. We peeled 20 onions to fill up the pot, I like to collect mine as I cook and store them in a ziplock bag in the freezer.
- Foliage: Feel free to go outside and have FUN looking for different leaves 🍃or flowers. You can use any herb of choice at the grocery store as well.
- Pantyhose: Use any nylon pantyhose you have on hand. I like nude as the color won’t leak and I can see the placement of my leaf.
Nutrition
Nutrition information is automatically calculated, so should only be used as an approximation.