
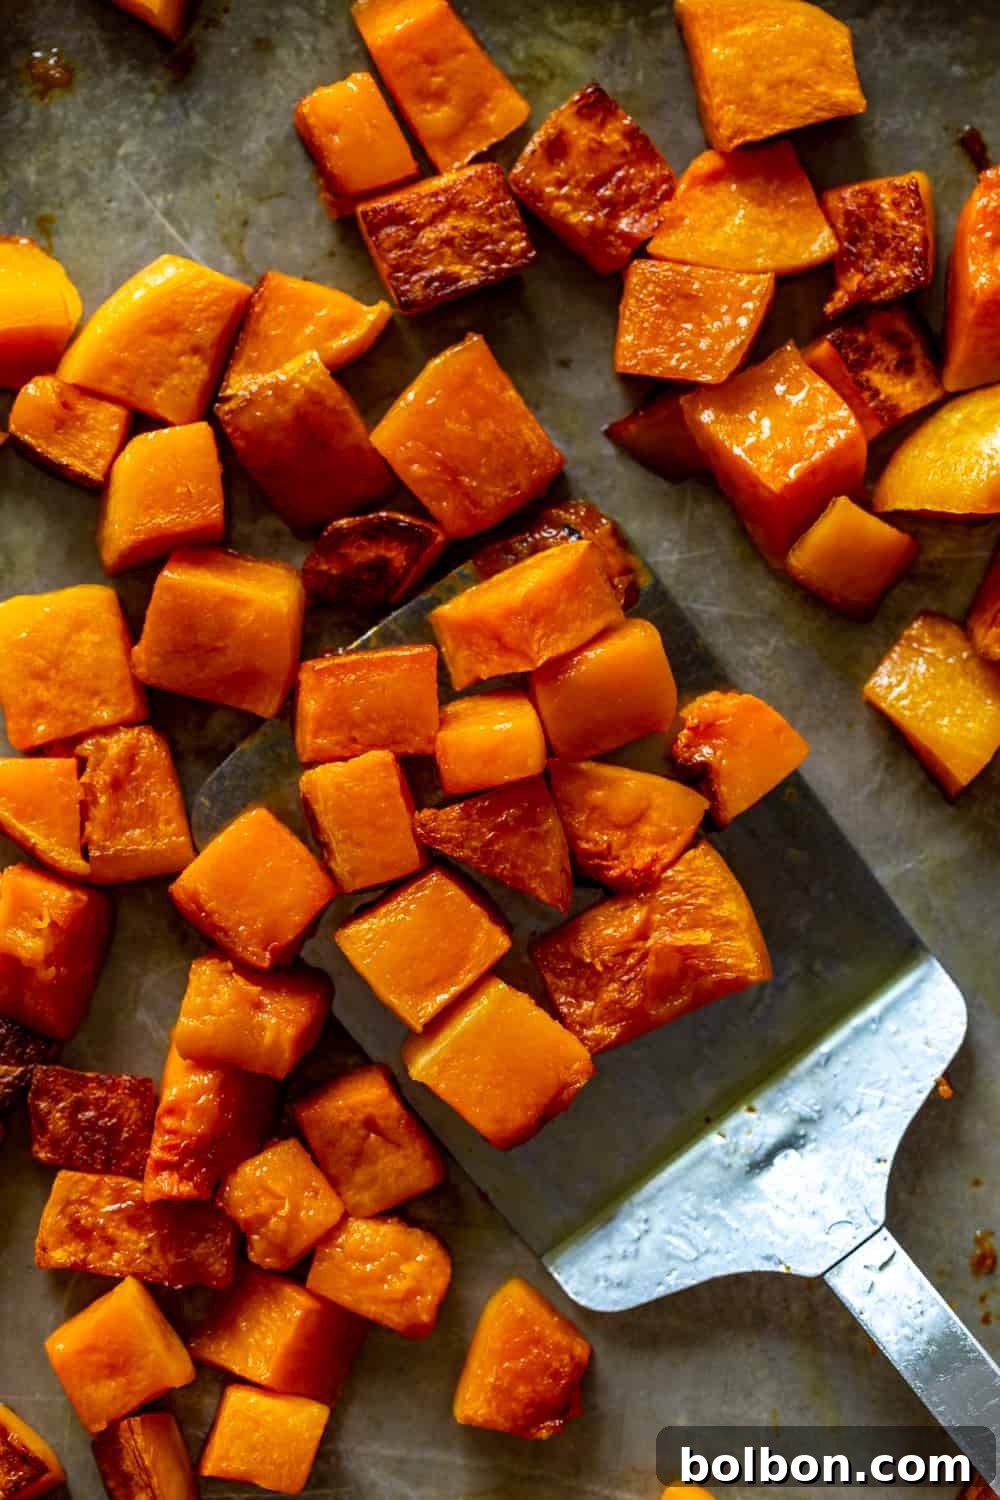
Welcome to the ultimate guide on effortlessly preparing butternut squash! While its hard exterior and unique shape might seem intimidating, mastering how to peel, cut, and roast this incredibly versatile and nutritious winter squash is simpler than you think. Say goodbye to kitchen frustrations and hello to delicious, perfectly prepared butternut squash, a staple that graces tables from autumn through winter. This comprehensive guide will walk you through each step with clear instructions and helpful tips, ensuring your butternut squash is ready for roasting, mashing, or adding to your favorite dishes.
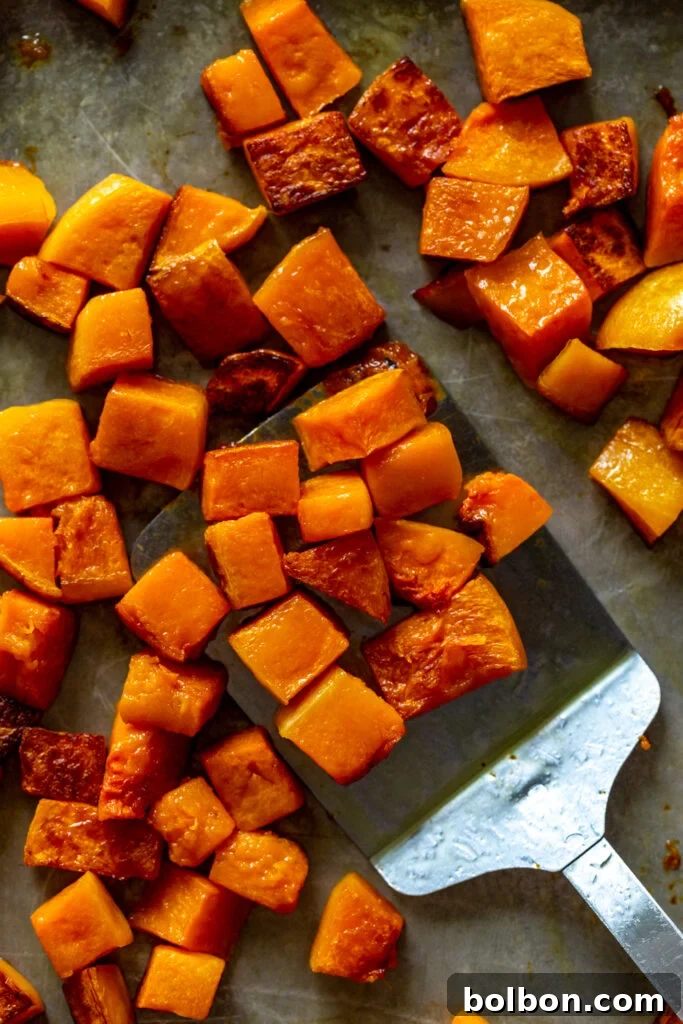
Butternut squash, with its sweet, nutty flavor and creamy texture, is a true seasonal delight. Rich in vitamins A and C, fiber, and potassium, it’s not just tasty but also incredibly good for you. It’s a fantastic addition to soups, stews, salads, and as a standalone side dish. Many people shy away from preparing it from scratch due to the perceived difficulty, but I promise, with the right tools and techniques, you’ll be a butternut squash expert in no time. This article will show you exactly how to achieve perfectly peeled and uniformly cut squash, ready for a simple roast that will become a new favorite in your culinary repertoire.
Selecting and Storing Your Butternut Squash
Before you even begin peeling, selecting the right butternut squash is key. Look for a squash that feels heavy for its size, indicating good moisture content. The skin should be uniformly tan, dull, and free from any green patches, which suggest it’s underripe. Avoid squash with soft spots, cuts, or blemishes. Once you’ve chosen your perfect squash, store it in a cool, dark, and dry place, such as a pantry or cellar, where it can last for several weeks, or even up to a few months. Once cut, wrap any unused portions tightly in plastic wrap and store them in the refrigerator for up to 3-5 days.
The Easiest Way to Peel Butternut Squash
The thought of peeling a butternut squash can be daunting. Its firm, thick skin is notoriously difficult to navigate with a standard peeler. However, the secret weapon for effortless butternut squash peeling is undoubtedly a high-quality Y-peeler. This ergonomic tool fits comfortably in your hand and makes short work of even the toughest skins, not just for butternut squash but also for sweet potatoes, carrots, cucumbers, and more. I love this kitchen essential so much that I keep two on hand, ensuring I’m always ready to tackle a squash.
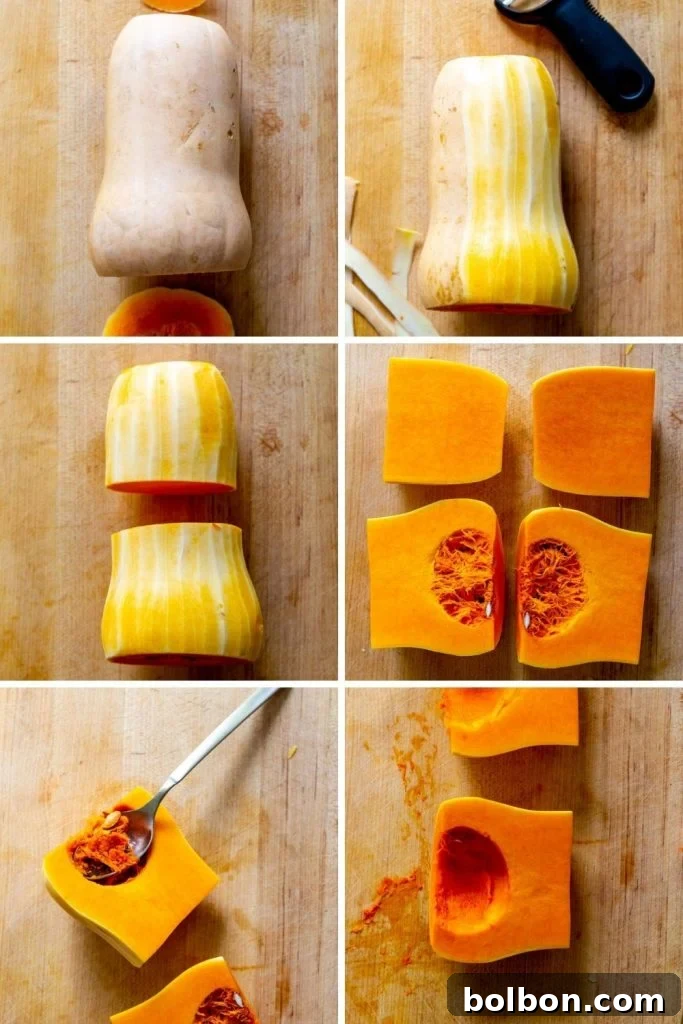
To begin the peeling process, lay the squash on a stable cutting board. Using a sharp, sturdy chef’s knife, carefully trim off both ends of the squash. This creates flat surfaces, allowing the squash to sit more securely on the board, significantly enhancing safety and ease of handling. Next, hold the squash firmly, either vertically or horizontally, whichever feels more comfortable for you. With your Y-peeler, apply even pressure and peel the skin off in long, continuous strips. Work your way around the entire squash until all the tough outer skin is removed, revealing the vibrant orange flesh beneath. You’ll be amazed at how quickly and easily the peeler glides through the skin, turning a formerly cumbersome task into a breeze.
For those who might not have a Y-peeler or prefer an alternative method, here are a couple of other ways to soften the skin before peeling:
- Microwave Method: Pierce the squash several times with a fork. Microwave it on high for 2-4 minutes. This will slightly soften the skin, making it easier to peel with any vegetable peeler or even a paring knife. Be careful, as the squash will be hot.
- Roasting Method: If you plan to roast halves or large chunks, you can simply roast the squash with the skin on. After roasting until tender, the skin will be much easier to remove or can even be eaten, depending on your preference and the squash variety.
Mastering the Art of Cutting Butternut Squash
Once your butternut squash is beautifully peeled, it’s time to tackle the cutting. Its unique shape, featuring a bulbous base and a cylindrical neck, can appear challenging, but with a sharp chef’s knife and a systematic approach, you’ll achieve perfect, uniform pieces every time. Uniformity is key for even cooking, especially when roasting.
First, place the peeled squash horizontally on your cutting board. Locate the point where the long, neck portion meets the round, bulbous end. Using your sharp knife, cut the squash in half at this natural division. This separates the two distinct parts, making them much easier to handle individually. Now you have two manageable pieces to work with.
Take the long, cylindrical neck portion and slice it lengthwise into two halves. You’ll notice this part is solid flesh. Next, take the bulbous bottom section and also slice it lengthwise into two halves. This portion contains the seeds and stringy pulp. Using a sturdy spoon, scoop out all the seeds and fibrous strands from the center of both halves of the bulbous section. Discard the seeds or save them for roasting later – roasted squash seeds make a delicious, healthy snack similar to pumpkin seeds.
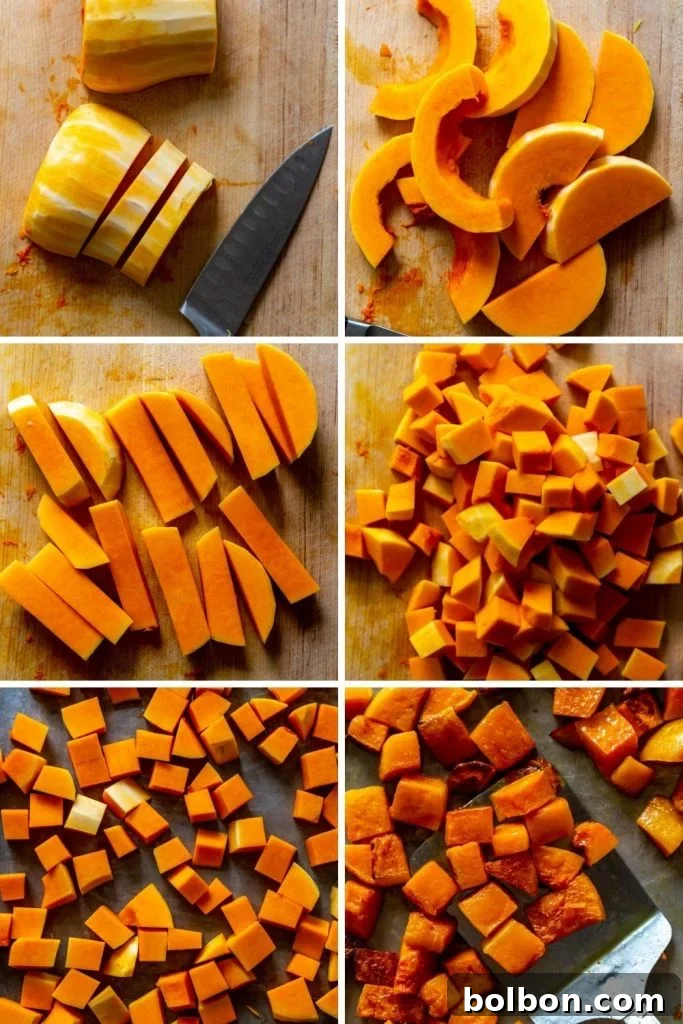
With all pieces now peeled and seeded, flip each piece over so the flat, cut side is down on your cutting board. This provides maximum stability and prevents the squash from rolling while you cut. Slice each piece into evenly thick “half moons” or planks. The thickness will depend on your desired final cube size and how quickly you want it to cook. Aim for about ¾-inch thick slices for roasting cubes.
Finally, lay these half-moon slices flat and cut them into equally sized sticks. Then, dice these sticks into uniform, bite-sized cubes. Consistency in size is crucial for even cooking, ensuring every piece is tender at the same time. These cubes are perfect for roasting, soups, stews, or even mashing. For alternative cuts, you could also cut the neck into rounds for a different presentation, or simply cut the squash into larger wedges or halves for stuffing and baking.
How to Roast Butternut Squash to Perfection
Roasting is arguably the most popular and delicious way to prepare butternut squash. The high heat caramelizes its natural sugars, bringing out its inherent sweetness and creating beautifully tender, slightly crispy edges. It’s a simple process that yields incredible flavor with minimal effort.
Begin by preheating your oven to 425 degrees Fahrenheit (220 degrees Celsius). A hot oven is essential for achieving that desirable caramelization and tender interior without overcooking. While the oven preheats, take your uniformly cubed butternut squash and transfer it to a large baking sheet. Ensure there’s enough space for the squash to spread out in a single layer without overcrowding. If your baking sheet is too small, use two to prevent steaming, which can lead to mushy squash instead of nicely roasted pieces.
Drizzle the squash generously with olive oil, ensuring every cube is lightly coated. Olive oil helps in even browning and adds a rich flavor. Season liberally with kosher salt and freshly ground black pepper. For a savory twist, consider adding dried herbs like thyme or rosemary, a pinch of garlic powder, or even a dash of paprika. For a sweeter profile, a touch of cinnamon or maple syrup can elevate the flavors beautifully, especially for fall-inspired dishes.
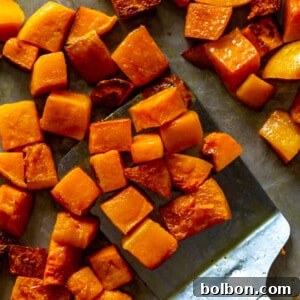
Toss everything together directly on the baking sheet to ensure all the cubes are evenly coated with oil and seasonings. Spread them back into a single layer. Place the baking sheet in the preheated oven and roast for 25-40 minutes. The cooking time will vary depending on the size of your cubes and your oven’s efficiency. Halfway through the roasting time (around 15-20 minutes), use a metal spatula to turn the squash cubes. This ensures even browning on all sides. Continue roasting until the squash is fork-tender, easily pierced with a knife, and beautifully golden brown and caramelized around the edges. Keep an eye on it to prevent burning.
Once perfectly roasted, immediately remove the baking sheet from the oven. Serve your roasted butternut squash as a delightful side dish, add it to salads, or incorporate it into other recipes. It’s a versatile foundation for countless meals.
Nutritional Powerhouse: The Health Benefits of Butternut Squash
Beyond its delicious taste and versatility, butternut squash is a nutritional powerhouse, making it a fantastic addition to any healthy diet. It’s low in calories but packed with essential vitamins, minerals, and dietary fiber. Here’s a closer look at its impressive health benefits:
- Rich in Vitamin A: Butternut squash is an excellent source of beta-carotene, which the body converts into Vitamin A. This vitamin is crucial for maintaining healthy vision, supporting immune function, and promoting skin health. A single serving can provide well over 100% of your daily recommended intake.
- High in Vitamin C: Another powerful antioxidant found in abundance in butternut squash, Vitamin C boosts the immune system, aids in collagen production for healthy skin, and helps protect cells from damage by free radicals.
- Good Source of Fiber: Dietary fiber is essential for digestive health, promoting regularity, and preventing constipation. It also helps regulate blood sugar levels, contributes to a feeling of fullness, and can support weight management.
- Potassium Power: Butternut squash provides a significant amount of potassium, an electrolyte vital for maintaining fluid balance, nerve signals, and muscle contractions. It also plays a role in regulating blood pressure.
- Antioxidant Properties: In addition to Vitamins A and C, butternut squash contains other antioxidants, including various carotenoids, which help fight inflammation and protect against chronic diseases.
- Versatile and Diet-Friendly: Being naturally gluten-free and easily adaptable to vegetarian and vegan diets, butternut squash is a flexible ingredient that can fit into various dietary needs and preferences, offering a healthy alternative to many starchier sides.
Incorporating butternut squash into your meals is an easy and delicious way to boost your nutrient intake and enjoy its numerous health advantages.
More Delicious Butternut Squash Recipes to Try
Once you’ve mastered the art of peeling, cutting, and roasting butternut squash, a whole world of culinary possibilities opens up! This versatile vegetable can be transformed into an array of comforting and healthy dishes. Don’t limit yourself to just roasting; explore these ideas to make the most of your prepared squash:
- Creamy Butternut Squash Soup: Puree roasted or boiled butternut squash with vegetable broth, a touch of cream (or coconut milk for a dairy-free option), and spices like nutmeg or ginger for a classic, soul-warming soup.
- Butternut Squash Mac and Cheese: Add a healthy twist to a comfort food favorite by blending cooked butternut squash into your cheese sauce. It adds a beautiful color and extra nutrients without compromising on flavor.
- Butternut Squash Risotto: Incorporate roasted butternut squash cubes into a creamy risotto for an elegant and flavorful main course or side dish.
- Butternut Squash Curry: Try my Easy Chickpea Curry and add some tender butternut squash for a hearty, aromatic, and nutritious meal. Its sweetness pairs wonderfully with a variety of curry spices.
- Butternut Squash Salad: Toss roasted butternut squash cubes with leafy greens, goat cheese, pecans or walnuts, and a balsamic vinaigrette for a vibrant and satisfying autumn salad.
- Stuffed Butternut Squash: Halve and roast the squash, then fill the cavities with a savory mixture of grains, vegetables, herbs, and cheese or breadcrumbs for an impressive main dish.
- Butternut Squash Hash: Combine diced roasted butternut squash with onions, bell peppers, and your favorite protein (like sausage or eggs) for a delicious breakfast or brunch hash.
With its natural sweetness and earthy notes, butternut squash truly shines in both sweet and savory applications. Experiment with different spices and flavor combinations to discover your personal favorites!
Roasted Butternut Squash
By Meghan McMorrow | Fox and Briar
Prep Time: 20 mins | Cook Time: 30 mins
Yields: 4 Servings
Print Recipe
Ingredients
- 1 Butternut Squash (2-3 pounds)
- 2 TBSP olive oil
- Kosher salt, to taste
- Freshly ground black pepper, to taste (optional)
- Optional seasonings: dried thyme, rosemary, garlic powder, paprika, cinnamon, maple syrup.
Instructions
How to Prepare Butternut Squash
- Use a sharp knife to carefully cut off both ends of the butternut squash, creating flat, stable surfaces.
- Using a sharp Y-peeler (recommended for ease), peel the tough skin off the squash in long strips, working your way around the entire surface.
- Cut the squash in half crosswise, separating the lower bulbous end from the longer neck portion.
- Slice each of these pieces lengthwise. For the bulbous end, use a spoon to scoop out all the seeds and fibrous strands.
- Flip the pieces over so the flat, cut side is down on your cutting board. Slice each piece into evenly thick half moons (approximately ¾-inch thick).
- Cut these half moons into equally sized sticks, then dice the sticks into uniform, bite-sized cubes. Aim for roughly ¾-inch cubes for even roasting.
How to Roast Butternut Squash
- Preheat your oven to 425 degrees Fahrenheit (220 degrees Celsius).
- Spread the peeled and cubed butternut squash onto a large baking sheet in a single layer. If needed, use two baking sheets to avoid overcrowding, which can cause steaming instead of roasting.
- Drizzle the squash generously with 2 tablespoons of olive oil. Toss the cubes to ensure they are evenly coated.
- Season the squash with kosher salt and freshly ground black pepper to taste. Add any optional seasonings like dried herbs or spices if desired.
- Roast in the preheated oven for approximately 25-40 minutes.
- After about 15-20 minutes, use a metal spatula to turn the squash cubes to promote even browning and caramelization.
- Continue roasting until the squash is tender when pierced with a fork and has achieved a beautiful golden-brown color with caramelized edges.
- Remove from the oven and serve immediately as a delicious side dish or integrate into other recipes.
Nutrition Facts (Approximate)
Serving Size: 1 serving | Calories: 146kcal | Carbohydrates: 22g | Protein: 2g | Fat: 7g | Saturated Fat: 1g | Sodium: 8mg | Potassium: 660mg | Fiber: 4g | Sugar: 4g | Vitamin A: 19931IU | Vitamin C: 39mg | Calcium: 90mg | Iron: 1mg
Nutrition information is automatically calculated and should only be used as an approximation.
Additional Info
Course: Sides
Did you enjoy this recipe?
Please leave a comment, rate the recipe, and share your delicious creations! Don’t forget to tag me on Instagram @foxandbriar AND use #foxandbriar so I can see what you made!
Disclosure: This post contains affiliate links, which means that if you purchase the items I recommend through the links I provide, I get a small commission at no extra cost to you. For more info, please see my disclosure policy. Thanks for supporting Fox and Briar!