
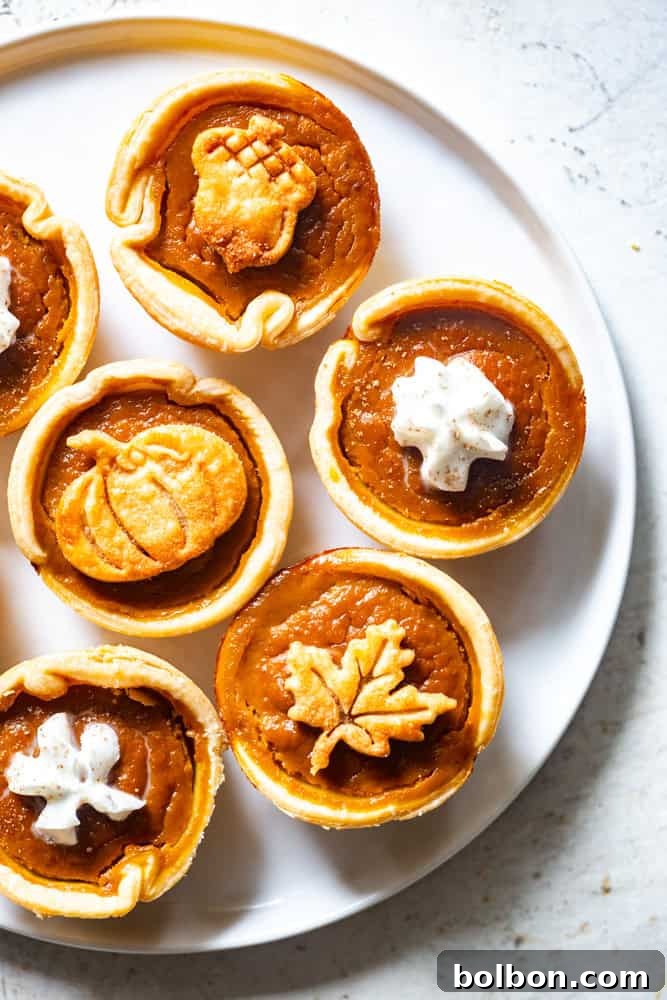
Welcome to the ultimate guide for crafting the most adorable and utterly delicious mini pumpkin pies! Perfect for Thanksgiving gatherings, festive fall parties, or simply a cozy evening treat, these bite-sized delights are incredibly easy to make, quick to bake, and an absolute joy to devour. Forget the fuss of a full-sized pie; these individual portions offer all the comforting flavors of classic pumpkin pie in a perfectly portioned package.
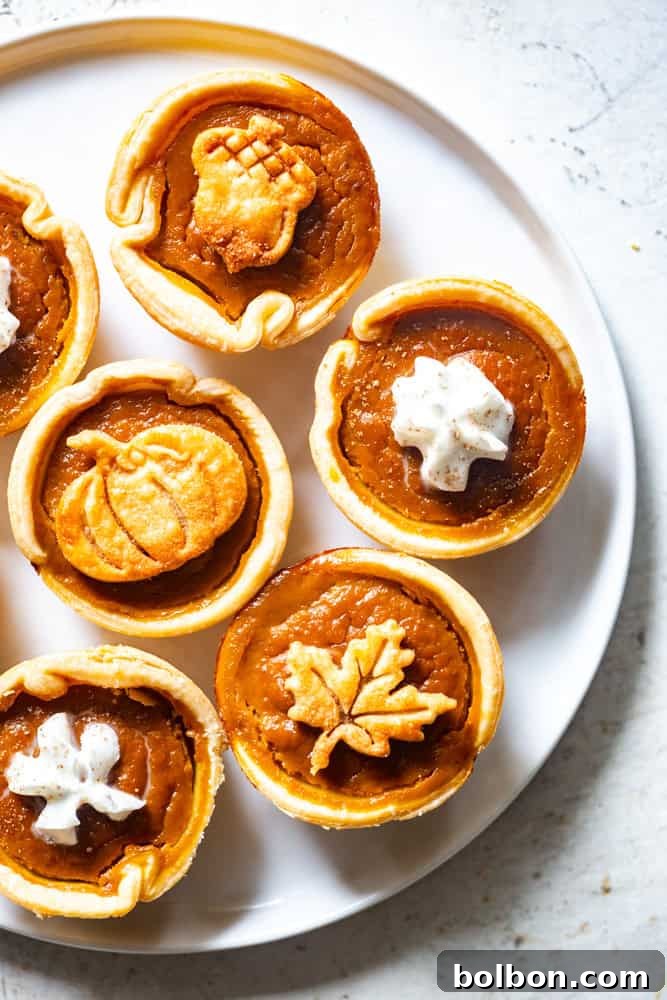
There’s something truly magical about the aroma of pumpkin spice wafting through the house during autumn. For my 7-year-old son, pumpkin pie isn’t just a dessert; it’s a cherished tradition. A few years back, his kindergarten class hosted a “harvest party,” inviting children to bring their favorite foods to share. Knowing his love for pumpkin pie, I decided to whip up a batch of these mini versions. They were an instant sensation! I was flooded with texts from other parents asking for the recipe, astonished by how simple and delightful they were. This recipe is a delightful adaptation of my beloved Easy Pumpkin Pie, which graces our table every year.
Why You’ll Adore These Mini Pumpkin Pies
Mini pumpkin pies offer a charming and practical alternative to their larger counterparts. Here’s why they’ll become your new favorite fall dessert:
- Perfectly Portioned: Each pie is an individual serving, eliminating the need for slicing and ensuring everyone gets a beautiful, intact dessert. This makes them ideal for potlucks, parties, and holiday buffets.
- Easy to Serve: No messy slices! Guests can easily grab a pie, making cleanup a breeze and serving stress-free.
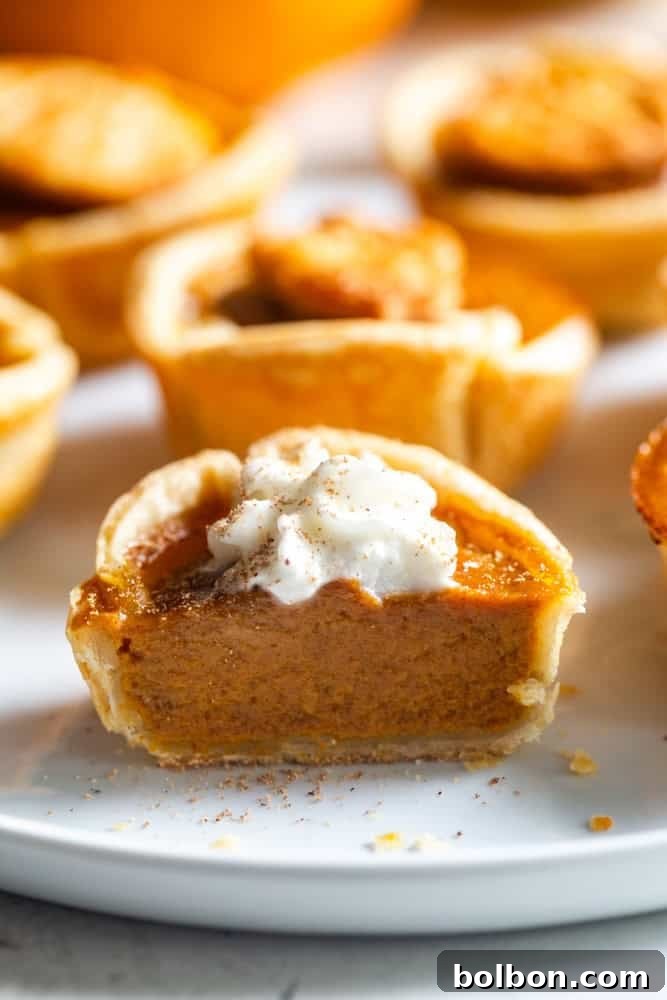
- Visually Appealing: Their small size is inherently cute, and they present beautifully on a dessert platter, especially when garnished with a dollop of whipped cream or decorative crust cutouts.
- Kid-Friendly: Children often find individual treats more appealing. They’re also easier for little hands to manage.
- Faster Baking Time: Mini pies bake significantly faster than a large pie, allowing you to enjoy your delicious creation sooner.
- Great for Gifting: Package a few mini pies in a decorative box for a thoughtful homemade gift during the holidays.
Essential Ingredients for Perfect Mini Pumpkin Pies
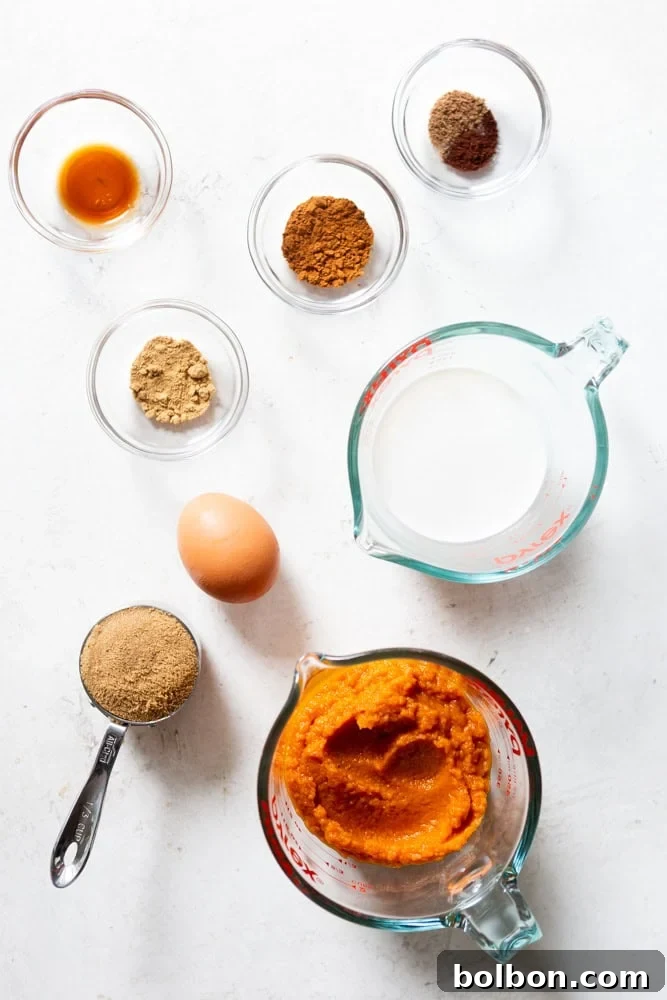
Crafting these delectable mini pumpkin pies requires a handful of simple, wholesome ingredients. Each plays a crucial role in achieving that classic, creamy, and spiced pumpkin flavor we all crave during the fall season.
- Pie Crusts: The foundation of any great pie! You’ll need enough dough for two 9-inch pies. Whether you opt for the convenience of store-bought crusts or prefer the flaky perfection of a homemade recipe, both work wonderfully. Store-bought crusts are a fantastic time-saver, especially when preparing for a crowd. If making your own, ensure it’s rolled to about 1/4 inch thickness for the best results.
- Pumpkin Puree: For consistent results and ease, canned pumpkin puree is my go-to. Brands like Libby’s are known for their reliable quality and smooth texture. Be sure to use pure pumpkin puree, not pumpkin pie filling, which already contains sweeteners and spices. If you have access to fresh, sweet pumpkins, feel free to make your own homemade puree for an extra special touch.
- Brown Sugar: This recipe foregoes sweetened condensed milk, relying on brown sugar to provide the perfect level of sweetness. Beyond sweetness, brown sugar lends a subtle, rich molasses flavor that complements the pumpkin and spices beautifully, adding depth to the filling.
- Half-and-Half: This American dairy product, a blend of half milk and half heavy cream, is key to achieving a wonderfully smooth and creamy custard texture. Its fat content strikes a perfect balance, preventing the pie from being too rich or too watery. If half-and-half isn’t available, you can substitute with a mixture of half whole milk and half heavy cream, or even just heavy cream for an extra decadent pie.
- Eggs: Eggs are vital for binding the filling ingredients together, allowing the custard to set properly during baking. They also contribute to the pie’s rich flavor and smooth consistency. Using large eggs is generally recommended for consistency in baking.
- Vanilla Extract: A touch of pure vanilla extract enhances all the other flavors in the pie, adding a warm, aromatic note that elevates the overall taste profile. Don’t skip this ingredient; it truly makes a difference.
- Spices: The heart of pumpkin pie flavor! A harmonious blend of cinnamon, ground ginger, nutmeg, and a pinch of ground clove creates that iconic, comforting pumpkin spice aroma and taste. These spices are carefully balanced to warm your palate without overpowering the delicate pumpkin flavor.
- Salt: Often overlooked, a small amount of salt is essential. It balances the sweetness of the brown sugar and brightens all the other flavors, ensuring the pie isn’t overly sweet but perfectly harmonious.
Crafting the Ideal Pie Crust for Miniature Delights
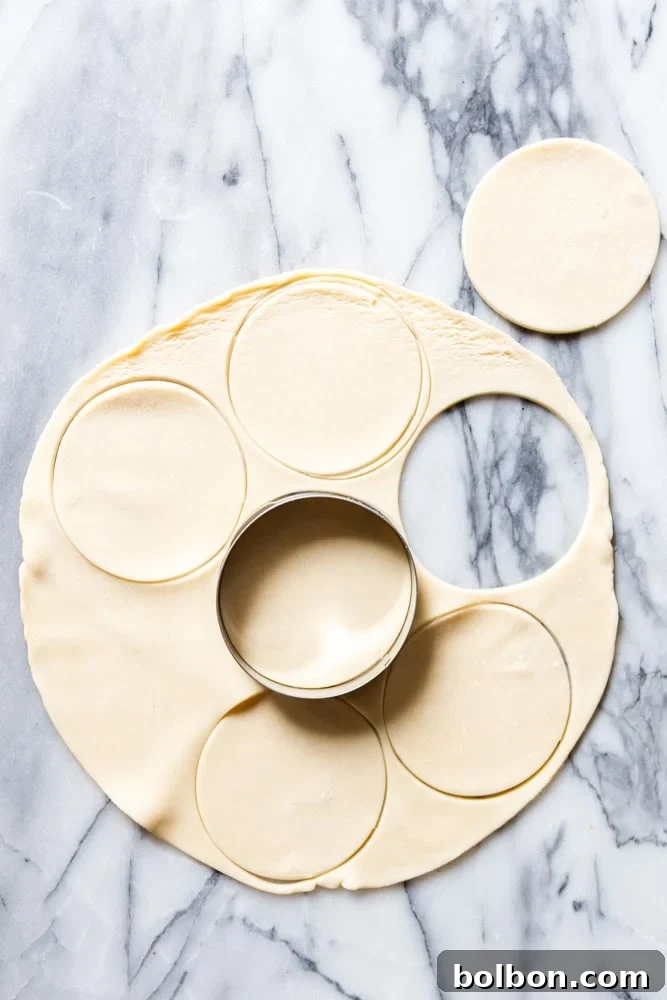
The crust is just as important as the filling in a pumpkin pie, and for mini pies, presentation and structural integrity are key. While I often lean on the convenience of quality store-bought pie crusts for these individual treats, feel free to use your favorite homemade recipe if you prefer. You’ll need enough dough equivalent to two standard 9-inch pie crusts. Typically, one round of pie dough will yield about 6 mini pie crusts, with a few scraps left over for decorative purposes.
- Roll Out the Dough: If you’re working with homemade dough, roll it evenly to approximately 1/4 inch thickness. This ensures a sturdy base that can hold the rich filling. Most store-bought crusts come pre-rolled to an appropriate thickness, saving you a step.
- Cut Your Rounds: To create the perfect mini pie shells, use a round cutter that is about 3 and 3/4 inches in diameter. A standard English muffin ring, as I’ve used, or even the rim of an upside-down glass of the right size, can work in a pinch! Press firmly to get clean cuts, arranging the cuts as close as possible to maximize your yield from each sheet of dough.
- Repeat and Gather: Continue cutting rounds from the second crust. Don’t discard the leftover scraps; these can be reformed and rolled out once more to cut additional rounds, or saved to make charming decorative toppers.
- Fit into Muffin Tins: Gently place each dough round into the cups of a 12-cup muffin tin. Carefully press the dough into the bottom and up the sides of each cup, ensuring there are no air pockets between the dough and the tin. A smooth, even crust will bake uniformly.
- Dock the Crusts: Using a fork, prick the bottom of each mini pie crust a few times. This “docking” technique helps prevent the crust from puffing up excessively during baking, ensuring a flat base for your filling.
- No Par-Baking Needed: One of the beauties of these mini pumpkin pies is that you don’t need to par-bake the crusts! The relatively short baking time, combined with the small volume of filling, allows the crust to cook through perfectly alongside the custard. This saves valuable time and simplifies the process.
Step-by-Step: Assembling Your Mini Pumpkin Pies
Once your ingredients are prepped and your crusts are ready, assembling these mini marvels is a straightforward process. Follow these simple steps for perfectly baked, flavorful pies:
- Preheat Your Oven: Start by preheating your oven to 350 degrees F (175 degrees C). This ensures the oven is at the correct temperature when your pies are ready to go in, promoting even baking.
- Prepare the Filling: In a medium-sized bowl, combine all the ingredients for the pumpkin pie filling: pumpkin puree, half-and-half, eggs, brown sugar, vanilla extract, salt, cinnamon, ground ginger, nutmeg, and ground clove. Whisk everything together until the mixture is smooth and well combined. This can be done with a hand whisk or an electric mixer on low speed.
- Chill the Filling: For best results, chill the prepared pumpkin pie filling in the refrigerator while you prepare your pie crusts. A slightly colder filling can help the crust cook more evenly without becoming soggy.
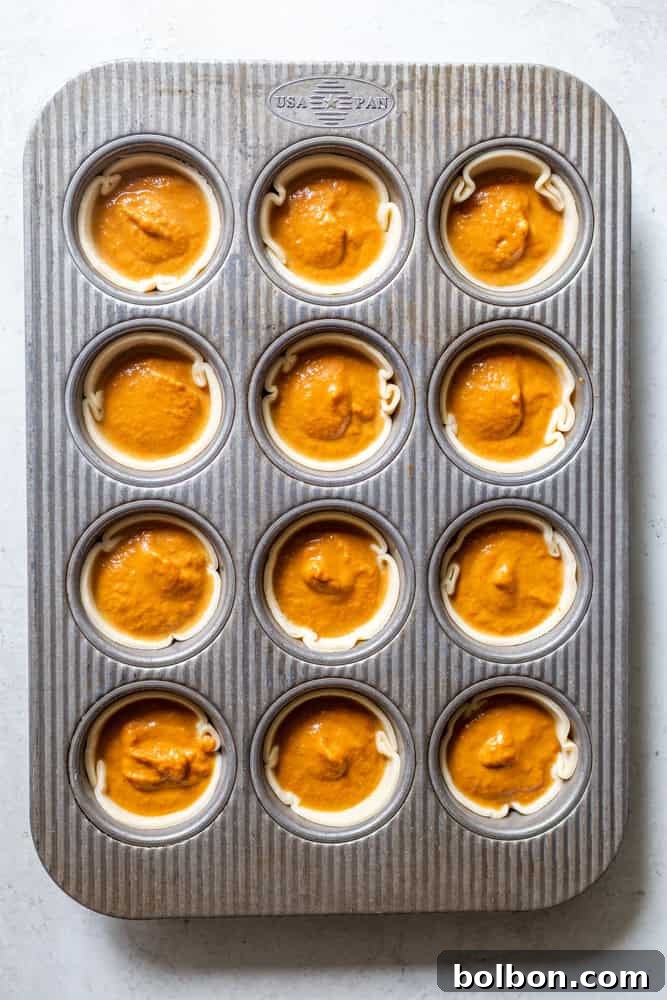
- Fill the Crusts: Carefully spoon or pour the pumpkin pie filling into each mini pie crust nestled in the muffin tin cavities. Be mindful not to overfill; leave about a 1/4-inch space between the top of the filling and the rim of the crust. This allows for the slight expansion of the custard during baking and prevents spillage.
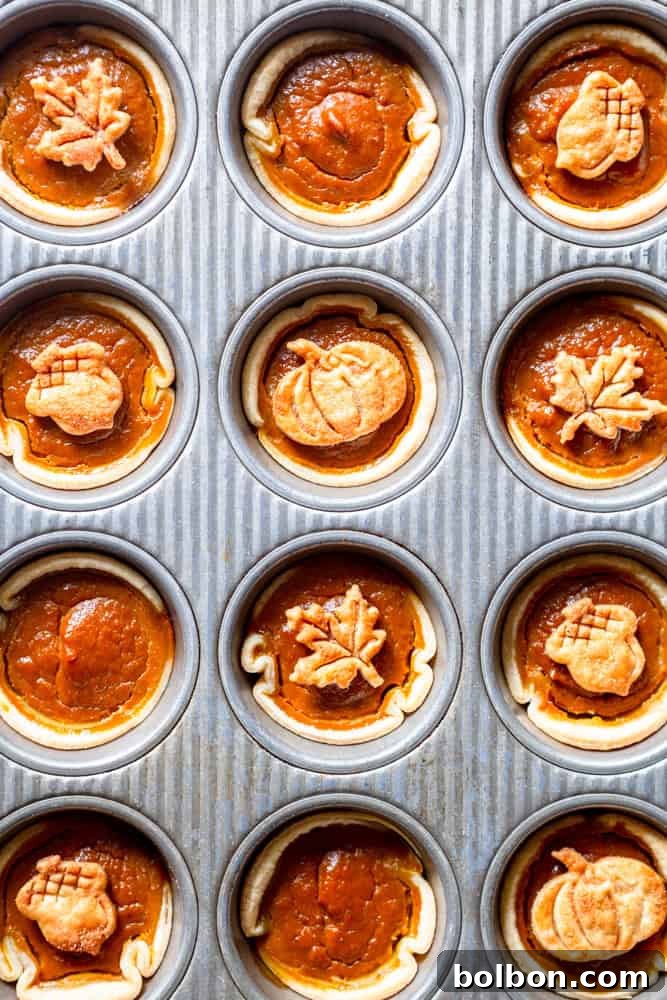
- Bake to Perfection: Transfer the muffin tin to the preheated oven. Bake for 25-30 minutes. You’ll know they’re done when the filling is set – a gentle jiggle of the pan should reveal a firm center with perhaps a slight wobble in the very middle. The crust edges should also be golden brown.
- Cool Completely: Once baked, remove the muffin tin from the oven and allow the mini pies to cool in the pan on a wire rack for about 10-15 minutes. Then, carefully remove them from the tin and transfer them directly to the wire rack to cool completely. Cooling thoroughly is essential for the custard to fully set and for the flavors to meld beautifully.
Elevate Your Pies with Decorative Crust Toppers
While entirely optional, adding decorative pie crust toppers transforms these already charming mini pies into true showstoppers. It’s a fantastic way to use up any leftover pie dough scraps and adds a touch of artisanal flair. I’ve had pie crust punchers for years that make this process incredibly simple; these newer versions are similar to what I use.
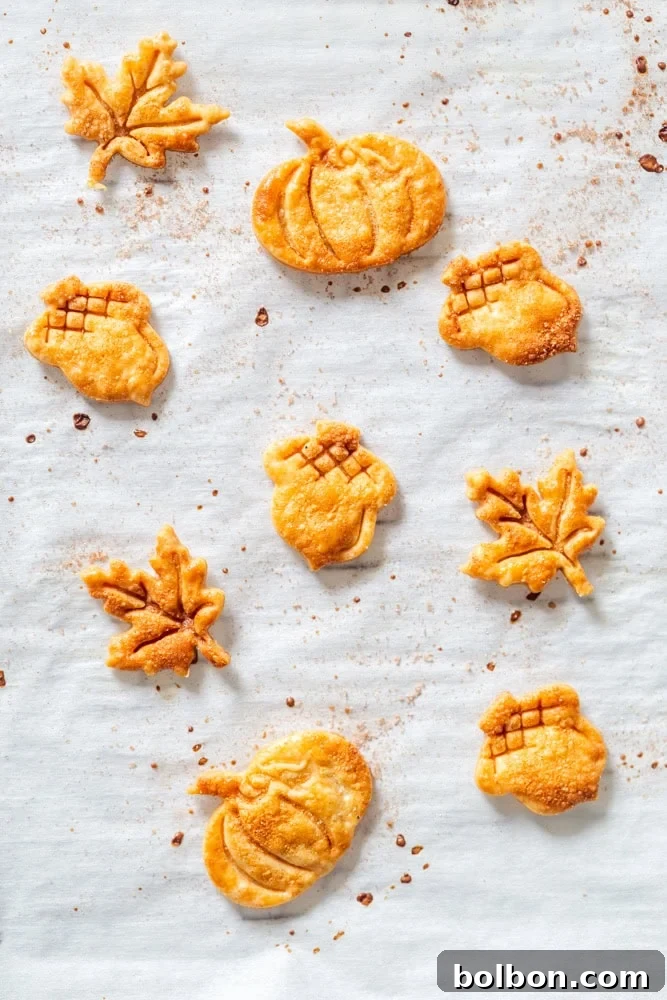
- Gather Scraps: Collect any leftover pie dough scraps from cutting your mini pie crusts. Gently press them together and roll them out thinly again, aiming for about 1/8 to 1/4 inch thickness.
- Cut Shapes: Use mini cookie cutters or specialized pie crust punchers to cut the dough into festive shapes like leaves, pumpkins, or any other fall-themed designs. Get creative!
- Prepare for Baking: Carefully transfer your cutouts to a parchment-lined baking sheet. For a beautiful golden finish and a touch of sweetness, lightly brush the tops of the dough shapes with a little milk or half-and-half. Then, sprinkle them generously with a mixture of sugar and cinnamon.
- Bake Separately: Bake these decorative toppers in a preheated oven at 350 degrees F (175 degrees C) for approximately 8-12 minutes, or until they turn a lovely golden brown and become crisp. Keep a close eye on them, as thin dough bakes quickly.
- Cool and Store: Allow the pie crust cookies to cool completely on the baking sheet before handling. Once cooled, they can be stored in an airtight container at room temperature for 1-2 days.
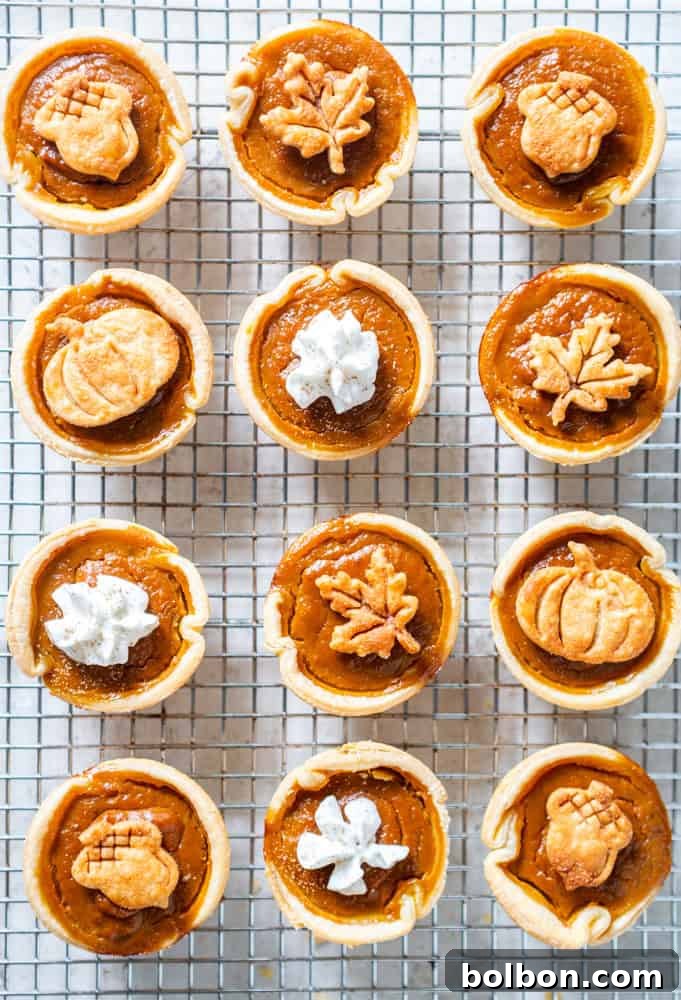
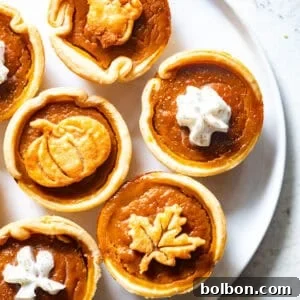
- Adorn Your Pies: Just before serving, place these beautiful, crisp pie crust toppers gently on top of your cooled mini pumpkin pies, perhaps alongside a generous swirl of whipped cream.
Master the Art of Make-Ahead Mini Pies
One of the many benefits of mini pumpkin pies is their excellent make-ahead potential, making them perfect for stress-free entertaining during busy holiday seasons. I almost always prepare my pumpkin pies, both regular-sized and mini, a day in advance of serving. This allows the flavors to deepen and the custard to achieve its optimal set.
- Cool Completely First: After baking, it’s crucial to let the mini pies cool completely on a wire rack. This can take a couple of hours at room temperature. Rushing this step can lead to condensation and a soggy crust when stored.
- Refrigeration is Key: Once fully cooled, transfer the mini pies to an airtight container. Arrange them in a single layer if possible, or place parchment paper between layers to prevent sticking. Store them in the refrigerator for up to 2-3 days. Chilling also firms up the custard beautifully, enhancing its texture.
- Toppings Last: For the best presentation and texture, hold off on adding any toppings, such as decorative pie crust cookies or whipped cream, until just before you’re ready to serve. Adding them too early can cause the crust toppers to soften and the whipped cream to weep, making the pies soggy.
- Freezing for Longer Storage: If you want to prepare them even further in advance, mini pumpkin pies freeze remarkably well. Bake and cool them completely. Then, wrap each pie individually in plastic wrap, followed by a layer of aluminum foil. Place them in a freezer-safe container or bag. They can be frozen for up to 1 month. Thaw them overnight in the refrigerator before serving.
Baking Your Mini Pumpkin Pies to Golden Perfection
Getting the baking time just right is essential for a perfectly set, creamy pumpkin custard and a flaky, golden crust. These mini pies, baked in standard 12-cup muffin tins, generally require 25-30 minutes in an oven preheated to 350 degrees F (175 degrees C).
- How to Tell When They’re Done: The key indicator is the “jiggle test.” Gently shake the muffin tin. The centers of the pies should be mostly set with only a slight, very subtle wobble. The edges of the filling should appear firm, and the crusts should be beautifully golden brown. Avoid overbaking, as this can lead to a dry, cracked filling.
- Adjusting for Different Sized Tins: If you opt to use a mini muffin tin, the baking time will be significantly shorter. Start checking for doneness around 12-15 minutes. For larger tart tins (e.g., 4-inch tart pans), the baking time will be closer to 30-35 minutes. Always keep a watchful eye on your pies, as oven temperatures can vary.
- Cooling is Crucial: Once baked, allow the pies to cool in the muffin tin on a wire rack for about 10-15 minutes before carefully removing them. This initial cooling helps them firm up and prevents them from breaking. Transfer them to a wire rack to cool completely at room temperature before refrigerating or serving.
Essential Equipment for Seamless Baking
Having the right tools can make all the difference in ensuring a smooth and enjoyable baking experience. For these mini pumpkin pies, you’ll need a few key items:
- 12-Cup Muffin Tin: This is the star of the show for creating uniform, individual pies. A good quality, non-stick muffin tin will ensure easy removal of your baked pies. THIS is a highly recommended choice for its durability and performance.
- Round Cookie Cutter (approx. 3.75 inches): Essential for cutting perfect circles from your pie dough. As mentioned, an English muffin ring or a glass of the right diameter can also work.
- Mixing Bowls: For whisking together the pumpkin pie filling.
- Whisk: To ensure all ingredients in the filling are thoroughly combined and smooth.
- Measuring Cups and Spoons: For accurate ingredient measurements.
- Wire Cooling Rack: Crucial for allowing your mini pies to cool completely and prevent a soggy bottom crust.
- Optional: Pie Punchers/Mini Cookie Cutters: For making those adorable decorative crust toppers. THESE are a great option for festive shapes.
Serving Suggestions & Garnish Ideas
While delicious on their own, mini pumpkin pies truly shine when dressed up with a few complementary garnishes. Here are some ideas to make your pies even more irresistible:
- Classic Whipped Cream: A generous dollop of freshly whipped cream is the quintessential topping for any pumpkin pie. For extra flavor, consider adding a touch of vanilla extract or a pinch of cinnamon to your whipped cream. You can even pipe it on for an elegant presentation. Try my recipe for Easy Homemade Whipped Cream.
- Decorative Pie Crust Toppers: As discussed, these add a charming, homemade touch and a delightful textural contrast.
- Caramel Sauce Drizzle: A light drizzle of homemade or store-bought caramel sauce adds a luxurious sweetness that pairs beautifully with pumpkin.
- Dusting of Spices: A simple sprinkle of ground cinnamon, nutmeg, or pumpkin pie spice adds visual appeal and an extra burst of aroma.
- Candied Pecans or Walnuts: For a delightful crunch and nutty flavor, garnish with a few candied nuts.
- A Scoop of Ice Cream: Vanilla bean or cinnamon ice cream would be a heavenly accompaniment, especially when served slightly warm.
Frequently Asked Questions (FAQs) About Mini Pumpkin Pies
Here are answers to some common questions you might have when baking these delightful mini pumpkin pies:
- Can I make these gluten-free? Yes, absolutely! Simply substitute the regular pie crusts with your favorite gluten-free pie crust dough. The filling itself is naturally gluten-free.
- How can I make these dairy-free? To make the filling dairy-free, substitute the half-and-half with full-fat coconut milk (from a can, well-shaken) or a dairy-free heavy cream alternative. Ensure your pie crust is also dairy-free.
- Can I use a different spice blend? While the classic combination of cinnamon, ginger, nutmeg, and clove is traditional, feel free to adjust to your taste. You can use a pre-made pumpkin pie spice blend (usually 1.5 – 2 teaspoons for this recipe), or add a pinch of allspice or cardamom for a unique twist.
- What if my pie crusts crack when I fit them into the muffin tin? Don’t panic! Pie dough can be delicate. Gently press the edges of the cracks together with your fingers to seal them. If the dough is too cold, it can be more prone to cracking; let it warm up slightly at room temperature for a few minutes before handling.
- How do I store baked mini pumpkin pies? Once completely cooled, store the pies in an airtight container in the refrigerator for up to 2-3 days. For longer storage, see the “Make-Ahead Mini Pies” section regarding freezing.
- Can I make these in a different shaped pan? Yes, you can! Small tart pans, ramekins, or even mini loaf pans can be used. Just remember to adjust the baking time accordingly. Larger individual portions will need more time, while smaller ones will need less. Always look for a firm center and golden crust.
Ready to Bake? Your New Favorite Fall Dessert Awaits!
These mini pumpkin pies are more than just a dessert; they’re a celebration of autumn, a heartwarming treat, and a delightful way to share the joy of the season. Their individual size makes them incredibly charming, and their irresistible flavor will have everyone reaching for more. Whether for a holiday feast or a simple fall day, this recipe promises ease, elegance, and pure pumpkin perfection. So gather your ingredients, preheat your oven, and prepare to bake a batch of these unforgettable mini pumpkin pies!
More Delicious Fall Recipes to Explore
- Easy Pumpkin Pie
- Pumpkin Bread Recipe
- Cranberry Brie Mini Tarts
Mini Pumpkin Pies
Meghan McMorrow | Fox and Briar
12
pies
These adorable mini pumpkin pies are fun for Thanksgiving or a fall themed party. They are easy and quick to make, and even more fun to eat!
Equipment
- 1 12 Cup Muffin Tin
Ingredients
- 2 pie crusts for 9 inch pie (store-bought or homemade)
Pumpkin Pie Filling
- 12 ounces canned pumpkin puree
- 1/2 cup half and half (Can substitute heavy cream or half whole milk and half heavy cream)
- 1 large egg
- 1/3 cup brown sugar (packed)
- 1/2 teaspoon vanilla extract
- 1/4 teaspoon salt
- 1 teaspoon cinnamon
- ½ tsp ground ginger
- ¼ tsp nutmeg
- Pinch ground clove
Instructions
- Preheat oven to 350 degrees F (175 C).
- In a medium bowl, mix together all ingredients for the pumpkin pie filling until smooth. Chill mixture in the fridge while preparing the pie crust.
- Roll out pie dough to 1/4 inch thickness (if using store-bought sheets, no need to roll). Use a round cookie cutter that is about 3 and 3/4 inches in diameter to cut the dough into circles. Carefully fit them together as closely as possible to get at least 6 circles out of each sheet of pie dough. Save the scraps if you would like to use them to make decorative toppers.
- Carefully fit each dough circle into the muffin tin cavities, gently pressing into the bottom and sides to ensure no air pockets. Use a fork to prick holes in the bottom of the mini pie crusts.
- Use a spoon to carefully fill the mini pies with the chilled pumpkin filling, leaving about a 1/4 inch space between the filling and the top of the crust.
- Bake at 350 degrees F (175 C) for 25-30 minutes, or until the filling has set (a slight wobble in the center is okay) and the crust is turning golden.
- Allow to cool in the pan for 10-15 minutes, then remove from the pan and cool completely on a wire rack. Can be served right away or stored in the fridge for 1-2 days. If desired, you can make pie crust cutouts to decorate the tops of the pies, see instructions below. Serve with whipped cream!
Pie Crust Cookie Toppers (Optional)
- Using the leftover scraps of the pie crust, use small cookie cutters or decorative crust cutters to cut out shapes.
- Brush with a little milk, then sprinkle with cinnamon sugar.
- Bake at 350 degrees F (175 C) for about 8-12 minutes, or until golden brown.
- Allow them to cool completely before placing them on top of the cooled pies.
Nutrition
Nutrition information is automatically calculated, so should only be used as an approximation.
Did you like this recipe?
Please comment, rate, and share! And don’t forget to tag me on Instagram @foxandbriar AND #foxandbriar so I can see what you made!